
Panopto is a recording tool used to capture screen activity, audio, and video for instructional content, presentations, and demonstrations. You might choose Panopto when you need to record a lecture, walkthrough, or explanation directly from your computer, especially when the recording needs to be shared securely with a class or campus audience. It’s well suited for narrated slides, software demos, and voice-only recordings.
1. Accessing Panopto
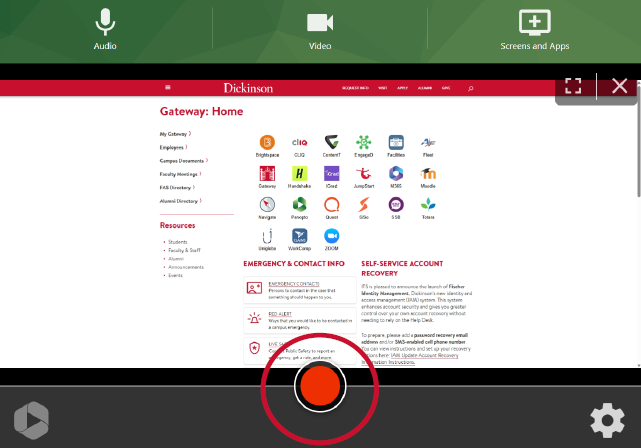
- Go to the Dickinson Gateway
- Click the green Panopto icon
Note: if using a Mac, Google Chrome works best
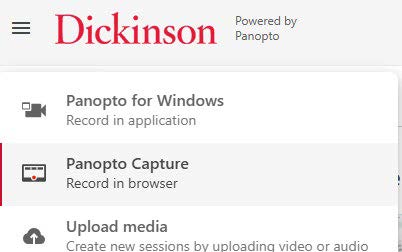
2. Setting Up Video Capture
- Click Create in the top left and select Panopto Capture
3. Adjusting Screenshare Settings
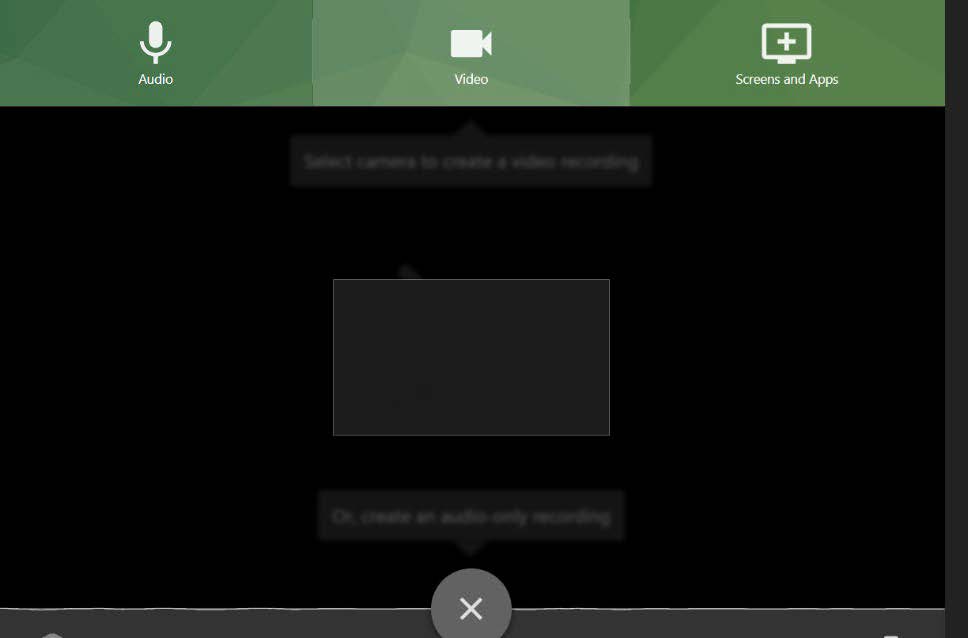
- Adjust your Audio, Video, and Screenshare settings
- If you’re only recording your screen, remember to select Audio, and click the checkmark so that it turns to an “X” to ensure your voice won’t be captured
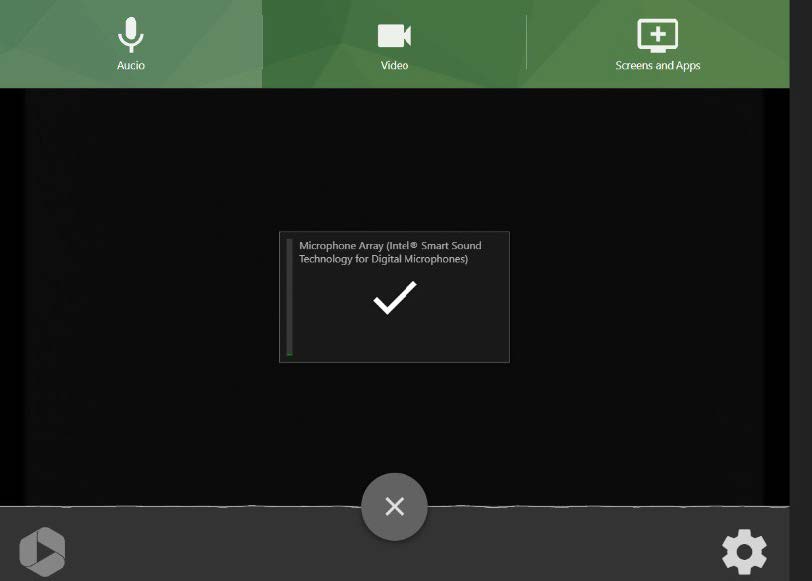
- Do the same thing for Video to ensure you won’t be seen in the recording
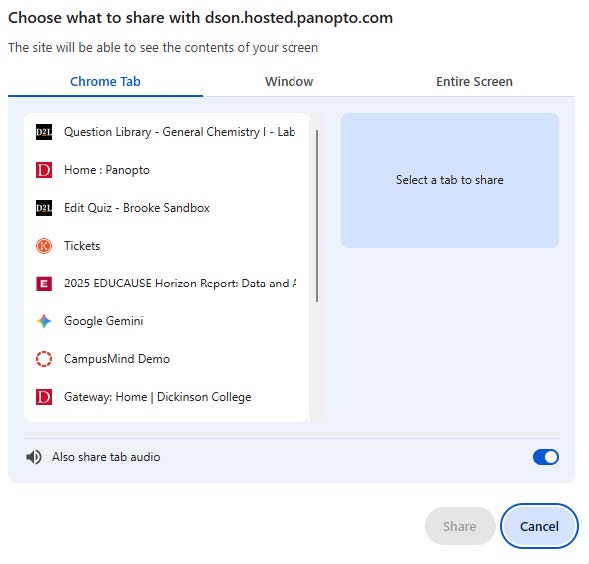
- Select the tab or window you want to record
- If you want the audio to come with it, be sure to switch the Also share tab audio toggle on
- Click Share
4. Starting the Recording
- Hit the record button
- You will be given a 5-second countodwn
- Consider waiting a second or two after the countdown finishes before playing what you want to record so nothing gets cut off
5. Stopping the Recording
- Navigate to the tab where Panopto is open and press the Stop button
- Once you have stopped the recording, Panopto will process the file
- In Panopto, once the processing has finished, click the gear icon on the recording preview image
6. Downloading the Audio Only
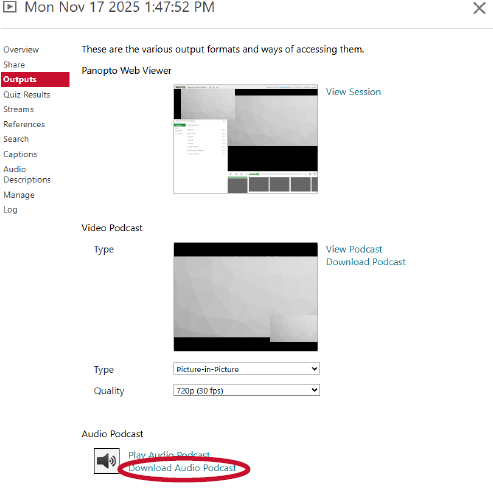
- Select Outputs from the menu on the left
- At the bottom, select Download Audio Podcast
- This will download the file to your computer as an .mp3
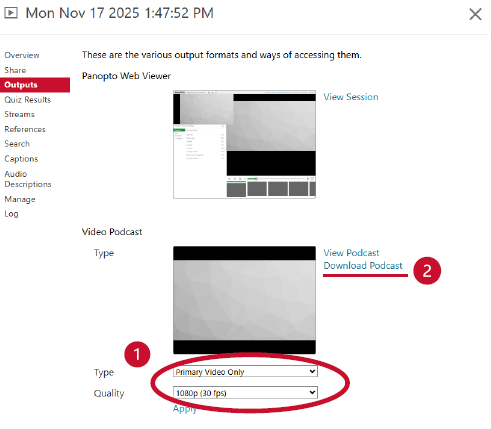
7. Downloading the Video
- If you want to download both audio and video, you will need to select Primary Video Only from the Type dropdown
- From the Quality dropdown, we recommend selecting 1080p (30 fps)
Note: You will need to wait until the video finishes processing again before you will be able to download the file.