Category: Featured

Dickinson Makes

Dickinson Makes Spring 2017 Make and Take Workshop Series

Dickinson Makes

DPrint

3D Printing : Fall 2016 Recap

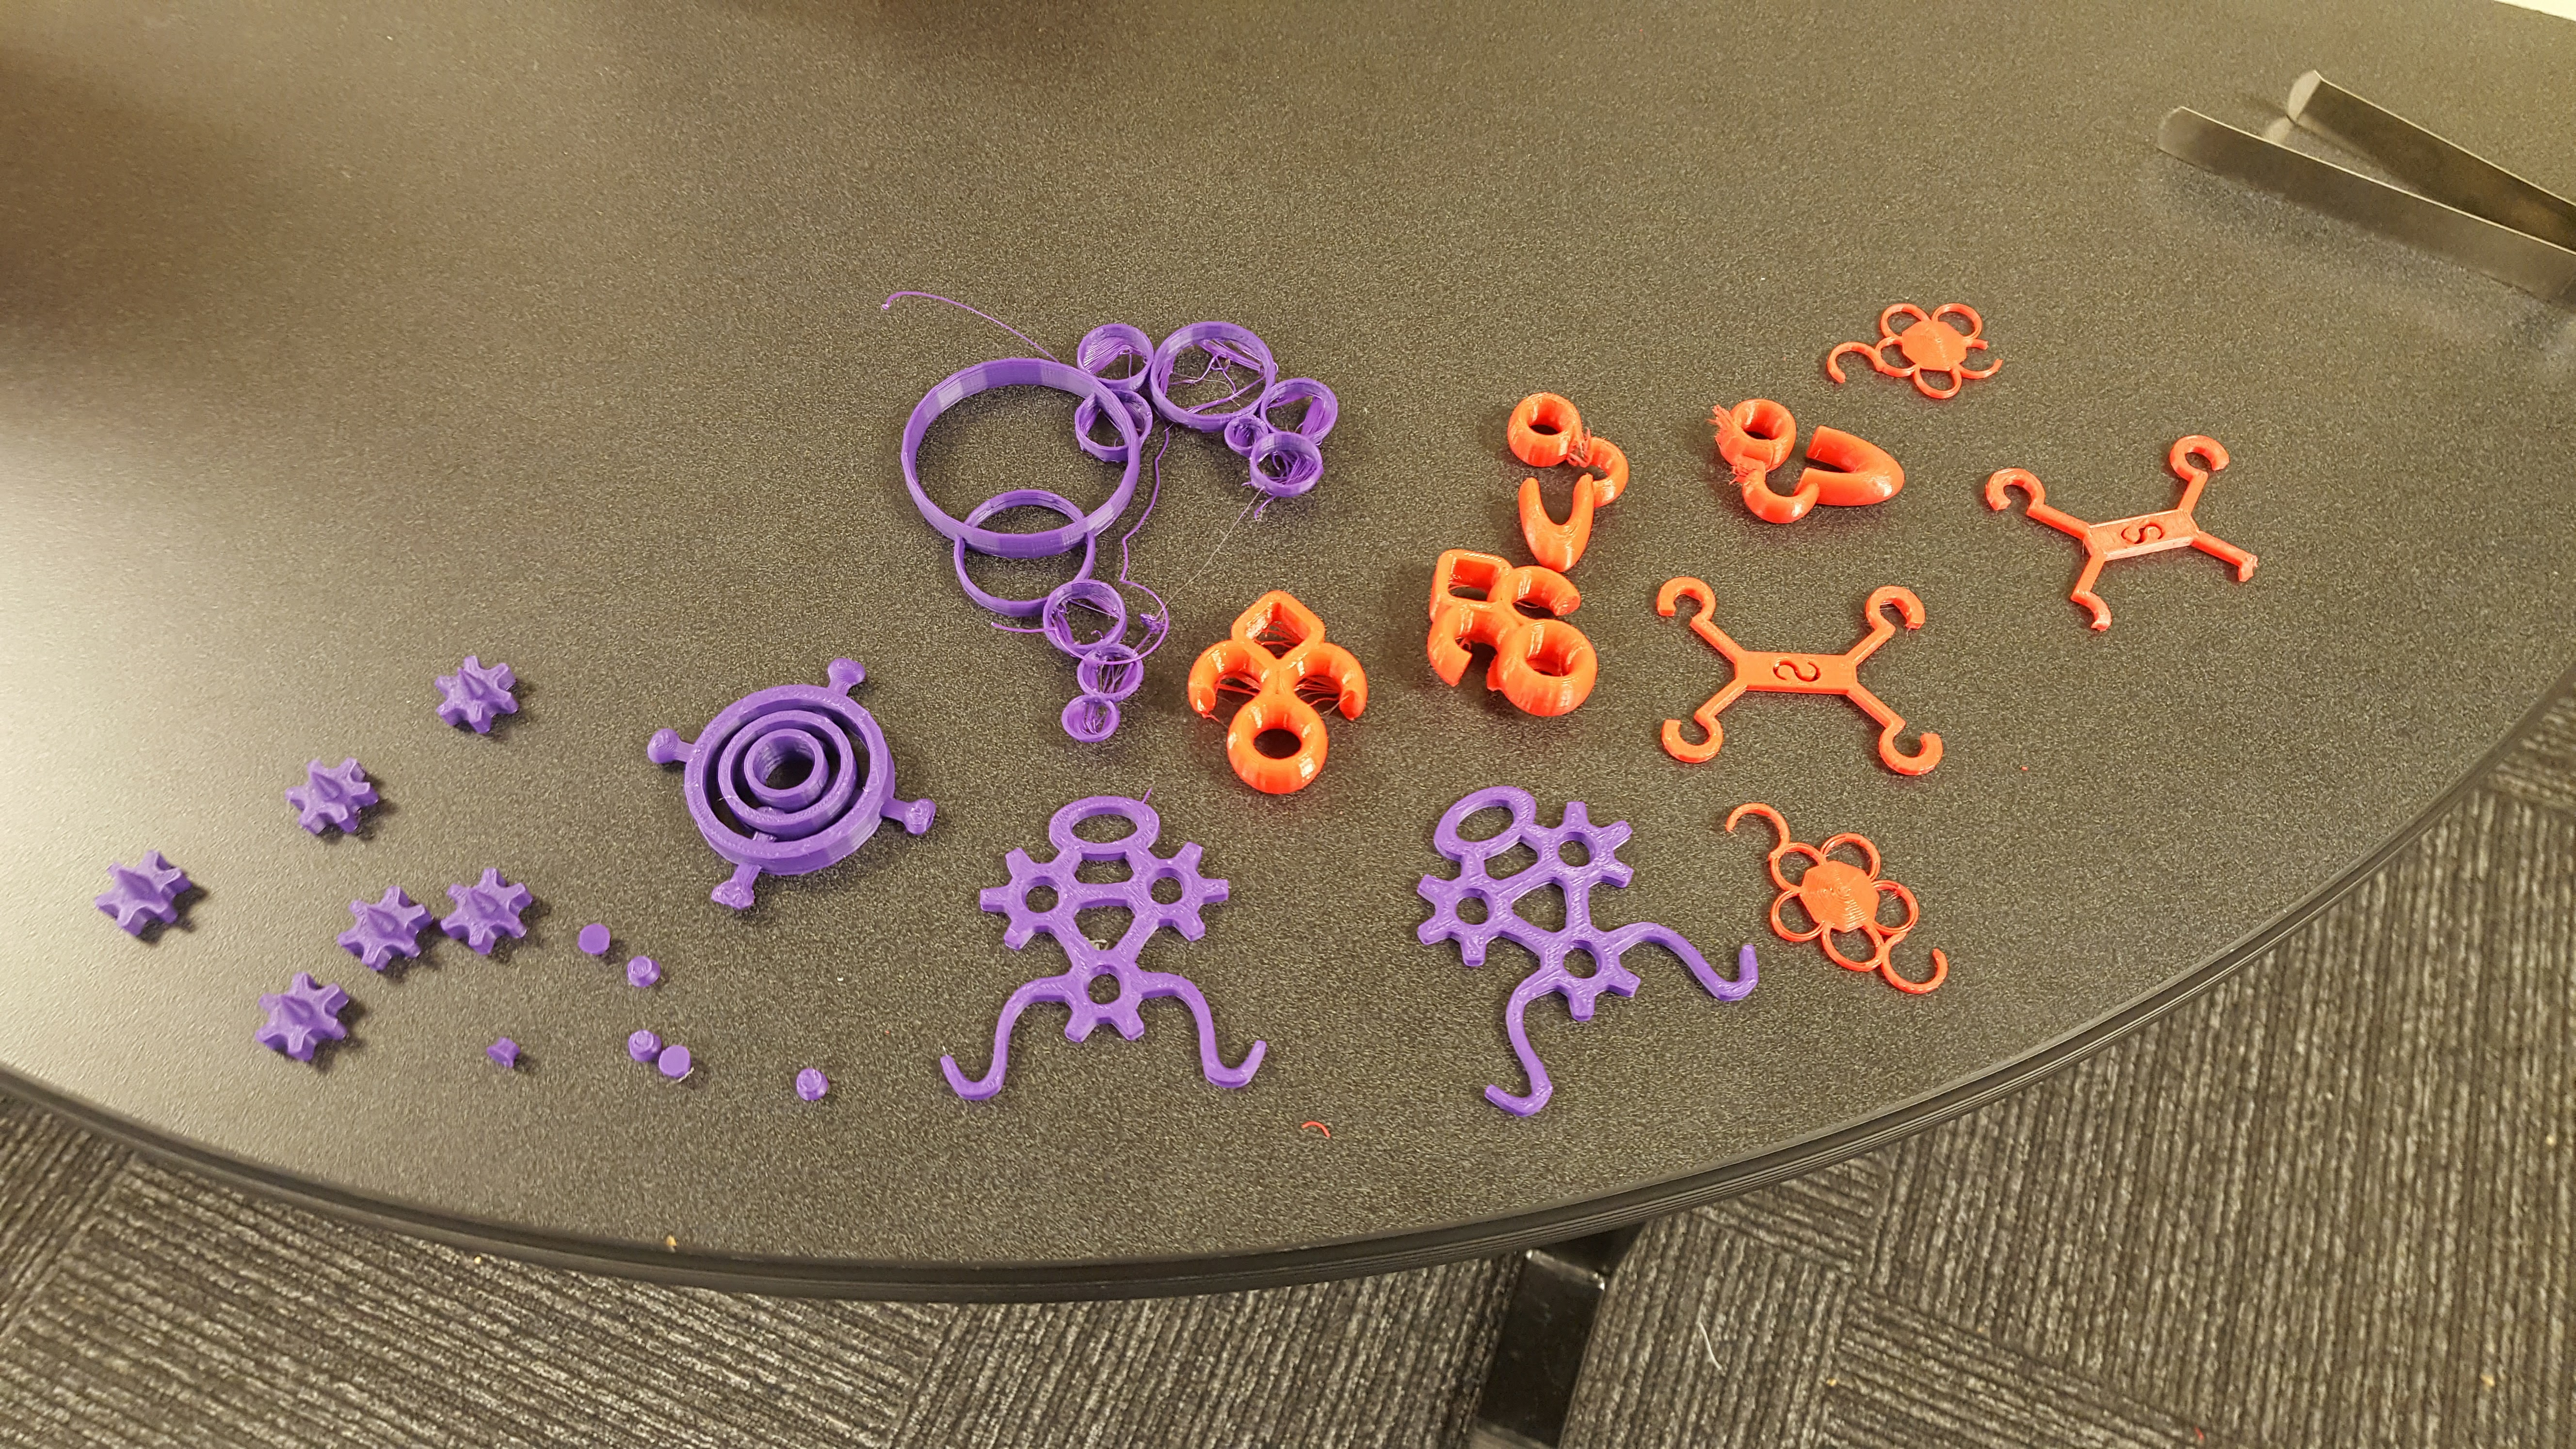
This semester our 3D printers were running daily to produce projects for a few different courses. The largest project came out of the Introduction to Sculpture course taught by Professor Amy Boone-McCreesh. The students were tasked with designing a file that had two simple requirements. It had to incorporate both a hook and a hole. This would allow the prints to connect to one another in countless ways much like the old barrel full of monkeys chains.

Professor Boone-McCreesh prototyped her own example file (see orange and clear prints below) to give her students an idea of where to start.  Brenda Landis then led one training session where the students were taught to use the online 3D modeling program, Tinkercad. They worked for about an hour prototyping and modifying their designs and sent the files over for test prints within 2 days. There were 6 students in the course and out of the initial test run 3 came out ready for more duplication, 1 needed minor tweaking and 2 needed extensive modification. After just a few days the files were able to be stabilized for mass production. The project goal was to print 20 copies of each file for an installation in the Writing Center (you can go check out the installation for yourself!).

The files were small enough to fit between 7 and 15 prints on the bed each time so after a week of printing daily, we had enough for the install. After reflecting on the experience we realized that some files ended up being larger than others but that also made them more stable and less likely to break when they were dropped so possibly increasing the scale would help with long term stability of the files.  The final installation files were printed in clear filament which was a help because the files could easily be repaired with hot glue that blended with the material perfectly so imperfections were not very noticeable.


More requests for prints came in as the semester progressed including a few from Professor Marcus Key’s Natural History Mosaic students. A (glow in the dark!) dinosaur skull and trilobite were printed off of files available on Thingiverse.

A student in an Environmental Studies course came to us late in the semester and wanted to print this mountain terrain for use in a presentation.

Professor Hans Pfister in Physics toured the Makery earlier this semester and was eager to chat to about the uses our 3D printer might provide in his work.  He recently read about the work Math Professor, Dave Richeson, has done on creating impossible cylinders. They are based on Sugihara’s Circle/Square Optical Illusion that is a 3-dimensional shape that looks like a circular cylinder but in a mirror looks like a square cylinder. Professor Pfister wondered if we could print a prototype from Professor Richeson’s work and in just a day Professor Richeson sent over an exported file and we printed a copy for both of them. We love it when a plan comes together.

You can download your own copy of the file on Thingiverse and this is the description of the file with blog posts and journal articles written by Professor Richeson included.

This is a 3D file based on Sugihara’s Circle/Square Optical Illusion. Kokichi Sugihara created the video “Ambiguous Optical Illusion: Rectangles and Circles.”
https://www.youtube.com/watch?v=oWfFco7K9v8
In it he shows a 3-dimensional shape that looks like a circular cylinder but in a mirror looks like a square cylinder.
The 3D file was created by Mathematics Professor, Dave Richeson, at Dickinson College. He has blogged about the project and has shared a pdf file that can be printed and cut to replicate the illusion. He also wrote an article about the illusion in the September 2016 issue of the journal Math Horizons. http://users.dickinson.edu/~richesod/RichesonImpossibleCylinder.pdf

https://divisbyzero.com/2016/07/05/sugiharas-circlesquare-optical-illusion/

https://divisbyzero.com/2016/07/06/make-a-sugihara-circlesquare-optical-illusion-out-of-paper/

Geogebra file and description
https://www.geogebra.org/m/EdSp6X76

Canon 5D

Full-Frame SLR Training Resources

In order to have access to The Media Center’s 5d and 6d full-frame SLR cameras, one must pass a technical quiz. This quiz covers the basic technique that you would learn in an introductory photography class. If you are self taught, you can reference the articles below.

In order to pass the quiz you must get all the questions correct. It is “open book” and you can research answers that you initially get wrong.

You must take the quiz at The Media Center during business hours (M-F 8-5) . Either Josh, Brenda or Julie will grade the quiz and give instant feedback.

The following topics will be included:

f-stop

shutter speed

ISO

focal length

setting the video settings


If you would like to schedule an appointment to speak about your projects or get some technical advice you can also reach out to Julie to addresses your ideas/ concerns: savagelj@dickinson.edu


Here are some readings to help you succeed passing the quiz

___________________________________________________________________


This article outlines the components of shooting manually in a very basic way.


How to Use Manual Mode to Make Artistic Choices for Your Photography


This article gives a bit more technical information about the same concepts:


Camera Exposure: Aperture, ISO & Shutter Speed


This article outlines the basic concepts of focal length:


4 Things You Should Know About Focal Length and Composition


Understanding video settings:


_____________________________________________________________________________________________

This series of video lectures gives an extremely in depth look at the technical aspects of digital photography (not necessary for the quiz):


GOOD LUCK!

Snapz window

Creating clips using Snapz, VLC, and QuckTime

Snapz is an application for capturing video from the screen while also capturing the audio from the computer.  It can be found on the Mac side of the computers in the Media Center. DISCLAIMER! This should only be used for the use of making short clips in which to make commentary directly related to your course work.  This same method can be used to pull clips from YouTube by omitting step 1.

  1. After, inserting the DVD you will need to quit the DVD player application, then search for the VLC app.  From the File menu choose Open Disc…  Click the Open Button.
  2. Locate the scene you want to use and pause the video.  Make sure to leave a buffer zone before the section you want it can be trimmed down later.  Search for the Snapz app.  Note: after opening Snapz the first time it can be activated in the future by pressing command + shift + 5.
  3. Choose Movie… Change the frame rate from 15 to 29. Uncheck cursor visible. Use the cross hairs tool to draw a selection around the video.
  4. Press return on the keyboard to start recording, then press play on VLC.  When you’ve got the portion you want press command + shift + 5 to stop the recording. Click the Save Now button. If you made a mistake you can also use the Move to Trash button and start over.
  5. The video will open in QuickTime Player when it finishes processing. From the Edit menu select Trim. Use the yellow handle bars on each side to trim off the ends and select just the section you want. Then Click the Trim button. When you are done close the window and QuickTime will prompt you to save. Name it, select where to save and click Save.
Video Menu, Snapshot

Create Film Stills using VLC

VLC is a free video player that anyone can download. http://www.videolan.org/vlc/ It is also installed on most computers on campus.

If the computer you are using doesn’t have a DVD drive, one can be borrowed from the media center.

  1. On a Mac after, inserting the DVD you will need to quit the DVD player application, then search for the VLC app. From the File menu choose Open Disc…  Click the Open Button.
    In Windows, choose VLC to open the disc when prompted.
  2. Locate the scene you want to use and pause the video. Under the video menu select snapshot.
  3. Locate the file in your pictures folder.


REVISED mc halloween

Halloween Costume Creation Workshop in the Makery


The Media Center Makery wants to help you get ready for Halloween. Come out to our workshop so we can help you create your Halloween Costume and props. We have a sewing machine, material, hot glues guns and other crafting supplies to get your started. If you have specific supplies needed, bring them along and our student assistants will help you with your creation. The Makery is open year round as a space for sewing and crafting (as well as 3d printing and programming) so drop in to continue working on your project during our open hours.

If you are looking for cheap material and other sewing/knitting supplies, check out the Carlisle Salvation Army Material Sale Friday October 9th and Saturday October 10th.

REVISED-mc-halloween

n e

Music Walk First Friday

The Media Center and Makery will be at the October 2nd Music Walk/Discover Downtown First Friday.  Using Media Center equipment to DJ music and showing you how to use circuits to make your own music. Stop by and say hi to MC Assistants Greg, Purti, and Kerin.

Greg is tinkering with Little Bits

Greg is tinkering with Little Bits to create custom instruments to play with when we are at Carlisle’s First Friday Music Walk downtown October 2nd.

Screen Shot    at

How to Scan From the Media Center Printer

Click the link below for a tutorial on how to scan from our printer!

————–> Scanning Tutorial <————–

Powered by WordPress & Theme by Anders Norén