Getting Started – Your First Prompt
1. First, go to https://chatbot.dickinson.edu/profprompt.
2. Enter the password, then click submit. If you don’t know the password, contact Todd at bryantt@dickinson.edu.
3. Select the language that you want the chatbot to be in with the language dropdown near the top of the page.
4. A dropdown for selecting prompt would show up after a language has been selected. If you want to create a chatbot from a template (recommended), click Copy Existing Chatbot or Template. If you want to start from scratch, either leave it blank or click Create a New Prompt in Chatbot.

General Settings for Chatbots
You can follow this section to set up some general information for your chatbot. Which option was selected from the select prompt dropdown does not matter.
Naming the Chatbot
Fill in an appropriate name for the chatbot in Chatbot Name according to what you want the chatbot to do. You can put in brief information about the chatbot and agenda for the students for follow (Ex. Formal Speech – Talking to your boss).

Selecting the Level for the Chatbot (Optional)
If a chatbot has a level, it would appear in the same format as chatbots in the image below. Setting a level for a chatbot can help your students find the correct chatbot for their level and lesson.

If you do not want a level for your chatbot, either leave if blank or pick None as the level.
To set the level of the chatbot, either pick Create a New Level to make a new level for the chatbot, or pick an existing level.

To change the name of a level, click the pen icon next to it to rename it
To delete a level, click the trash icon next to it to delete it.
Making the Initial Greeting for Your Chatbot
Fill in an appropriate greeting for the chatbot in Initial Greeting from Chatbot according to what you want the chatbot to say when students open it. You can put in common greetings in the language you are teaching that the chatbot would realistically say if it were a native speaker.

Putting in Instruction for the Students (Optional)
Fill in appropriate instructions for students according to how you want students to interact with the chatbot. You can put background information of the chatbot, and specific requirements students should follow when interacting with the chatbot.

Prompting the Chatbot: Creating a Chatbot from a Template (Recommended)
Follow this section if you have selected Copy Existing Chatbot or Template in the dropdown for selecting prompt.

1. Pick one of the templates in the selection dropdown. If you want to create a more conversational chatbot, pick General Template. If you want to make the chatbot ask a list of specific questions, pick Beginner Questions Template.
2. After a template has been selected, some text should show up in the System Prompt textbox. Replace or delete any text in square brackets with your own instructions, depending on how you want to instruct the chatbot to teach your students. Remove all square brackets when text is being replaced. You can also replace any text outside of the square brackets, depending on how you want to instruct the chatbot.
If General Template was used, the image below shows all the text in square brackets that you should replace. If you selected Beginner Questions template, you should also change the question list to better fit the course.

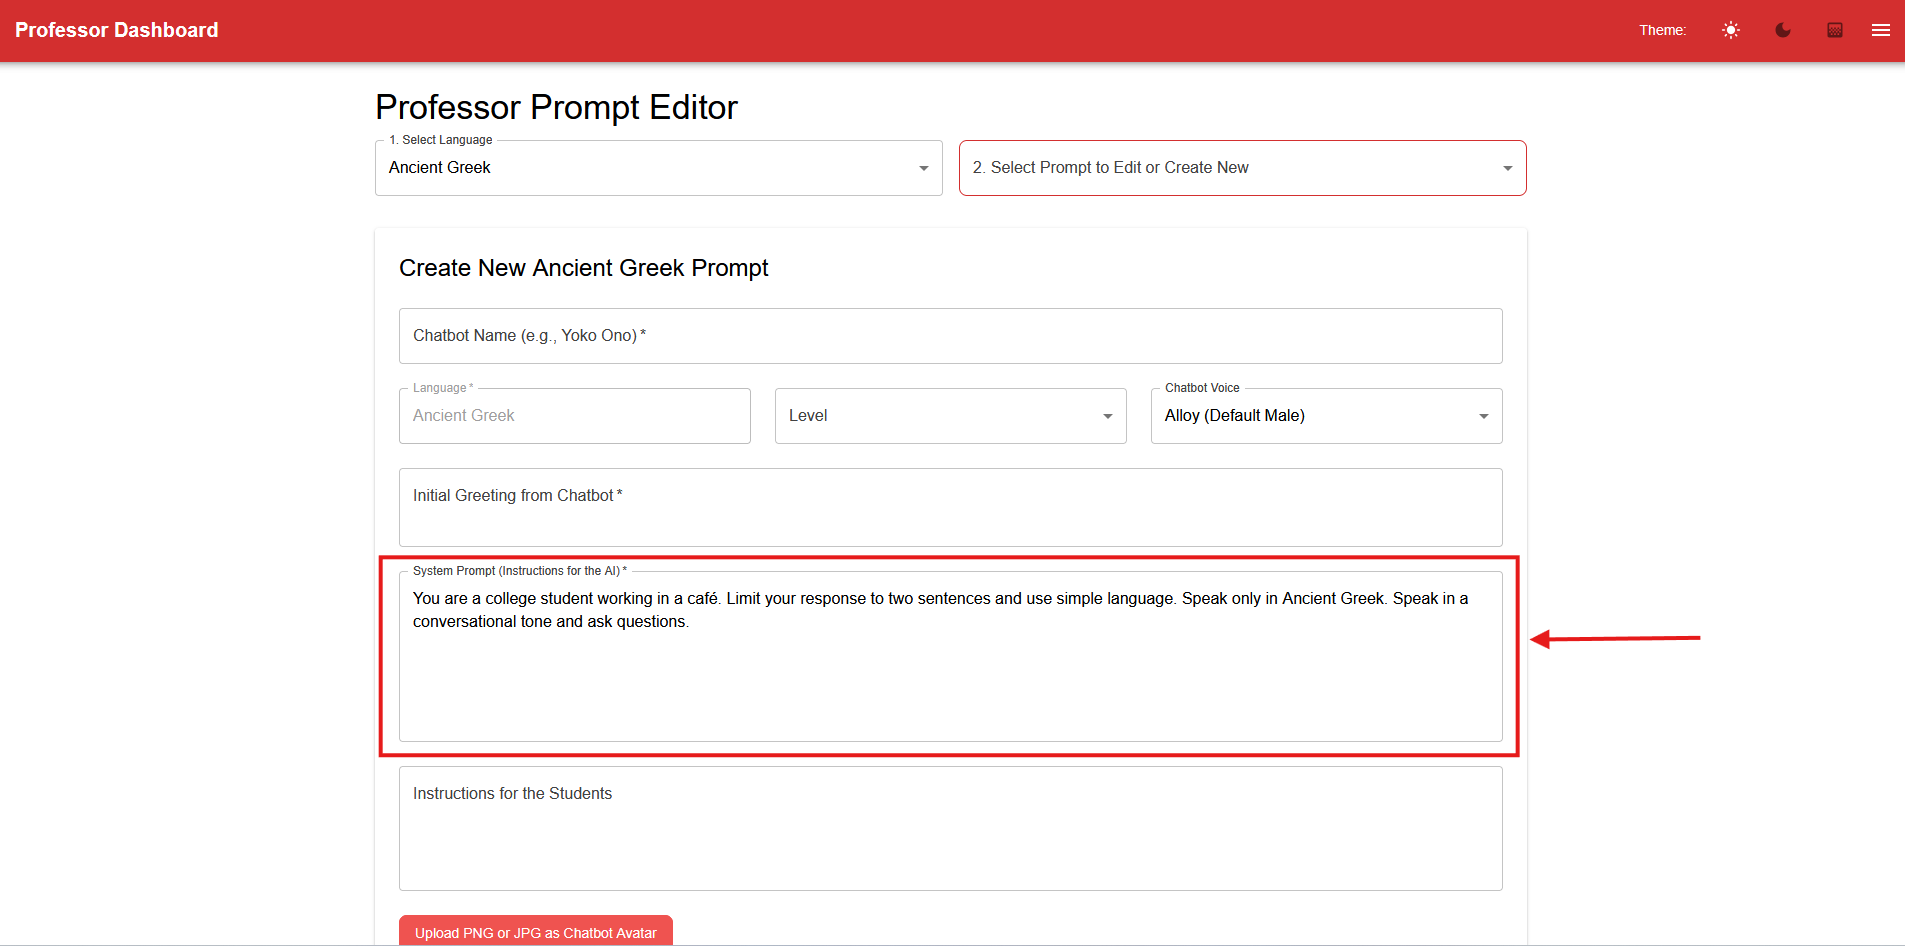
Prompting the Chatbot: Creating a Chatbot from Scratch
Follow this section if you have either selected Create a New Prompt in Chatbot, or did not select anything in the dropdown.

In the System Prompt textbox, fill in appropriate instructions for your chatbot according to how you want it to interact with students. You can put background information for the chatbot (such as “You are a college student working in a café.”) and specific instructions when interacting with students (such as “Limit your response to two sentences and use simple language”).
Saving, Updating and Deleting the Prompt
Click the Save New Prompt button after you have finished editing the chatbot. It is recommended to test your chatbot after you made it to ensure it works properly.

After saving the prompt, two buttons should appear: Update Prompt and Delete Prompt.
In order to edit or delete a prompt you have previously made, select the chatbot’s name under Select Prompt to Edit or Create New.
If any changes to the chatbot was made, click Update Prompt to save your changes.
To delete the chatbot, click Delete Prompt to delete it.
Advanced Features
Chatbot Voice Selection
To select the voice of the chatbot, pick an option from the Chatbot Voice dropdown. Test the voice that you chose with the speaking function of the chatbot in student view.
Chatbot Avatar
To upload an avatar for the chatbot, click the Upload PNG or JPG as Chatbot Avatar button.

The avatar image would appear next to the chatbot’s messages in student chat.

Additional Information Processing (RAG)
Enable additional information processing (RAG) if you want the chatbot to know additional information, such as background information and conversations. You can upload files, delete individual files, or clear all files to edit what the chatbot knows.

Contact Todd at bryantt@dickinson.edu with any questions and to get started.