
The Canon SL3 DSLR Camera is a versatile, beginner-friendly camera that gives you more creative control than a phone or point-and-shoot. You might use the Canon SL3 when you want higher-quality photos or video, sharper images in low light, or the ability to control settings like aperture, shutter speed, and ISO. It’s a great option for learning the fundamentals of photography while still being powerful enough for class projects, creative work, and campus events.
This tutorial will help you get started with the Canon SL3 DSLR camera. Follow the steps below to learn how to turn the camera on, take basic photos, and begin using manual settings for more creative control.
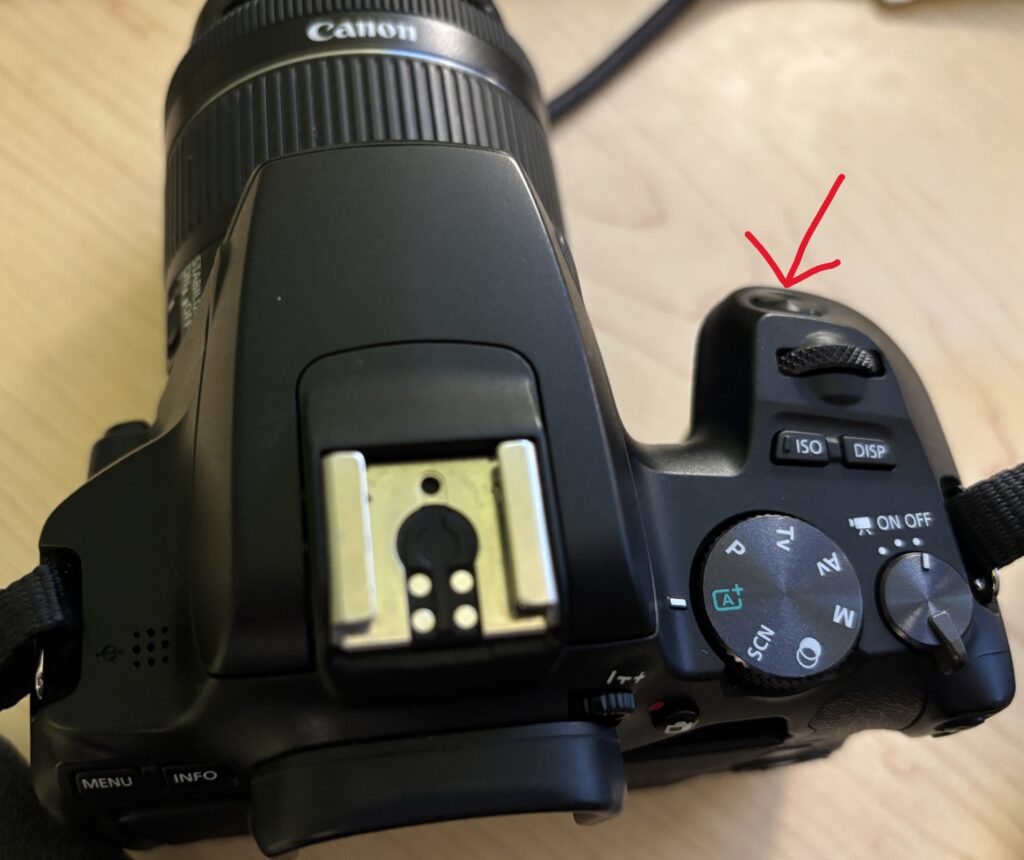
Turning the Camera On
- Make sure the battery is charged and an SD card is inserted
- Remove the lens cap
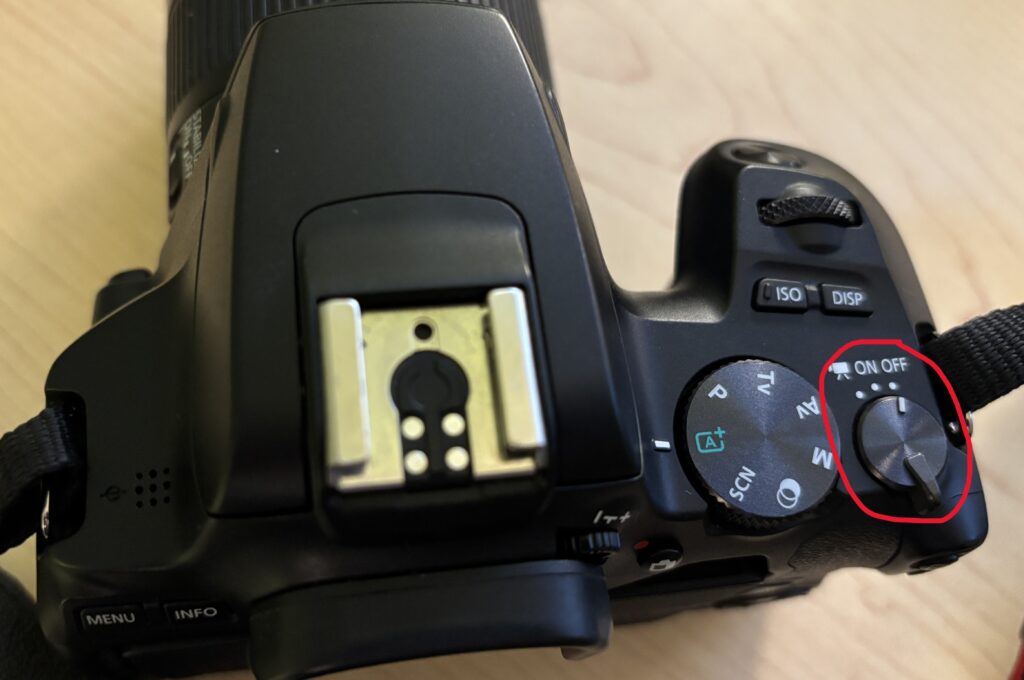
- Move the power switch on the top of the camera to ON
Taking a Photo
- Look through the viewfinder or use the screen
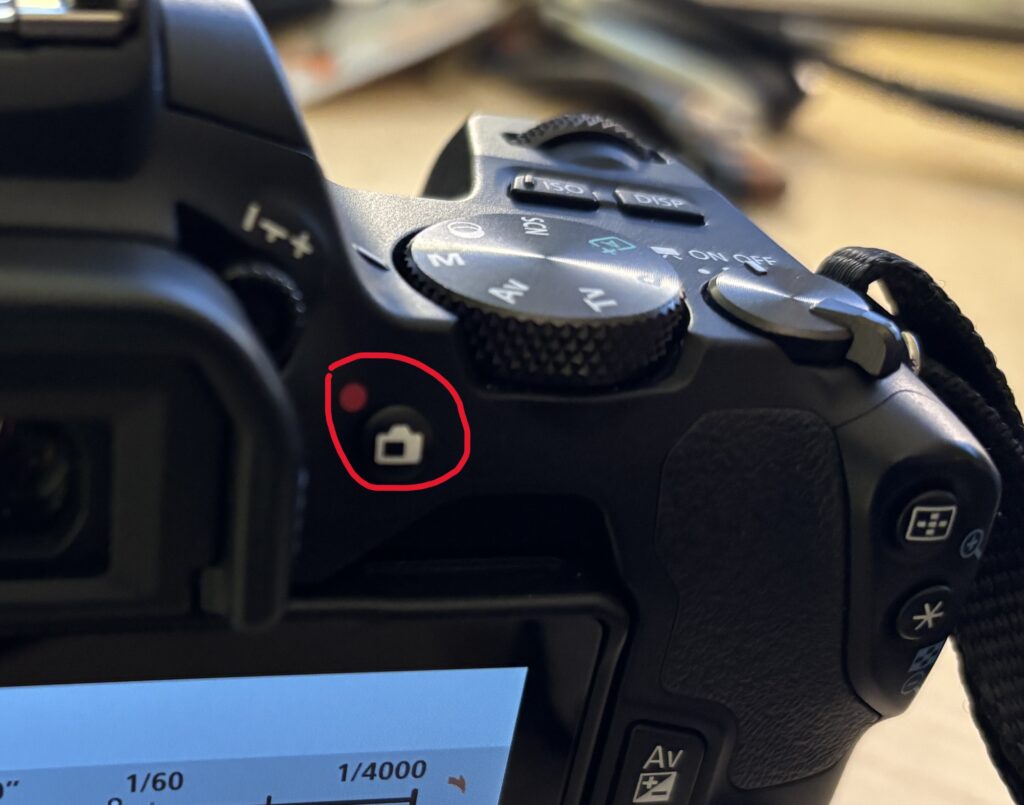
- To switch between the viewfinder and the screen, press the button with the camera icon

- Press the shutter button halfway to focus
- You’ll hear a beep or see a focus indicator
- Press the shutter button all the way down to take the photo
Using Auto Mode (Recommended for Beginners)
If you just need to take photos quickly:
- Turn the mode dial to A (Auto)
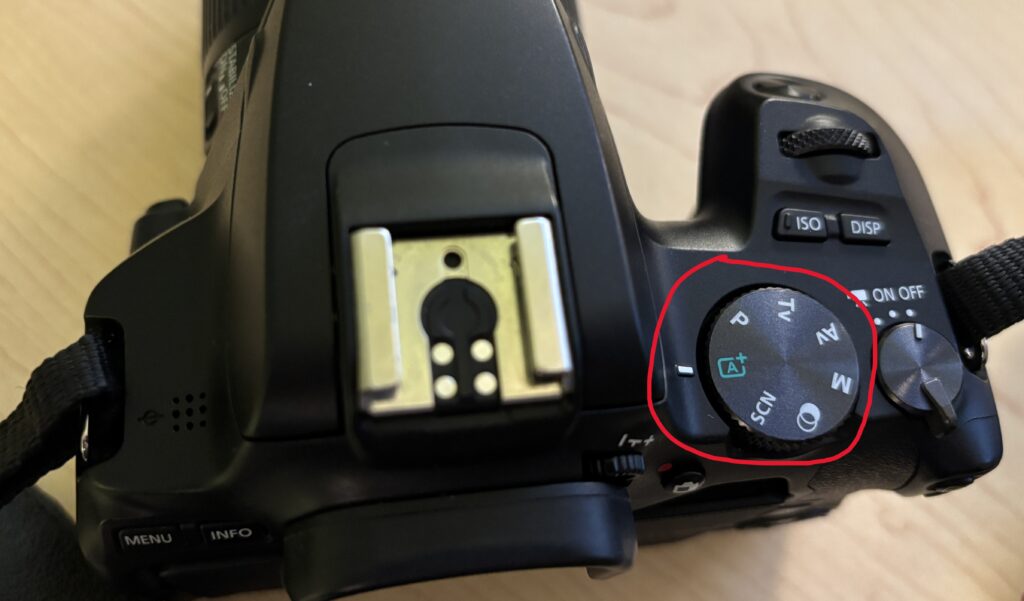
- The camera will automatically choose the best settings for you
- Focus on framing your shot and pressing the shutter
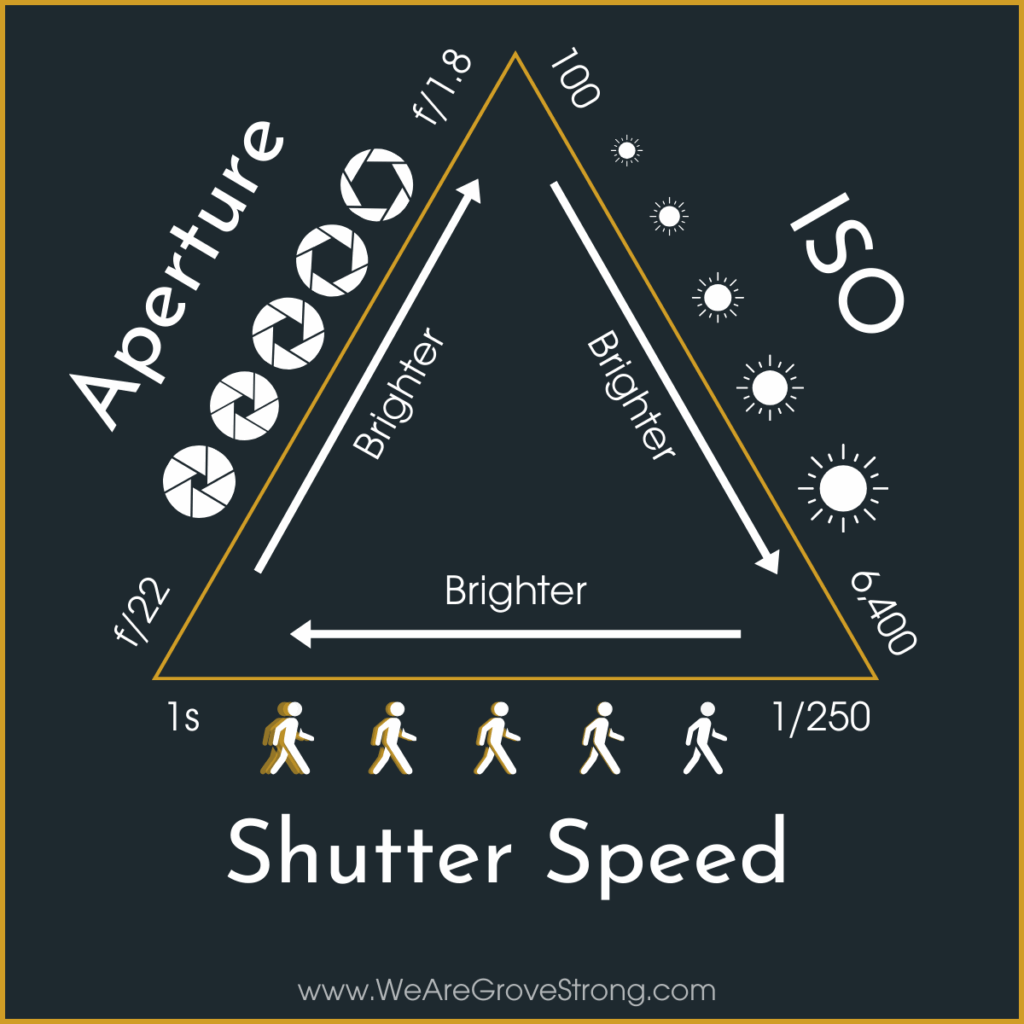
Understanding the Exposure Triangle
When you’re ready for more control, you’ll adjust three settings that affect how bright your photo is:
- Aperture (f-stop): Controls how much light enters the lens and how blurry the background is
- Shutter Speed: Controls how long the shutter stays open and how motion appears
- ISO: Controls how sensitive the camera is to light
Changing one setting affects the others. Together, these make up the exposure triangle.
Using Manual Mode
To control all settings yourself:
- Turn the mode dial to M (Manual)
- All settings will appear on the screen
In Manual mode:
- Use the main dial to change shutter speed
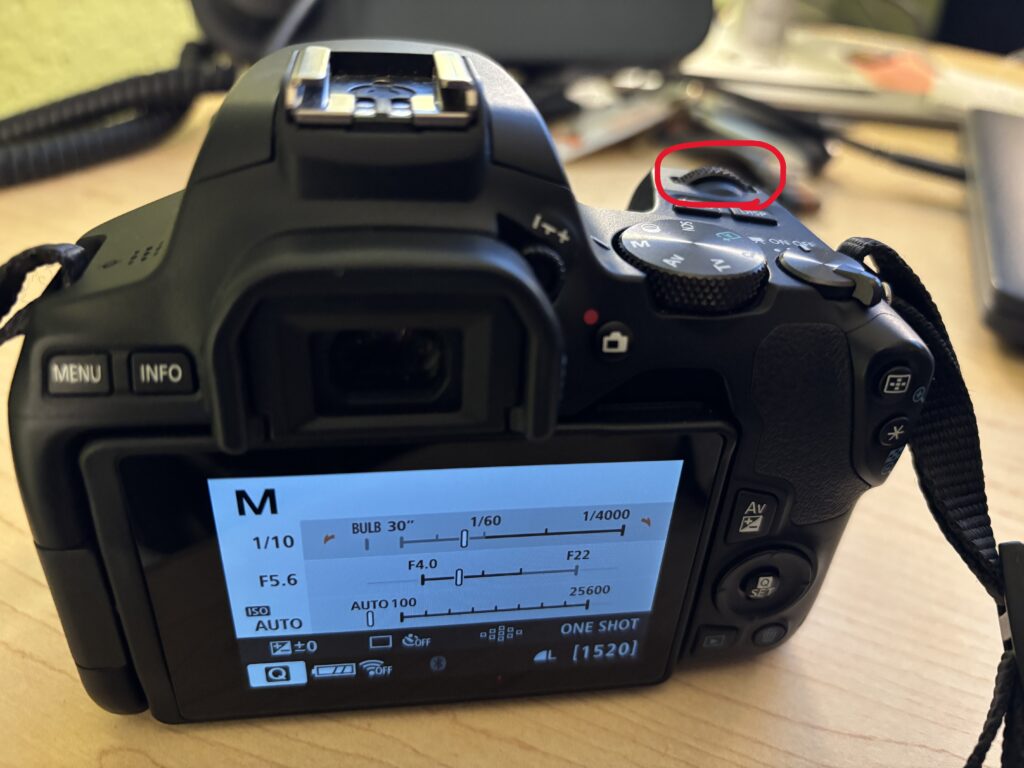
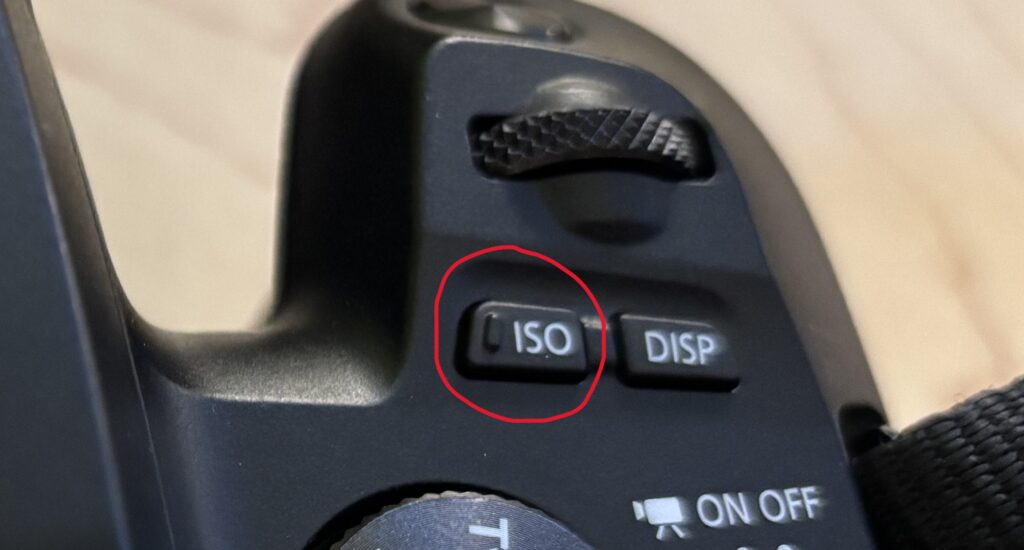
- Press the ISO button to adjust ISO
- To change the aperture, use the main dial while holding the AV button

Watch the exposure meter on the screen to help balance your settings.
Reviewing Your Photos
- Press the Play button to view photos you’ve taken
- Use the arrow buttons or dial to scroll through images
- Press Delete if you need to remove a photo
Shooting Video
- Turn the dial to movie mode
- To start and stop the recording, press the camera button with the adjacent red dot
Helpful Tips
- Use Auto mode when you’re unsure
- Use Manual mode when lighting or motion matters
- Keep your ISO as low as possible for cleaner images
- If photos look blurry, try a faster shutter speed
You’re Ready to Shoot
You don’t need to master every setting to take good photos. Start simple, experiment often, and adjust as you go. The Canon SL3 is a great camera for learning photography fundamentals while producing high-quality results.