
The Canon R30 Camcorder is a reliable, easy-to-use video camera designed for capturing high-quality footage with minimal setup. You might choose the Canon R30 when you need smooth, consistent video, strong auto-focus, and dependable audio for interviews, presentations, performances, or events. It’s especially well-suited for users who want professional-looking video without needing to manage complex camera settings.
This tutorial will help you get started with the Canon R30 camcorder. Follow the steps below to learn how to power on the camera, record video, and adjust basic settings for clear, steady footage.
1. Turning the Camcorder On
- Make sure the battery is charged and an SD card is inserted
- Press the Power button located on the back of the camera just above the battery
- Flip the switch by the lens to open its cover
2. Recording to the SD Card
- Press the Home button on the side of the camera
- On the touchscreen, select Other Settings
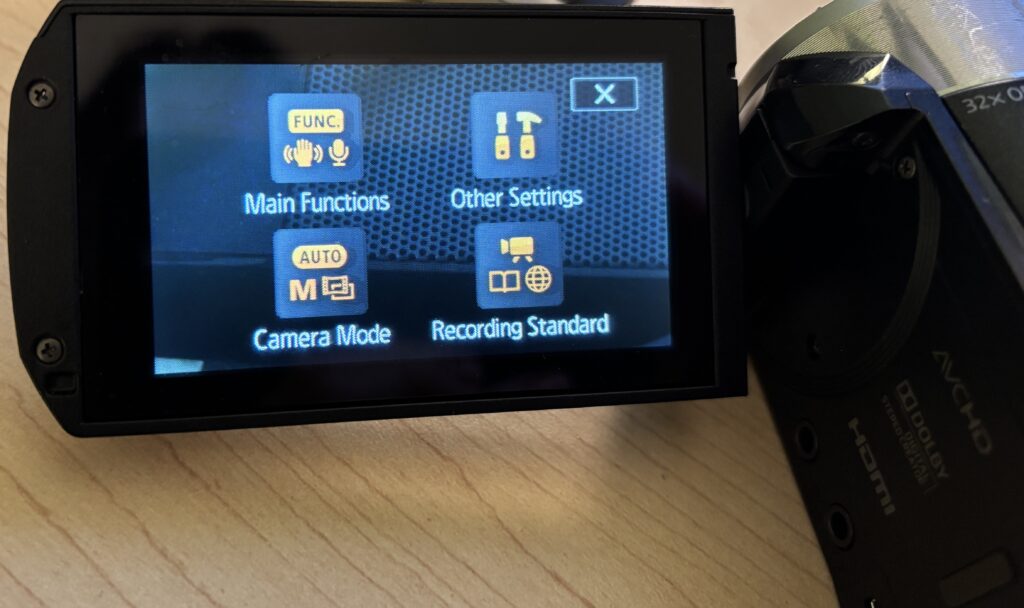
- Click the second tab with the filmstrip icon
- Select Rec. Media for Movies and change to SD
3. Checking the File Output Type
The camcorder allows you to select your desired recording format before you start recording. By default, the camcorder will record as an mp4 file. This is fine as long as what you’re recording is less than 30 minutes.
Planning to record something longer than 30 minutes? You’ll want to change the format to AVCHD so that your recording isn’t broken up into multiple files. To do so:
- Press the Home button on the side of the camera
- Navigate to the Recording Setup menu
- Select Movie Format
- Select AVCHD and Confirm
4. Using the Audio Level Indicator
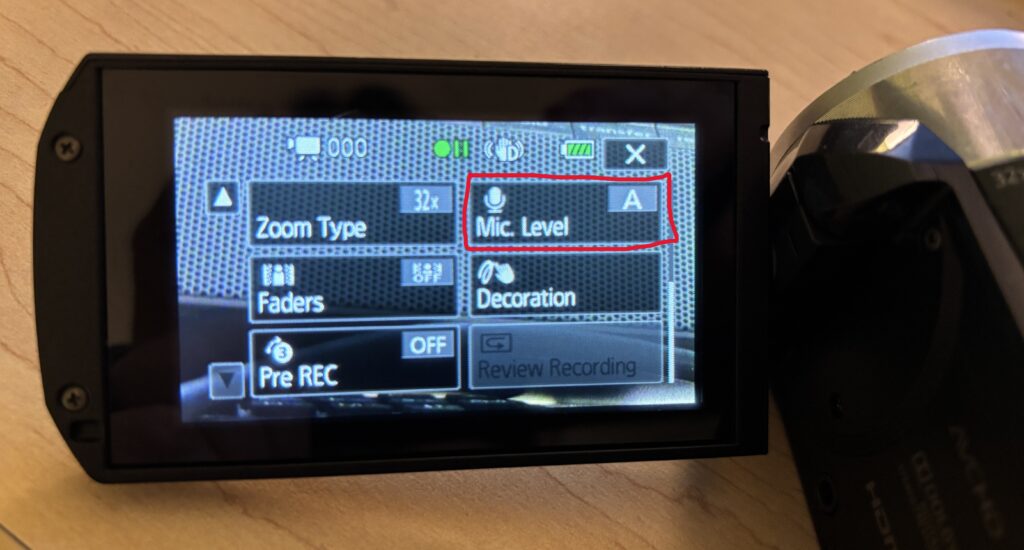
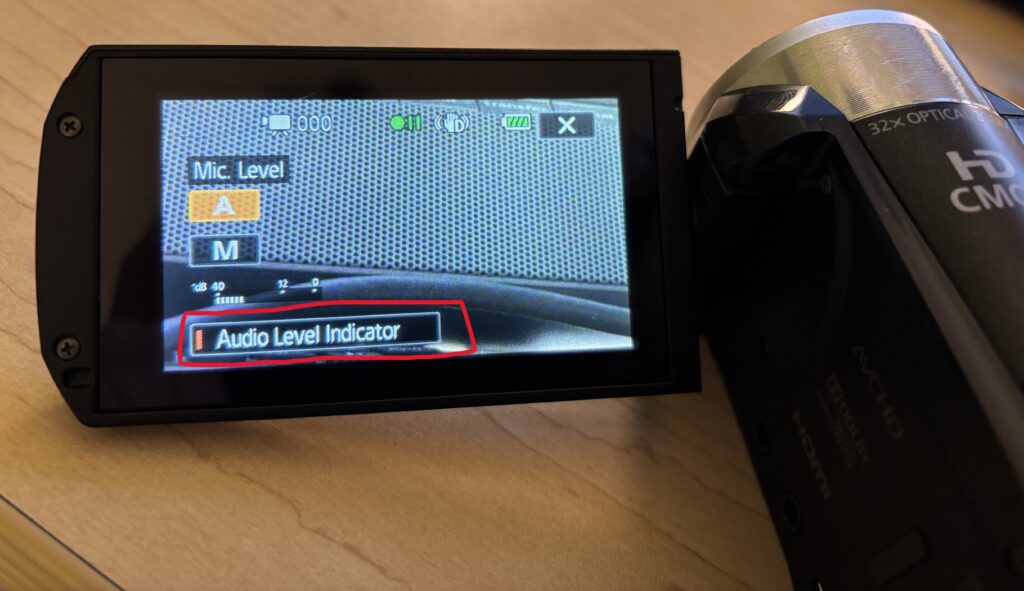
Provided you have the camcorder in Manual mode, the Audio Level Indicator can help you monitor audio while recording.
- On the touchscreen, press FUNC
- Scroll down and select Mic Level
- Press the Audio Level Indicator button and the scale should now display
5. Recording Video
- Frame your shot using the LCD screen
- Press the Record button to start recording
- Press the Record button again to stop
A red indicator on the screen confirms when recording is active.
6. Switching to Auto Mode
If you aren’t looking to adjust many settings, for most situations, Auto mode works well and requires no setup. Auto mode is ideal for interviews, presentations, performances, and events.
- Press the Home button on the side of the camera
- On the touchscreen, select Camera Mode
- Select Auto
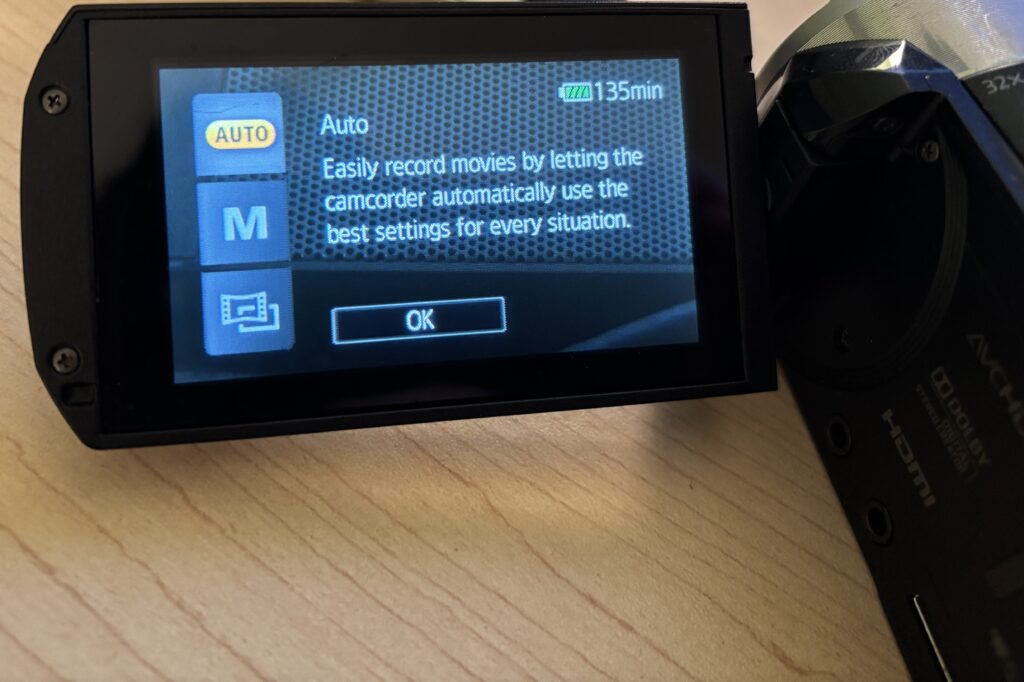
Note: when in Auto mode, your ability to change settings is limited. If you want more control over your settings, you’ll need to switch to Manual Mode using the same process as mentioned above.
7. Holding the Camcorder Steady
Good video depends on stable footage.
- Use the hand strap and keep elbows close to your body
- Move slowly when panning or tilting
- Use a tripod whenever possible for interviews or longer recordings
Even small movements are noticeable in video.
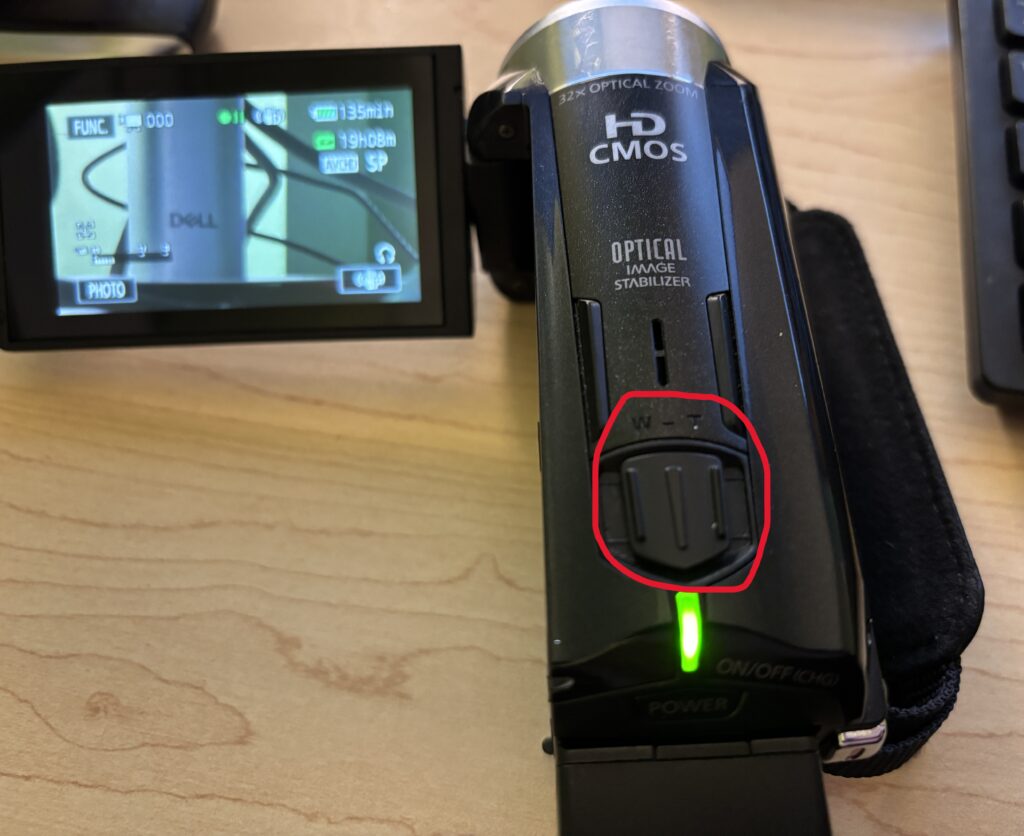
8. Zooming and Focus
- Use the zoom toggle slowly for smooth zooms
- Avoid excessive zooming while recording as it can be distracting
- Let the camera auto-focus, but pause briefly before recording to allow it to lock focus
Slow, intentional movements look more professional.
9. Reviewing Your Footage
- Press the Playback button to view recorded clips
- Use the on-screen controls to scroll through videos
- Delete clips you don’t need to free up space
Reviewing footage on location helps prevent reshoots later.
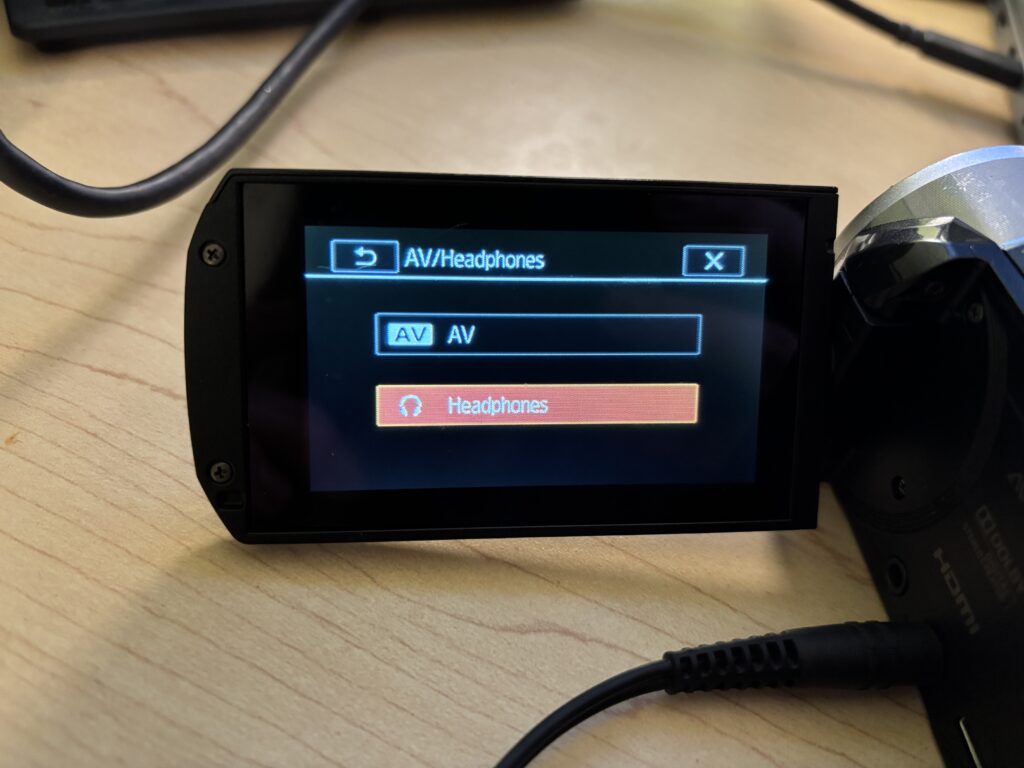
Using Headphones to Monitor Audio
If you’re using headphones to monitor audio during filming and you hear a buzzing noise once the headphones are plugged in, you will need to follow the below steps.
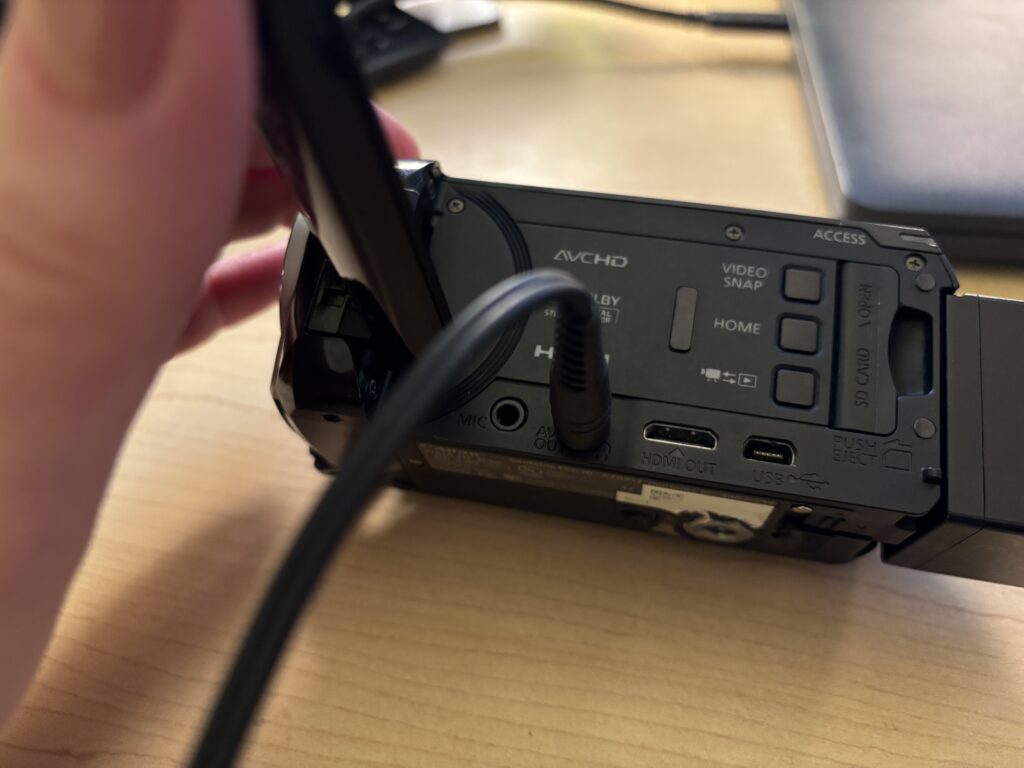
- Navigate to the menu by pressing the Home button on the side of the camera
- Select Other Settings
- Click the tab at the top with the wrench icon
- Scroll down to AV/Headphones and click on it
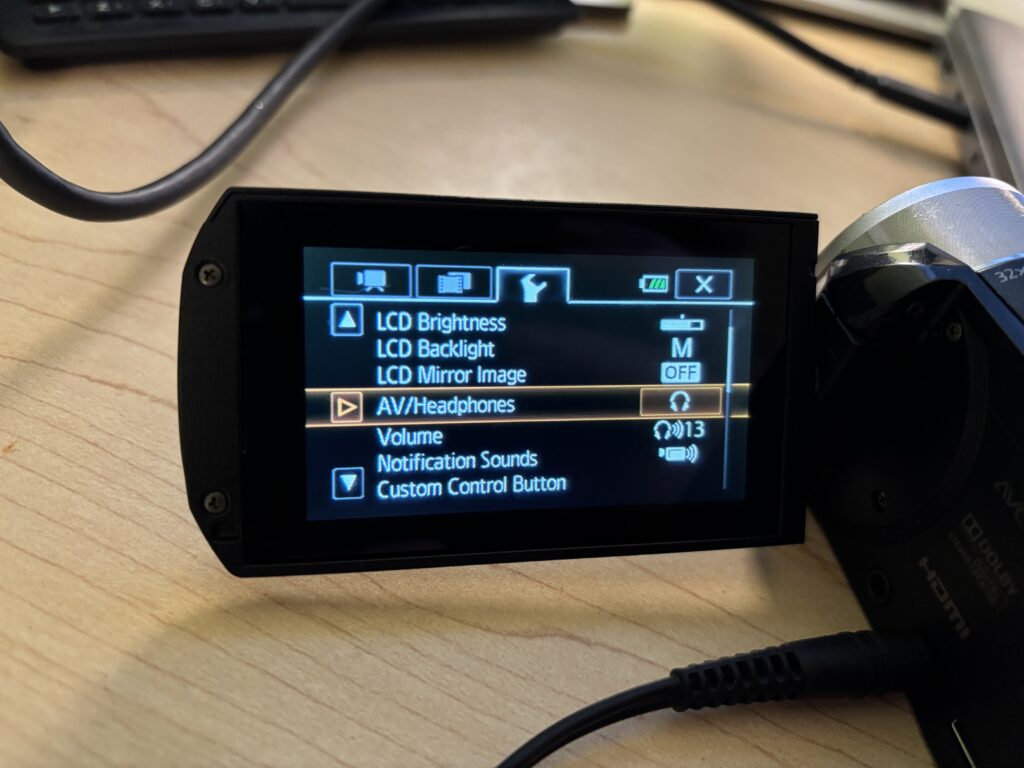
- Select the Headphones option
Helpful Tips
- Record a short test clip before important shoots
- Watch for background noise when recording audio
- Keep clips short and intentional
- Use a tripod whenever possible
You’re Ready to Record
You don’t need advanced settings to create strong video content. Start with Auto mode, focus on steady shots and clear audio, and build confidence as you record. The Canon R30 is a reliable camcorder for class projects, interviews, documentation, campus events, and more.