
Microsoft Teams is a video conferencing and collaboration tool commonly used for classes, meetings, and group work. If you’re familiar with Zoom, many of the core features in Teams will feel familiar but they may be located in slightly different places. This guide focuses on helping those who have previously used Zoom to get up and running quickly in Teams.
1. Getting Started
- Open Microsoft Teams (desktop app or web browser)
- Sign in using your institutional Microsoft account
- You will land on the Teams or Calendar view
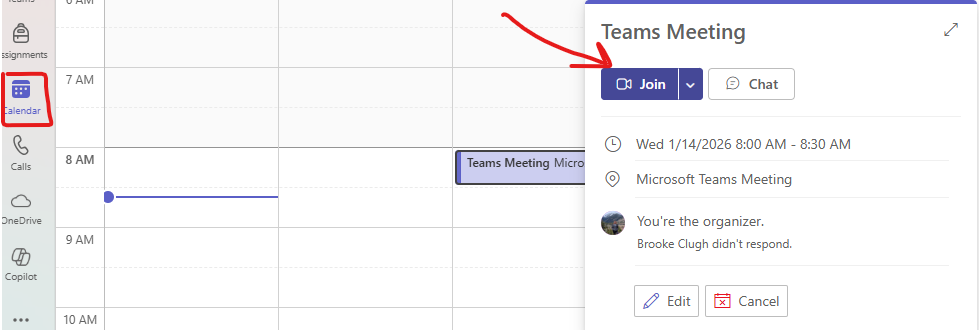
2. Joining a Video Call
- Click the Calendar tab on the left
- Find your scheduled meeting and click Join
- Or click a meeting link shared via email or chat
- Choose your camera and microphone settings
- Click Join now
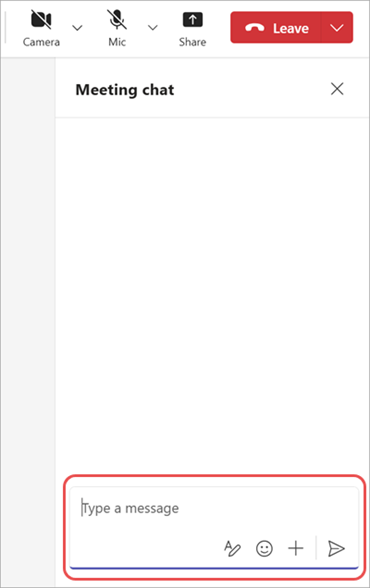
3. Audio and Video Controls During a Call
Once in the meeting, controls appear along the bottom of the screen:
- Camera icon: Turn video on or off
- Microphone icon: Mute or unmute
- Leave button: Exit the meeting

4. Chatting During a Call
- Click the Chat icon to open the meeting chat
- Type messages to everyone in the meeting
- Links and files shared in chat remain available after the meeting
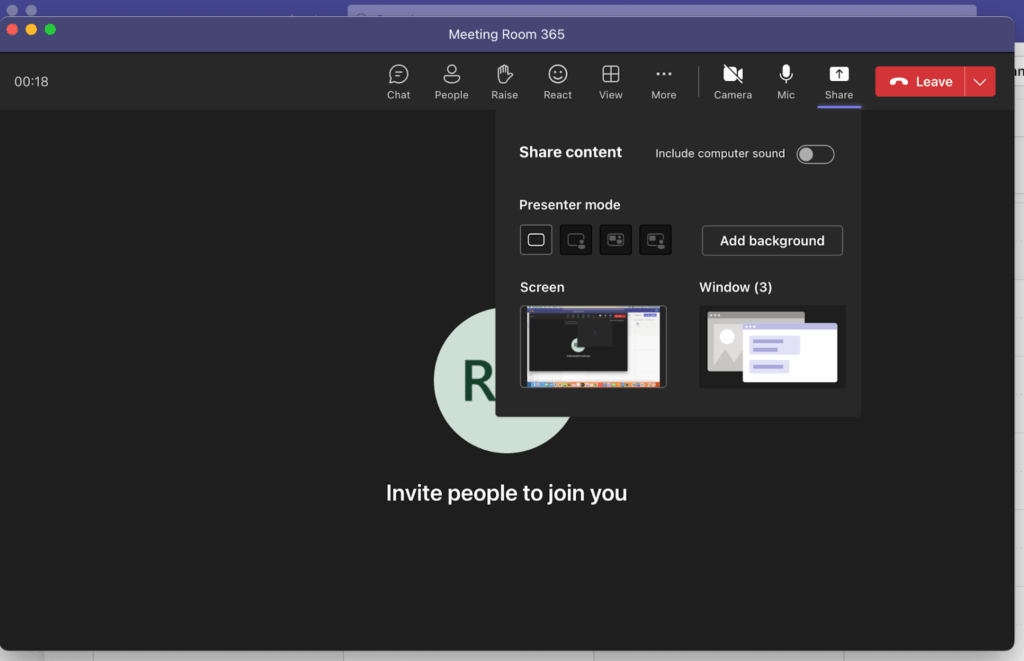
5. Sharing Your Screen
- Click Share (rectangle with arrow icon)
- Choose what to share:
- Entire screen
- A specific window
- A PowerPoint presentation
- Click Stop sharing when finished
6. Managing Participants
- Click People to view participants
- See who is muted, speaking, or has video on
- Meeting hosts may have additional controls
7. Recording a Meeting
- Click More options (three dots)
- Select Start recording
- A notification will appear for all participants
- Click Stop recording when finished
Recordings are saved to Microsoft OneDrive or SharePoint, not locally.
8. Ending or Leaving the Call
- Click Leave
- Hosts can end the meeting for everyone if needed
Helpful Tips for Zoom Users
- Teams meetings are often accessed through the Calendar, not a separate “Meetings” tab
- Chat and files persist after the meeting so nothing disappears when the call ends
- Screen sharing is more app-focused, which helps avoid sharing private notifications
- If something feels “missing,” check the More options (⋯) menu