
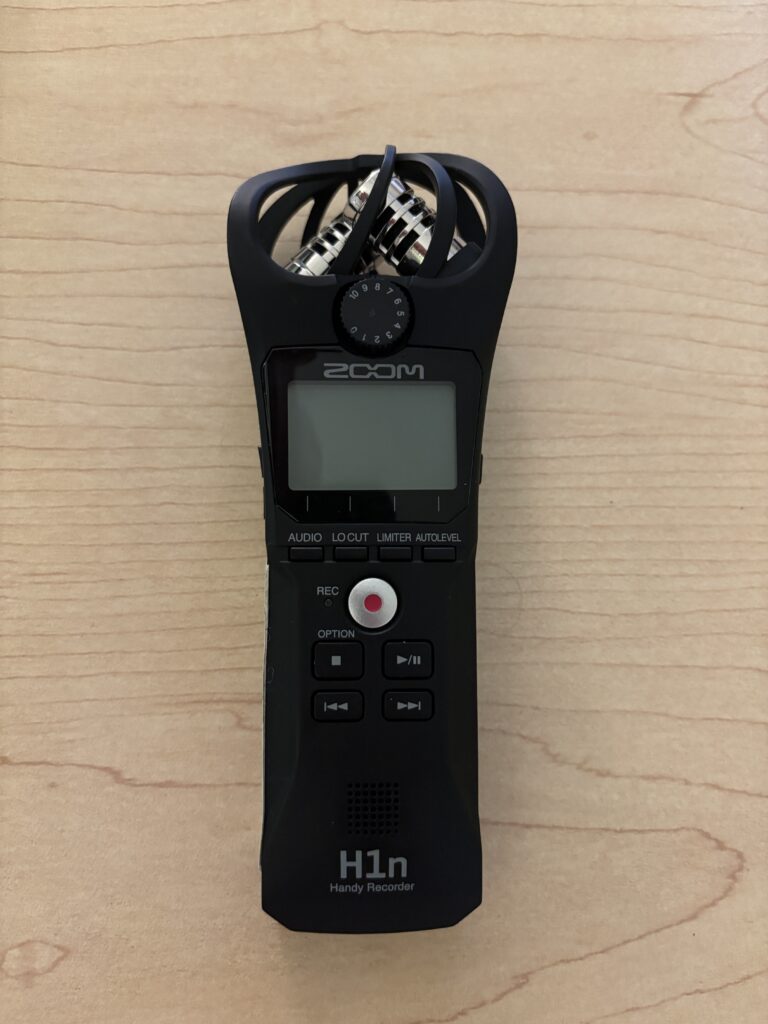
The Zoom H1n Handy Recorder is a compact, easy-to-use portable audio recorder designed for interviews, lectures, podcasts, and field recording. It features built-in stereo microphones, simple controls, and high-quality digital recording, making it ideal for beginners and experienced users alike. The H1n allows you to quickly capture clear, professional sound with minimal setup, whether you’re recording speech, music, or ambient audio.
1. Getting Started
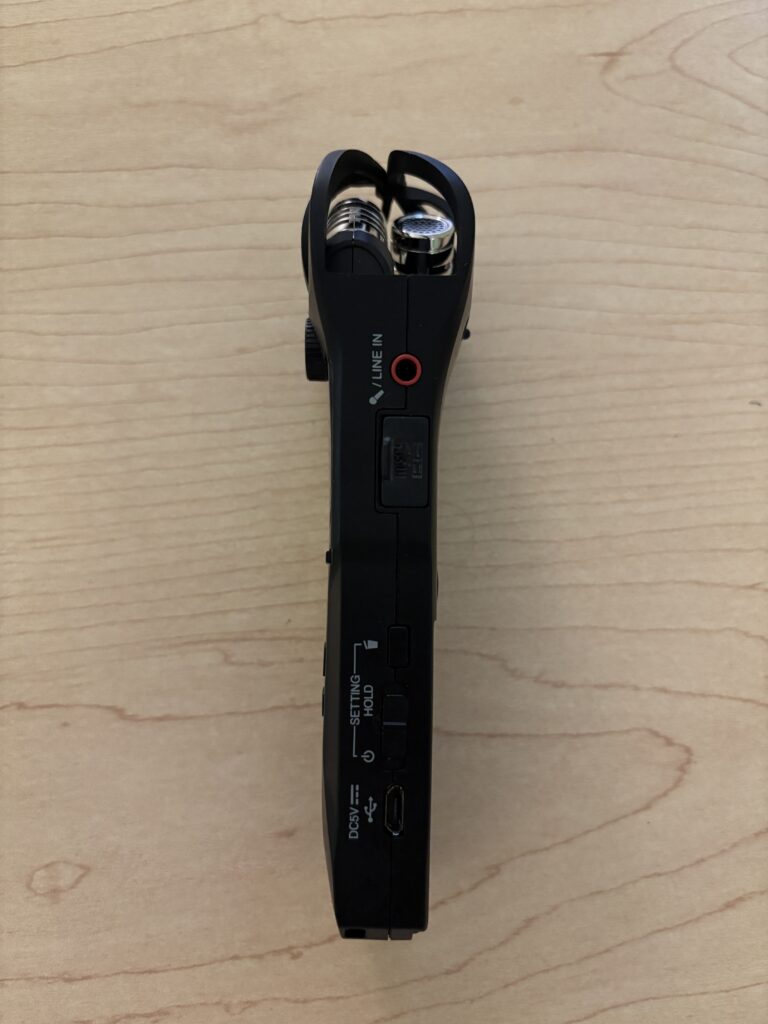
- Insert a microSD card into the slot on the side
- Insert two AAA batteries
- Slide the Power/Hold switch down to turn the recorder on
- Wait for the screen to fully load
2. Choosing a Recording Format
- On the front of the recorder, locate the Audio button
- Determine your format and quality
- Click to MP3 for smaller file size or 48k 16 bit for a wav file
While WAV is recommended for editing projects, MP3 can be read by nearly any program making it easier to work with.
3. Positioning the Built-In Microphones
The H1n has fixed X/Y stereo microphones on top.
- Point the microphones toward your sound source
- Place the recorder on a table or tripod when possible
- Avoid touching the recorder during recording
- Keep it about 6–24 inches from the source
4. Setting Input Levels
To manually set the input level:
- Press the Auto Level button on the front of the device once to turn it off
- Spin the numbered wheel on the front of the device while watching the meters on the screen
- Adjust the dial so peaks reach between –12 dB and –6 dB
5. Recording Audio
- Press Record to start recording
- The timer will begin counting
- Remain still during recording
- If you need to pause the recording, hit the play/pause button once and hit the same button again to restart
- Press Stop when finished to stop recording
6. Playing Back Your Recording
- Press the Play button
- Use the forward/back buttons to select files
- Adjust volume using the side buttons
- Listen through the speaker or headphones
7. Using an External Microphone (Optional)
- Plug a microphone into the mic/line in on the right side of the device
- Adjust the levels using the dial on the front
- Monitor audio with headphones if available
8. Transferring Files to a Computer
- Power off the recorder
- Remove the microSD card and insert into a computer or connect the recorder via USB
- If using the USB cable, select SD Card on the recording device when the screen turns on
- Look in the most recent folder (usually FOLDER01)
- Note: the date and time might be off, but it should be the most recent file(s)
- Copy the file(s) to your computer for editing
Helpful Tips
- Always do a short test recording
- Keep microphones pointed toward the speaker
- Record in quiet spaces
- Avoid handling noise
- Bring extra batteries
- Check levels before every session
A video walkthrough on using the device can be found here.