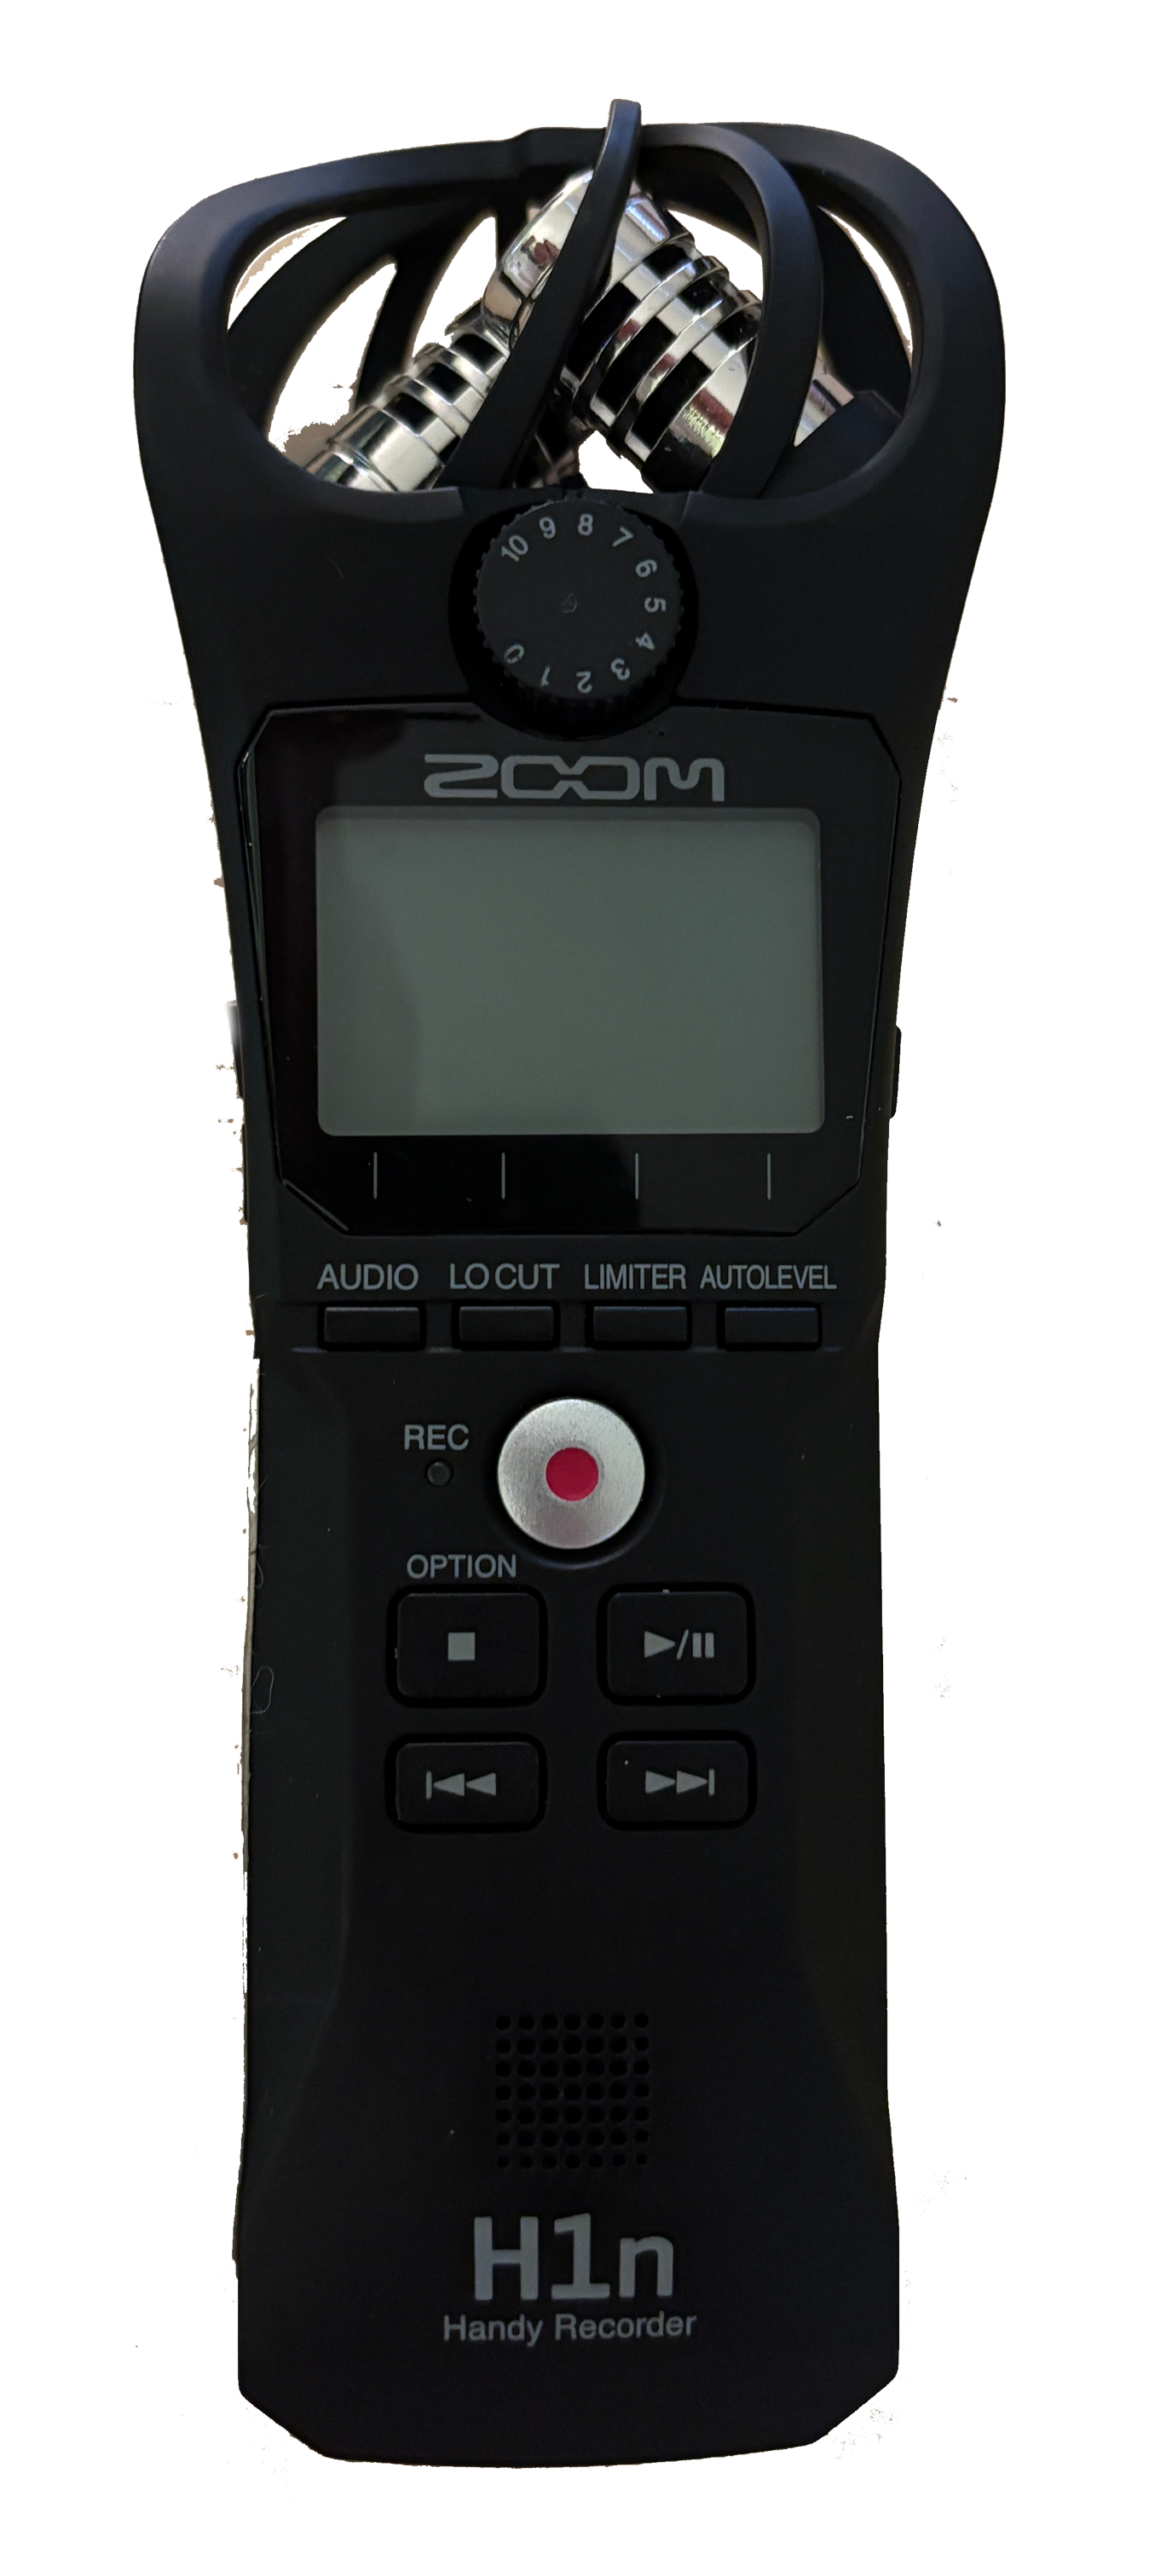
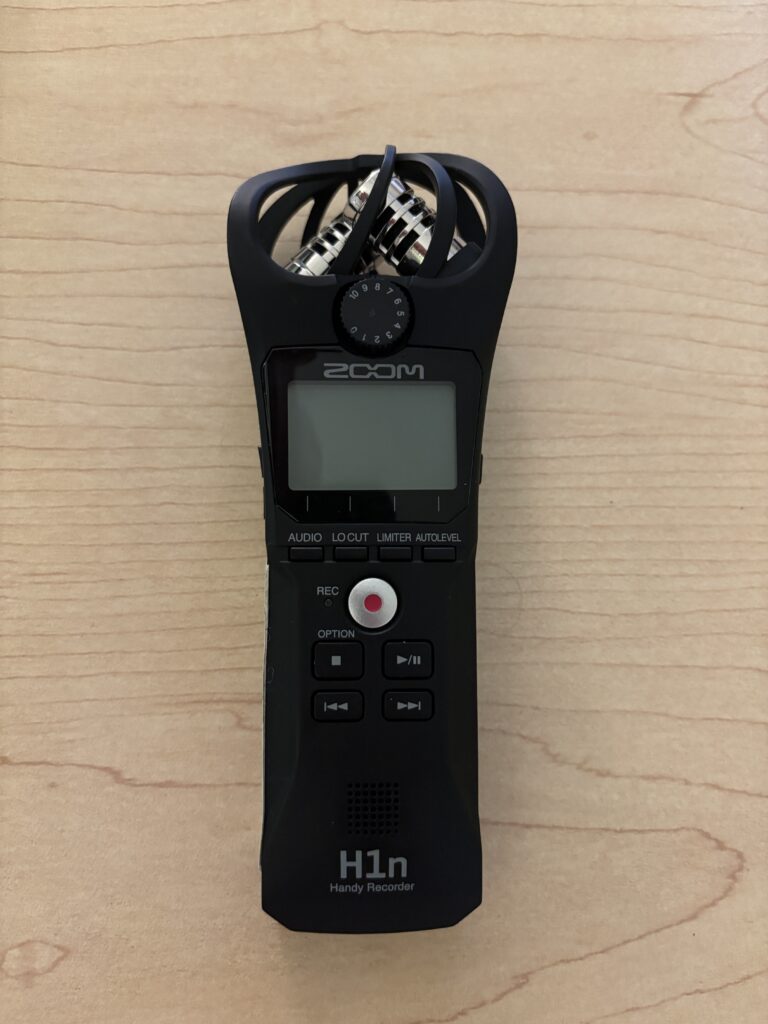
The Zoom H1n Handy Recorder is a compact, easy-to-use portable audio recorder designed for interviews, lectures, podcasts, and field recording. It features built-in stereo microphones, simple controls, and high-quality digital recording, making it ideal for beginners and experienced users alike. The H1n allows you to quickly capture clear, professional sound with minimal setup, whether you’re recording speech, music, or ambient audio.
1. Getting Started
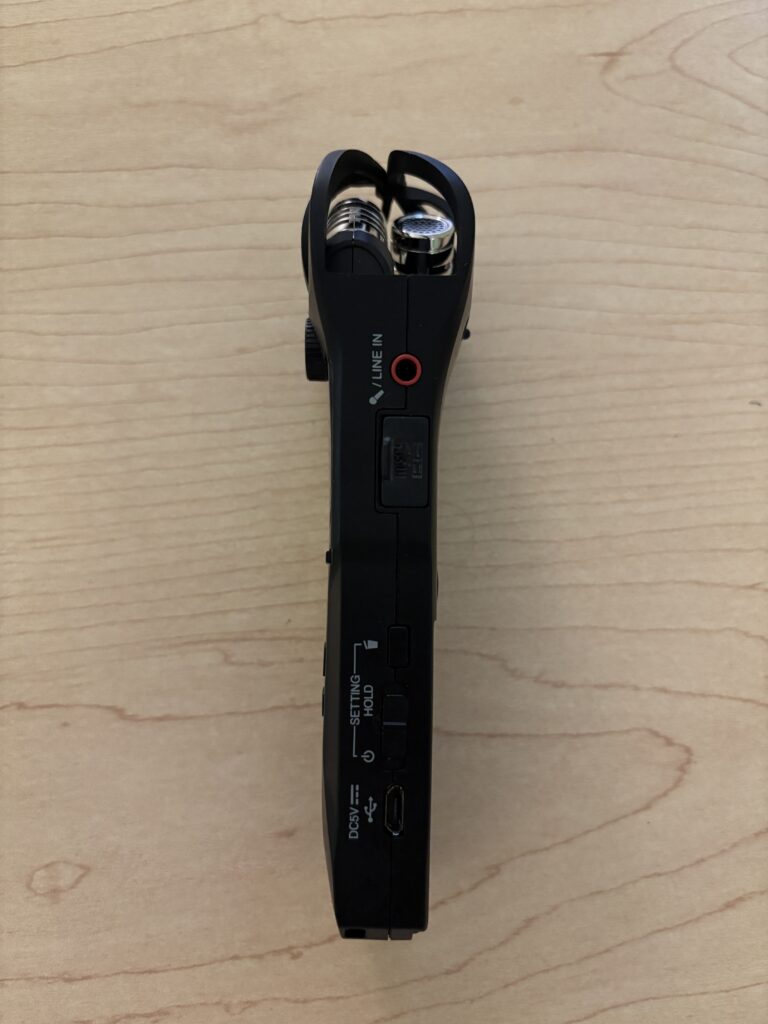
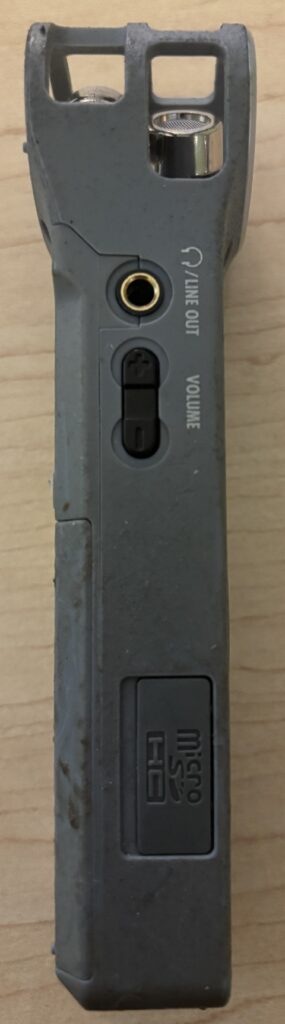
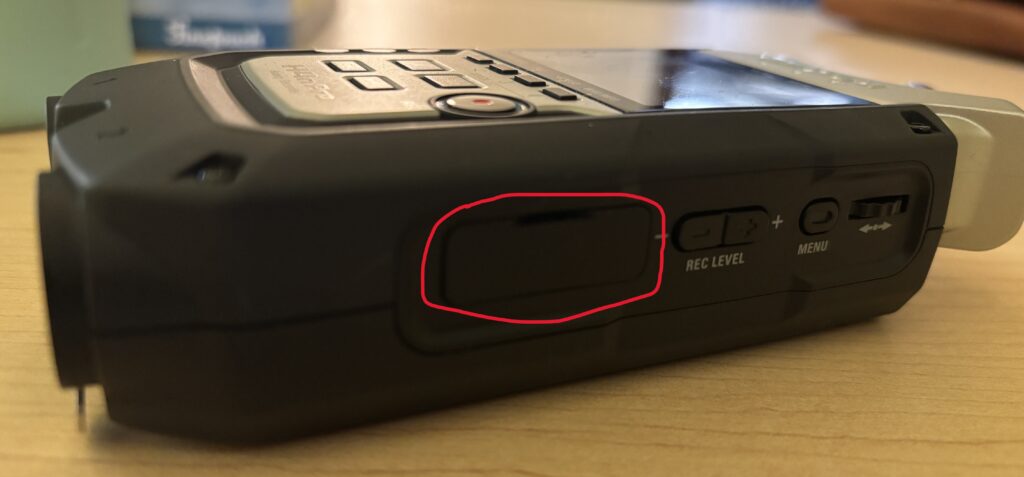
Insert a microSD card into the slot on the side
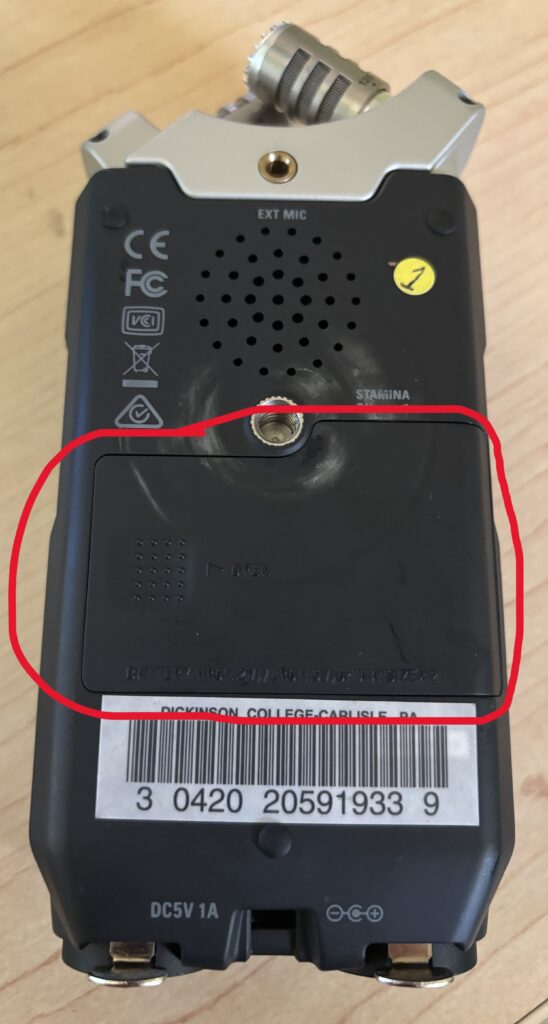
Insert two AAA batteries
Slide the Power/Hold switch down to turn the recorder on
Wait for the screen to fully load
2. Choosing a Recording Format
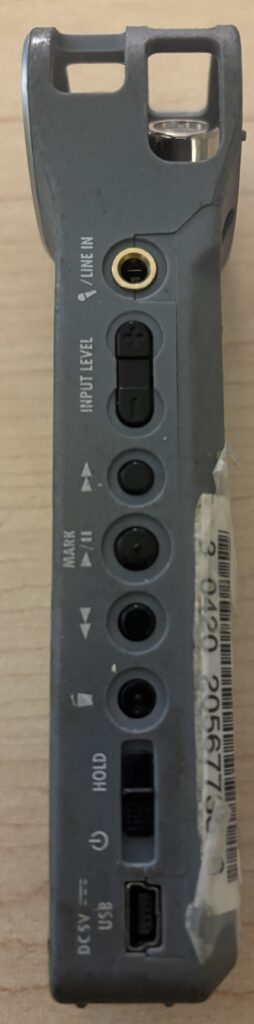
On the front of the recorder, locate the Audio button
Determine your format and quality
Click to MP3 for smaller file size or 48k 16 bitfor a wav file
While WAV is recommended for editing projects, MP3 can be read by nearly any program making it easier to work with.
3. Positioning the Built-In Microphones
The H1n has fixed X/Y stereo microphones on top.
Point the microphones toward your sound source
Place the recorder on a table or tripod when possible
Avoid touching the recorder during recording
Keep it about 6–24 inches from the source
4. Setting Input Levels
To manually set the input level:
Press the Auto Level button on the front of the device once to turn it off
Spin the numbered wheel on the front of the device while watching the meters on the screen
Adjust the dial so peaks reach between –12 dB and –6 dB
5. Recording Audio
Press Record to start recording
The timer will begin counting
Remain still during recording
If you need to pause the recording, hit the play/pause button once and hit the same button again to restart
Press Stop when finished to stop recording
6. Playing Back Your Recording
Press the Play button
Use the forward/back buttons to select files
Adjust volume using the side buttons
Listen through the speaker or headphones
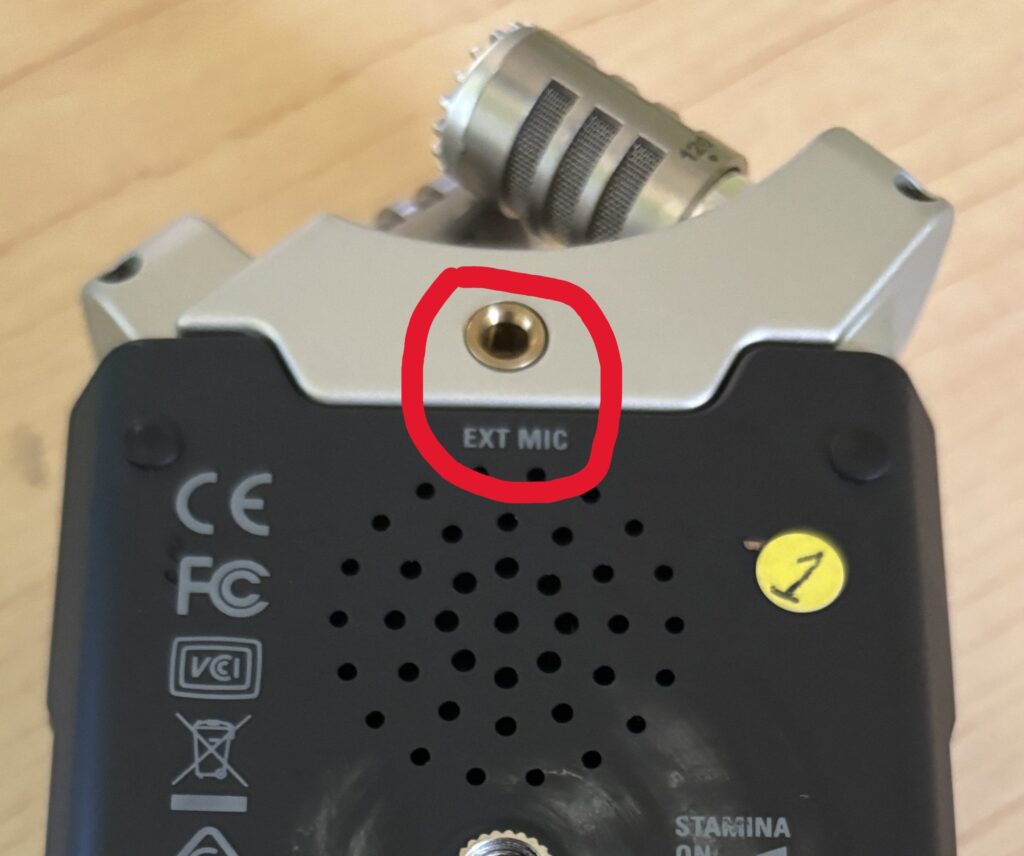
7. Using an External Microphone (Optional)
Plug a microphone into the mic/line in on the right side of the device
Adjust the levels using the dial on the front
Monitor audio with headphones if available
8. Transferring Files to a Computer
Power off the recorder
Remove the microSD card and insert into a computer or connect the recorder via USB
If using the USB cable, select SD Card on the recording device when the screen turns on
Look in the most recent folder (usually FOLDER01)
Note: the date and time might be off, but it should be the most recent file(s)
Copy the file(s) to your computer for editing
Helpful Tips
Always do a short test recording
Keep microphones pointed toward the speaker
Record in quiet spaces
Avoid handling noise
Bring extra batteries
Check levels before every session
A video walkthrough on using the device can be found here.
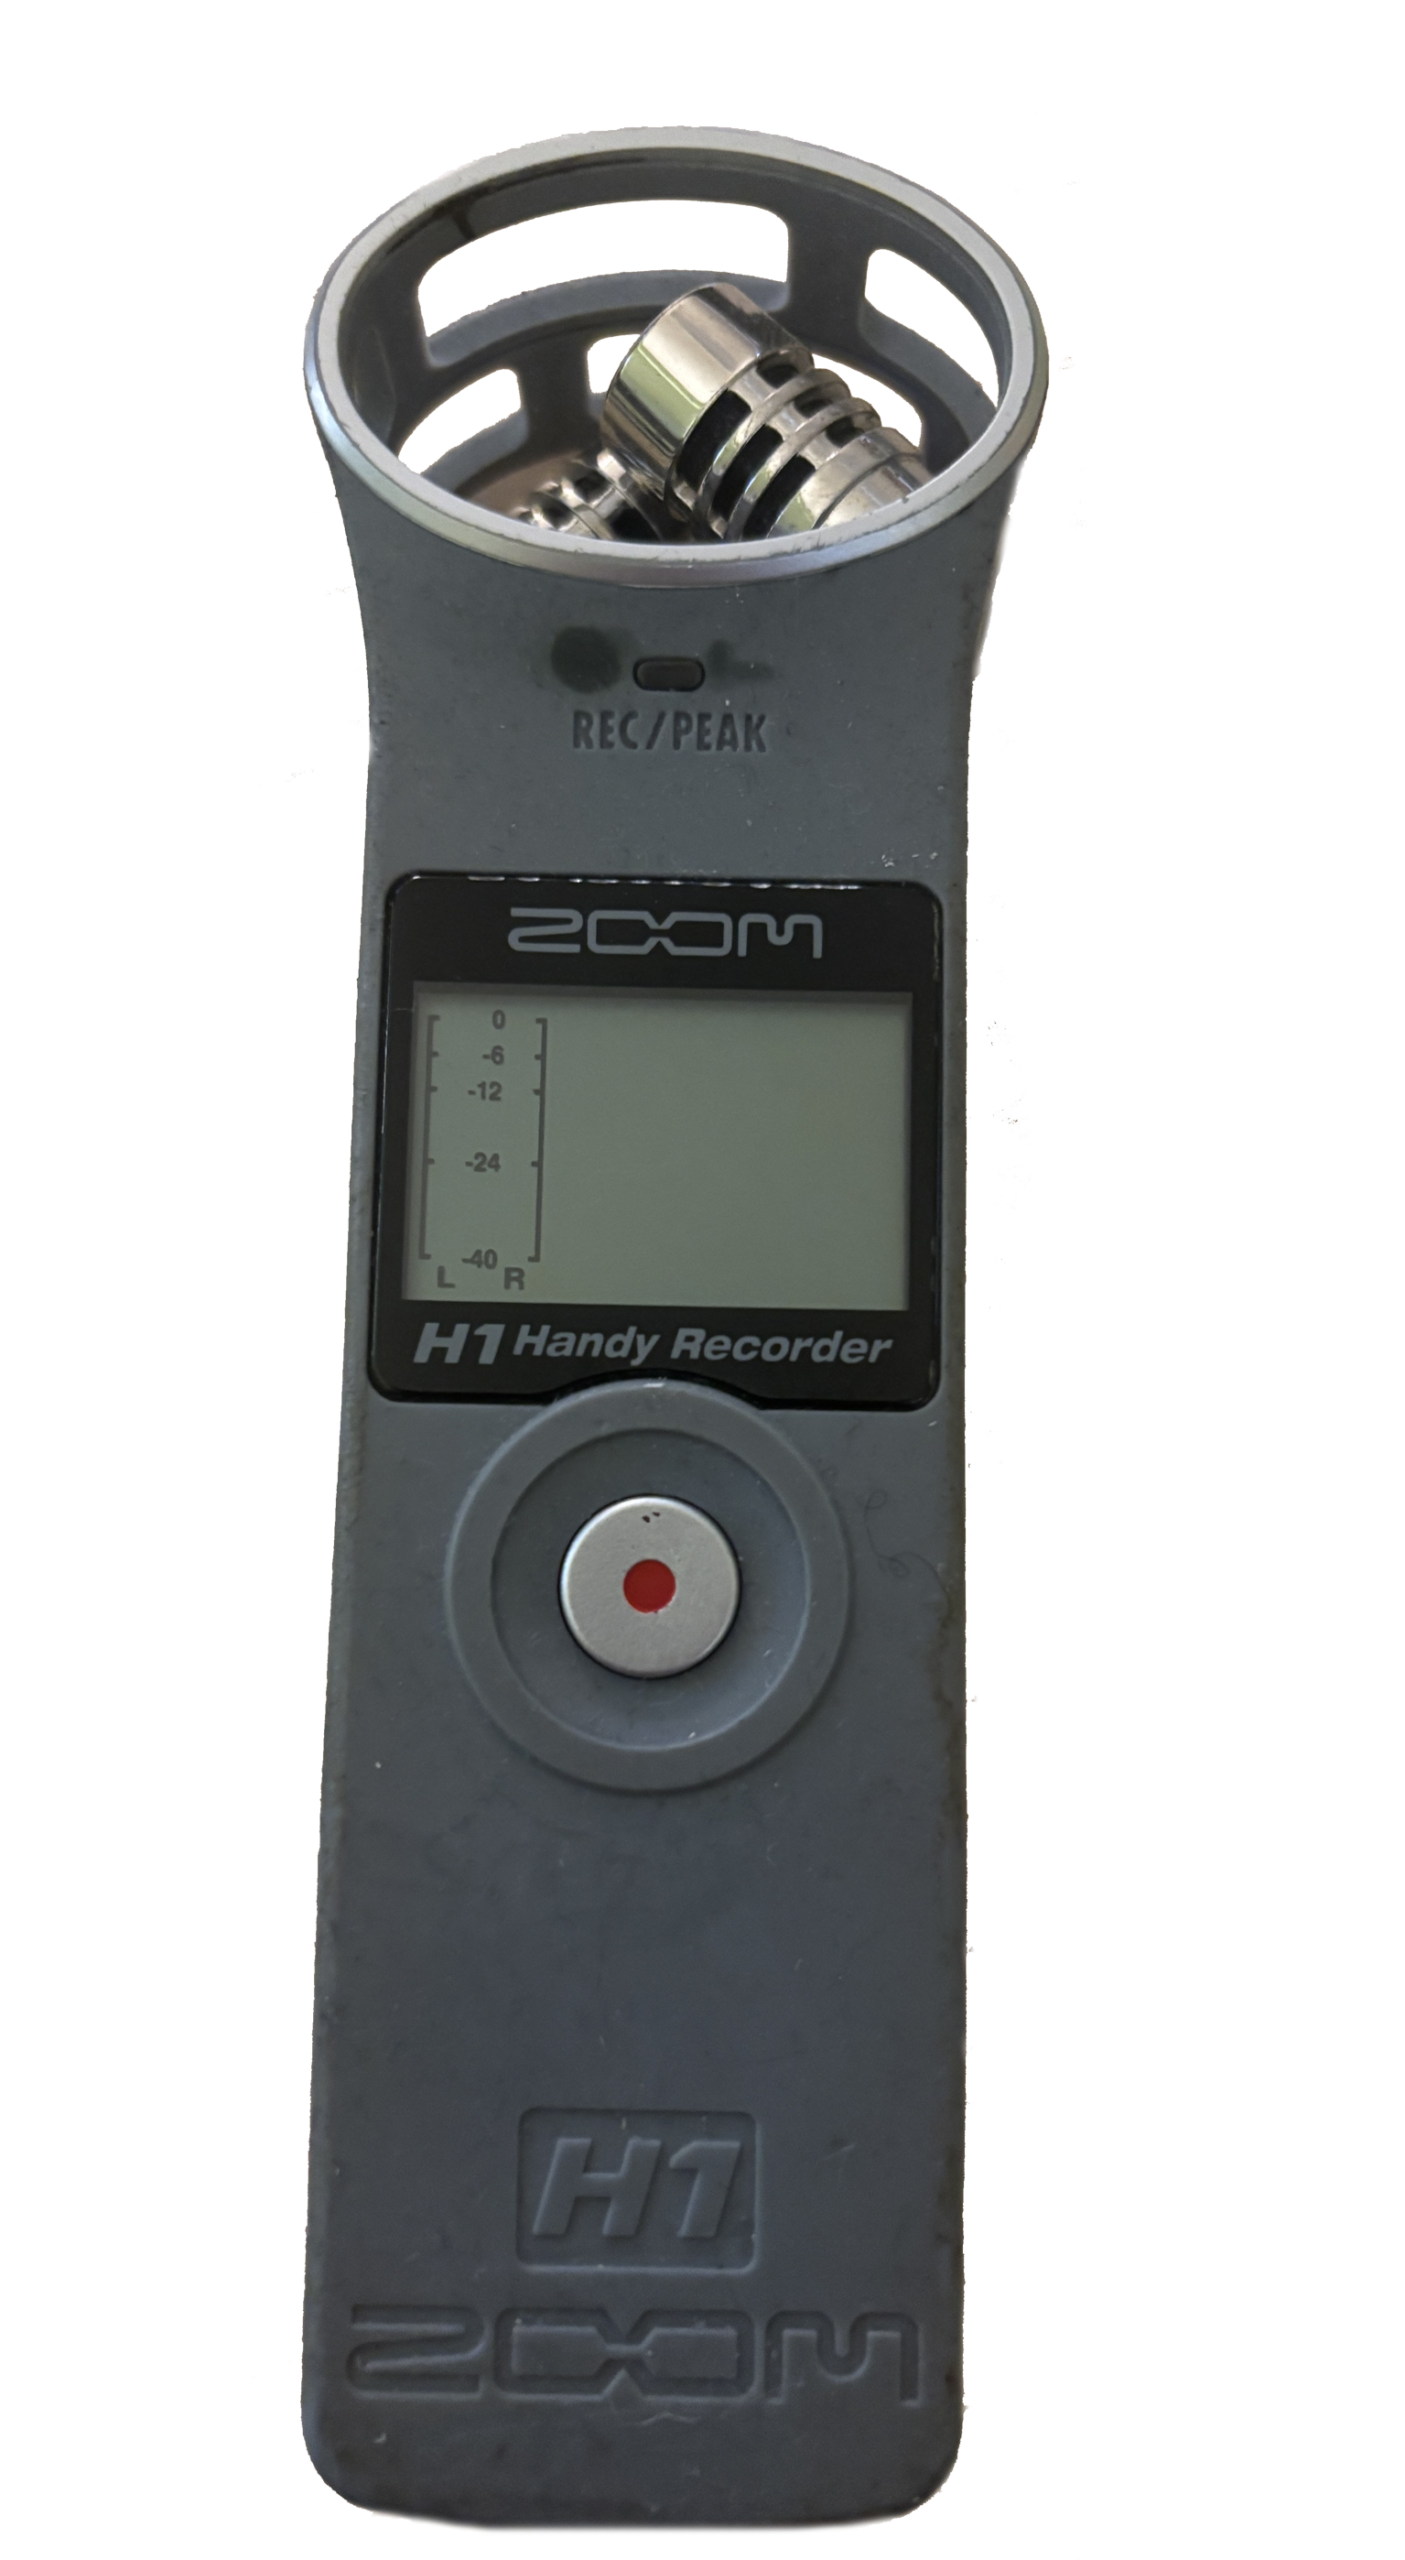
The Zoom H1 Handy Recorder is a compact portable audio recorder used for interviews, lectures, podcasts, and field recording. It features built-in stereo microphones and simple controls, making it ideal for quick, reliable audio capture without complicated setup.
This tutorial will help you record audio using the built-in microphones and save your files for later use.
1. Getting Started
Insert a microSD card into the slot on the side
Insert one AA battery
Slide the Power/Hold switch down to turn the recorder on
Wait for the screen to fully load
2. Choosing a Recording Format
On the back of the recorder, locate the WAV/MP3 switch
Slide to WAV for highest quality
Slide to MP3 for smaller file size
While WAV is recommended for editing projects, MP3 can be read by nearly any program making it easier to work with.
3. Positioning the Built-In Microphones
The H1 has fixed X/Y stereo microphones on top.
Point the microphones toward your sound source
Place the recorder on a table or tripod when possible
Avoid touching the recorder during recording
Keep it about 6–24 inches from the source
4. Setting Input Levels
Use the +/- on the right side of the device to adjust the input level
Speak at normal volume
Watch the meters on the screen
Adjust the dial so peaks reach between –12 dB and –6 dB
Avoid hitting 0 dB (this causes distortion)
5. Recording Audio
Press Record to start recording
The timer will begin counting
Remain still during recording
Press Record when finished to stop recording
6. Playing Back Your Recording
Press the Play button
Use the forward/back buttons to select files
Adjust volume using the side buttons
Listen through the speaker or headphones
7. Using an External Microphone (Optional)
Plug a microphone into the mic/line input on the right side of the device
Adjust recording level using the +/-
Monitor audio with headphones if available
8. Transferring Files to a Computer
Power off the recorder
Remove the microSD card and insert into a computer or connect the recorder via USB
Look in the most recent folder (usually FOLDER01)
Note: the date and time might be off, but it should be the most recent file(s)
Copy the file(s) to your computer for editing
Helpful Tips
Always do a short test recording
Keep microphones pointed toward the speaker
Record in quiet spaces
Avoid handling noise
Bring extra batteries
Check levels before every session
A video walkthrough on using the device can be found here.
Panopto is a recording tool used to capture screen activity, audio, and video for instructional content, presentations, and demonstrations. You might choose Panopto when you need to record a lecture, walkthrough, or explanation directly from your computer, especially when the recording needs to be shared securely with a class or campus audience. It’s well suited for narrated slides, software demos, and voice-only recordings.
1. Accessing Panopto
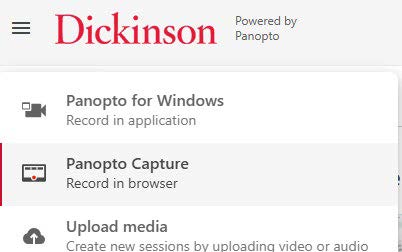
Go to the Dickinson Gateway
Click the green Panopto icon
Note: if using a Mac, Google Chrome works best
2. Setting Up Video Capture
Click Create in the top left and select Panopto Capture
3. Adjusting Screenshare Settings
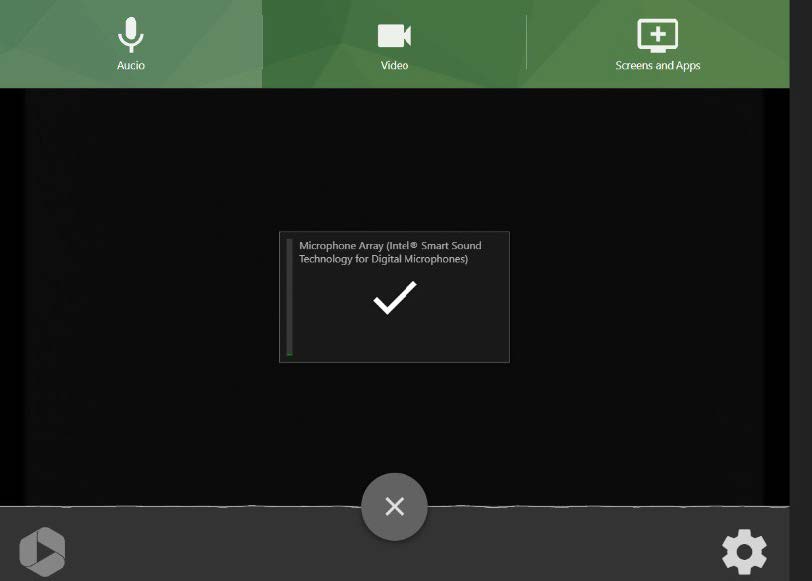
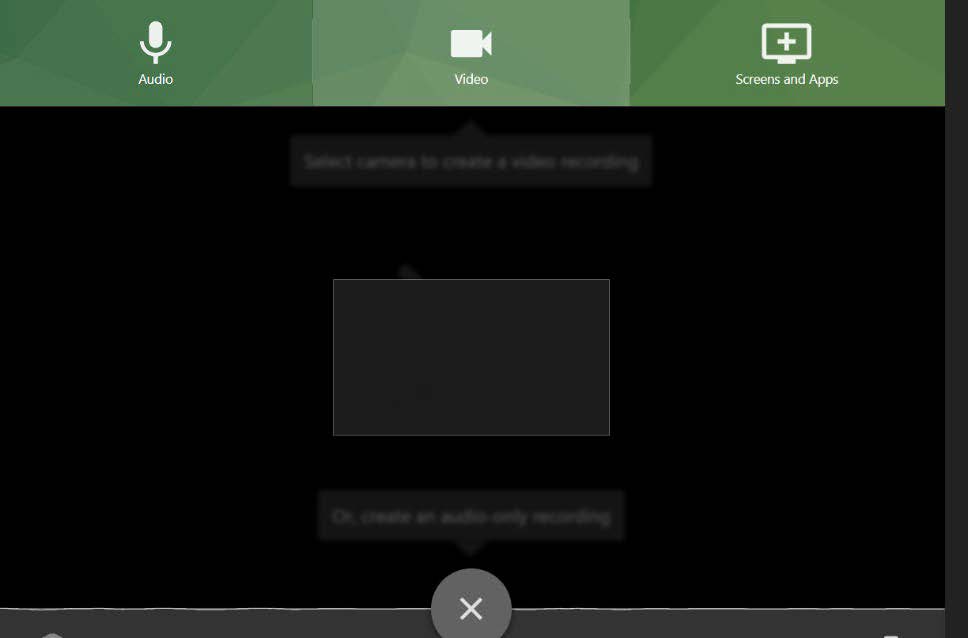
Adjust your Audio, Video, and Screenshare settings
If you’re only recording your screen, remember to select Audio, and click the checkmark so that it turns to an “X” to ensure your voice won’t be captured
Do the same thing for Video to ensure you won’t be seen in the recording
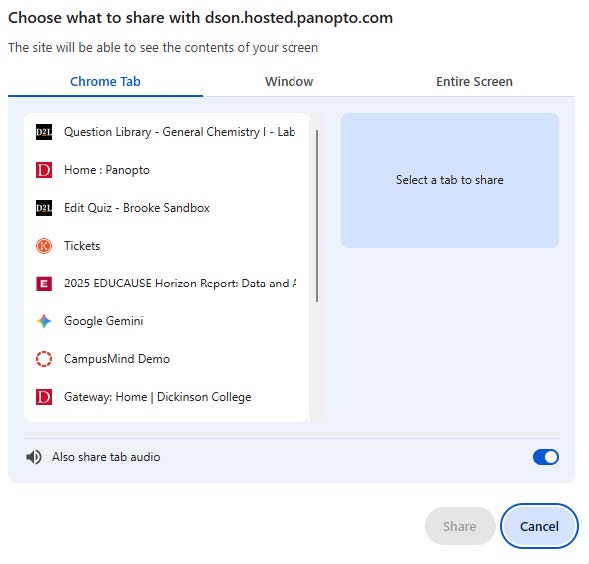
Select the tab or window you want to record
If you want the audio to come with it, be sure to switch the Also share tab audio toggle on
Click Share
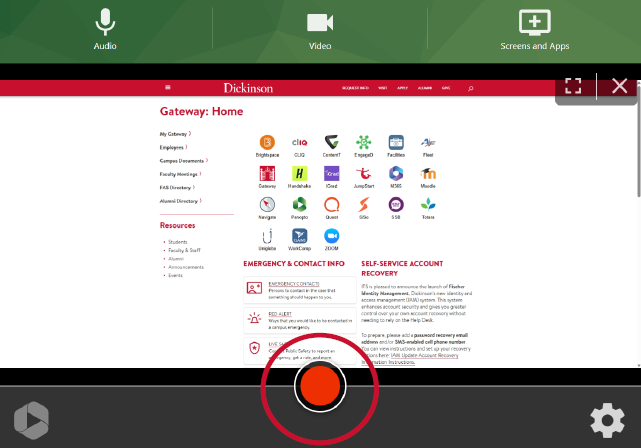
4. Starting the Recording
Hit the record button
You will be given a 5-second countodwn
Consider waiting a second or two after the countdown finishes before playing what you want to record so nothing gets cut off
5. Stopping the Recording
Navigate to the tab where Panopto is open and press the Stop button
Once you have stopped the recording, Panopto will process the file
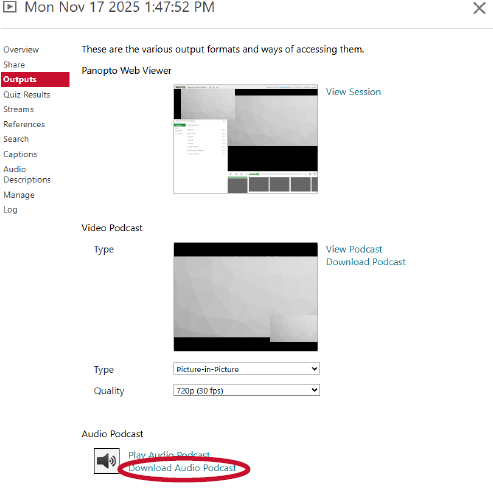
In Panopto, once the processing has finished, click the gear icon on the recording preview image
6. Downloading the Audio Only
Select Outputs from the menu on the left
At the bottom, select Download Audio Podcast
This will download the file to your computer as an .mp3
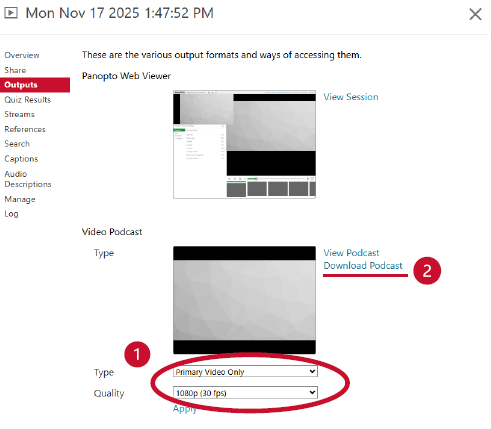
7. Downloading the Video
If you want to download both audio and video, you will need to select Primary Video Only from the Type dropdown
From the Quality dropdown, we recommend selecting 1080p (30 fps)
Note: You will need to wait until the video finishes processing again before you will be able to download the file.
Chapters allow viewers to jump to specific parts of a YouTube video. This is especially helpful for longer videos, tutorials, lectures, and presentations. Chapters improve viewer experience, accessibility, and make your video easier to navigate and reference.
This tutorial walks you through adding chapters to a YouTube video using timestamps in the video description.
1. Upload and Publish Your Video
Sign in to YouTube Studio
Upload and publish your video
Wait until processing is complete
Chapters can be added after the video is published.
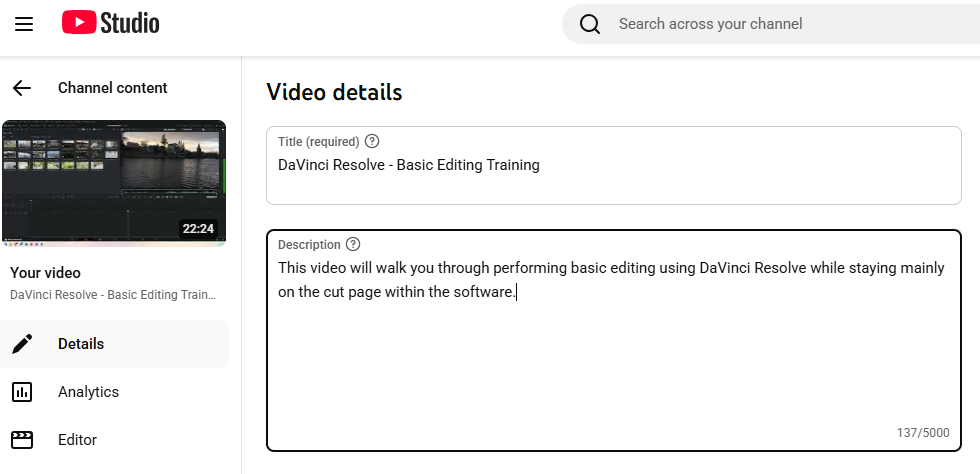
2. Open the Video Details Page
In YouTube Studio, click Content
Select the video you want to edit
Scroll to the Description box
This is where chapters are created.
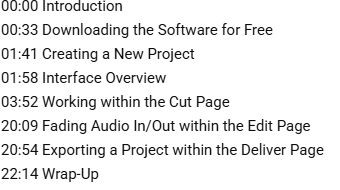
3. Create Chapter Timestamps
In the description, add timestamps in this format:
Each timestamp must be on its own line
Each timestamp must include a title
YouTube automatically converts these into clickable chapters.
4. Follow Chapter Rules
To work correctly, chapters must meet these requirements:
The first timestamp must start at 00:00
There must be at least three chapters
Each chapter must be 10 seconds or longer
Titles should be clear and descriptive
If these rules aren’t met, chapters will not appear.
5. Save Your Changes
Click Save
Refresh the video page to confirm chapters appear
Chapters will appear as sections on the playback bar as well as in the description as clickable links.
6. Edit or Update Chapters
Return to the video description at any time
Adjust timestamps or titles as needed
Save changes again
Chapters update immediately.
Helpful Tips
Keep chapter titles short and meaningful
Use chapters for major content shifts, not every sentence
Match titles to what viewers see or hear at that moment
Chapters work well alongside captions for accessibility
Chapters help viewers rewatch specific sections later
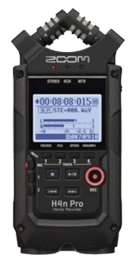
The Zoom H4n Pro is a portable, high-quality audio recorder used for interviews, podcasts, music recording, and field audio. It features built-in stereo microphones and external microphone inputs, making it flexible for a wide range of recording situations where clear, professional sound matters.
This tutorial will help you record audio using the built-in microphones and save your files for later use.
1. Getting Started
Insert an SD card into the side of the recorder
Insert fresh AA batteries or connect the power adapter
Slide the Power switch to turn the recorder on
Wait for the unit to fully boot
2. Choosing a Recording Mode
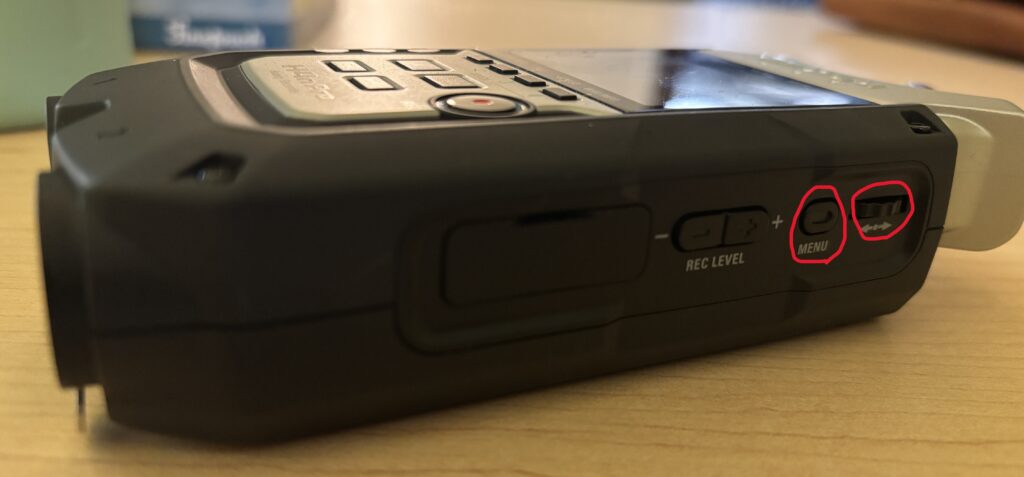
Press the Menu button located on the right side of the device
Use the wheel on the side to navigate to Mode
Select Stereo and press the wheel to confirm
3. Positioning the Built-In Microphones
The H4n Pro has adjustable X/Y stereo microphones on top.
Make sure those on pointed in the direction of your source
Decide if you want the mics to pick up a wider area (120) or focus in more (90) by turning the mics
Then, place the recorder on a table or a small tripod, or hold if necessary
4. Setting Input Levels
Press the Record button once
The meters will activate (standby mode)
Speak at normal volume
Use the + / – buttons on the right side of the device to adjust the recording level
Aim for levels that peak between –12 dB to –6 dB
5. Recording Audio
Press the Record button again to start recording
The timer will begin counting
Remain as still as possible during recording
Press Stop when finished
6. Playing Back Your Recording
Press the Play button
Use the jog wheel to select your file
Adjust playback volume using the buttons on the left side of the device
7. Using External Microphones (Optional)
External microphones provide better control for interviews and studio-style recordings.
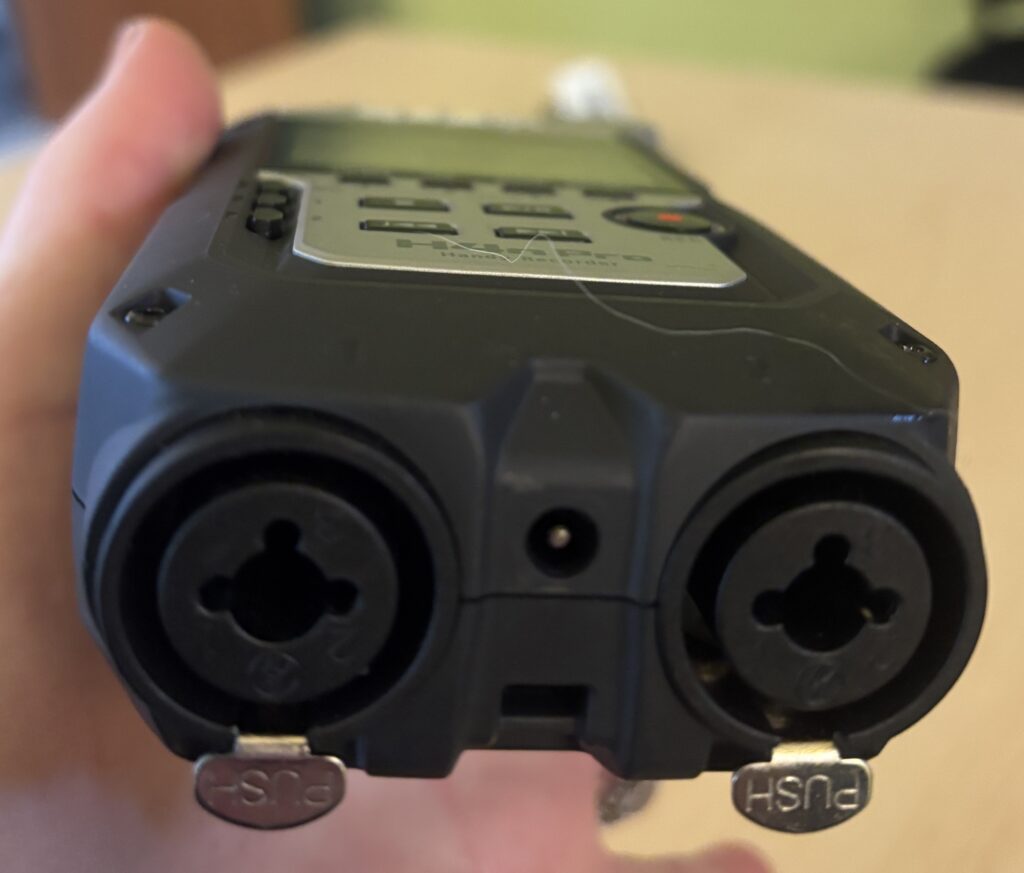
Plug microphones into Input 1 or Input 2 (XLR or ¼”) or into the 1/8″ external microphone
Press the Input button to enable the correct inputs
Adjust levels for each input separately
Monitor sound using headphones if available
8. Transferring Files to a Computer
Power off the recorder
Remove the SD card and insert it into a computer using an SD card reader
Or connect the recorder via USB
Files are typically saved as WAV or MP3, depending on settings
Copy audio files to your computer for editing
Helpful Tips
Always do a short test recording before starting
Remember to have the microphones pointed towards the source (speaker)
Monitor audio with headphones when possible
Record in quiet spaces to avoid background noise
Bring extra batteries for longer sessions
The below video walks you through the basics of setting up and using the Zoom H4n Pro Recorder.
Microsoft Teams is a video conferencing and collaboration tool commonly used for classes, meetings, and group work. If you’re familiar with Zoom, many of the core features in Teams will feel familiar but they may be located in slightly different places. This guide focuses on helping those who have previously used Zoom to get up and running quickly in Teams.
1. Getting Started
Open Microsoft Teams (desktop app or web browser)
Sign in using your institutional Microsoft account
You will land on the Teams or Calendar view
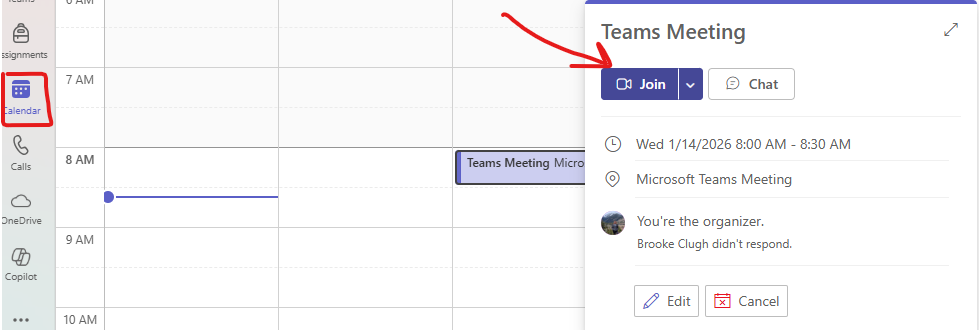
2. Joining a Video Call
Click the Calendar tab on the left
Find your scheduled meeting and click Join
Or click a meeting link shared via email or chat
Choose your camera and microphone settings
Click Join now
3. Audio and Video Controls During a Call
Once in the meeting, controls appear along the bottom of the screen:
Camera icon: Turn video on or off
Microphone icon: Mute or unmute
Leave button: Exit the meeting
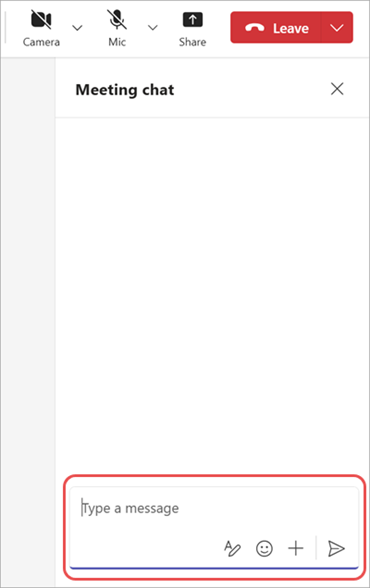
4. Chatting During a Call
Click the Chat icon to open the meeting chat
Type messages to everyone in the meeting
Links and files shared in chat remain available after the meeting
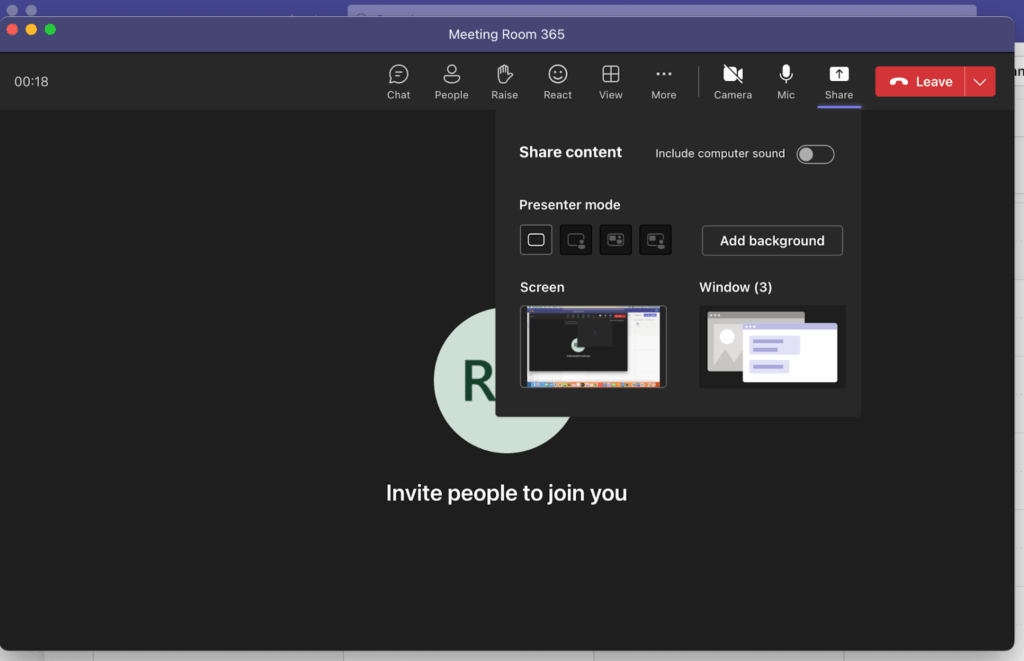
5. Sharing Your Screen
Click Share (rectangle with arrow icon)
Choose what to share:
Entire screen
A specific window
A PowerPoint presentation
Click Stop sharing when finished
6. Managing Participants
Click People to view participants
See who is muted, speaking, or has video on
Meeting hosts may have additional controls
7. Recording a Meeting
Click More options (three dots)
Select Start recording
A notification will appear for all participants
Click Stop recording when finished
Recordings are saved to Microsoft OneDrive or SharePoint, not locally.
8. Ending or Leaving the Call
Click Leave
Hosts can end the meeting for everyone if needed
Helpful Tips for Zoom Users
Teams meetings are often accessed through the Calendar, not a separate “Meetings” tab
Chat and files persist after the meeting so nothing disappears when the call ends
Screen sharing is more app-focused, which helps avoid sharing private notifications
If something feels “missing,” check the More options (⋯) menu
The Singer Heavy Duty sewing machine is a robust, classroom-friendly machine designed to handle thicker fabrics and more demanding sewing tasks. You might choose the Heavy Duty when you’re working with denim, canvas, leather, or multiple layers, or when you need faster stitching and more power than a basic machine provides. It’s perfect for projects that require durability, strength, and versatility without sacrificing ease of use.
This tutorial will help you get started with the Singer Heavy Duty sewing machine. Follow the steps below to thread the machine, wind a bobbin, and sew with confidence.
1. Getting Started
Place the machine on a stable, flat surface
Plug in the power cord and foot pedal
Turn the power switch ON
2. Winding the Bobbin
Place your thread spool on the spool pin
Guide the thread along the bobbin winding path (follow the numbered guides on the machine)
Put the bobbin on the bobbin winder spindle
Push it to the right and press the foot pedal to wind the bobbin evenly
3. Threading the Machine
Raise the presser foot to release the tension discs
Thread the upper thread from the spool through the numbered guides
Follow the threading path down, around the tension discs, and up to the needle
Thread the needle from front to back
Pull several inches of thread toward the back of the machine
4. Inserting the Bobbin
Open the bobbin cover plate
Place the bobbin into the bobbin case so the thread feeds in the correct direction
Pull the thread through the tension spring
Close the bobbin cover
5. Preparing to Sew
Place your fabric under the presser foot
Lower the presser foot
Hold both the top thread and bobbin thread behind the presser foot
Gently press the foot pedal to begin sewing
6. Sewing
Use the stitch selector to pick the appropriate stitch (straight or zigzag)
Direct the fabric with your hands — do not push or pull
Adjust stitch length as needed for your fabric and project
7. Finishing Your Sewing
Stop with the needle down in the fabric
Raise the presser foot
Pull your fabric back carefully and use the built-in thread cutter to trim threads
Helpful Tips
Test stitches on scrap fabric before sewing your project
If stitches look uneven, re-thread both upper thread and bobbin
Avoid forcing thick fabric — let the feed dogs guide it steadily
See the video below for a walkthrough on using the machine.
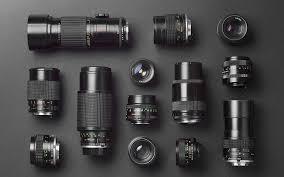
Choosing the right lens can completely change the way your video or photo looks. This quick guide explains the differences between wide-angle, telephoto, and fisheye lenses and when to use each.
Wide-Angle Lenses
Focal length: Usually 16-50mm
Field of view: Captures a large scene in a single frame
Use for: Landscapes, classrooms, group shots, or when you want to show a lot of context
Effect: Objects appear farther apart, and edges may stretch slightly
Tip: Great for cramped spaces because you can fit more into the shot without backing up.
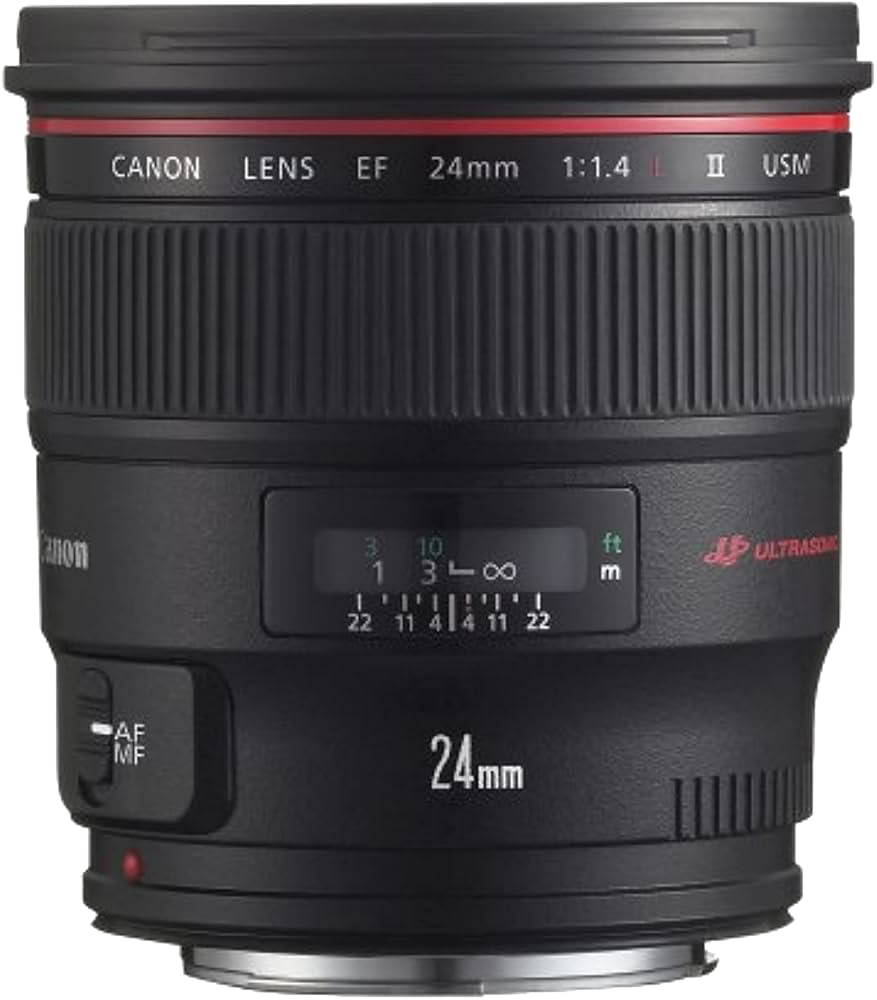
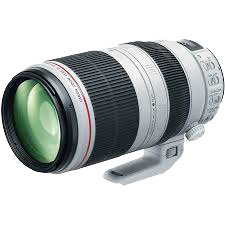
Telephoto (Higher Focal Length) Lenses
Focal length: 70mm or higher
Field of view: Narrow; zooms in on distant subjects
Use for: Sports, wildlife, interviews, or any shot where you can’t get physically close
Effect: Compresses depth, making background and foreground appear closer together
Tip: Requires steady hands or a tripod.
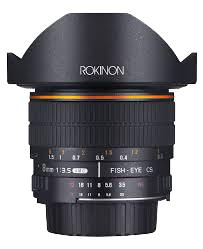
Fisheye Lenses
Focal length: Typically around 8–16mm
Field of view: Ultra-wide, often 180°
Use for: Creative effects, immersive shots, extreme perspectives, or 360° capture setups
Effect: Distorts the image, curving straight lines and exaggerating scale
Tip: Fun for dramatic or artistic shots, but not ideal for standard portraits or professional-looking video.
Helpful Tips
Always consider your space and subject before choosing a lens
Use wide lenses for tight rooms, telephoto for distant subjects, fisheye for creative or immersive effects
Check your camera’s crop factor as smaller sensors make lenses appear more zoomed in
Experiment! The more you try different lenses, the better you’ll understand their effects
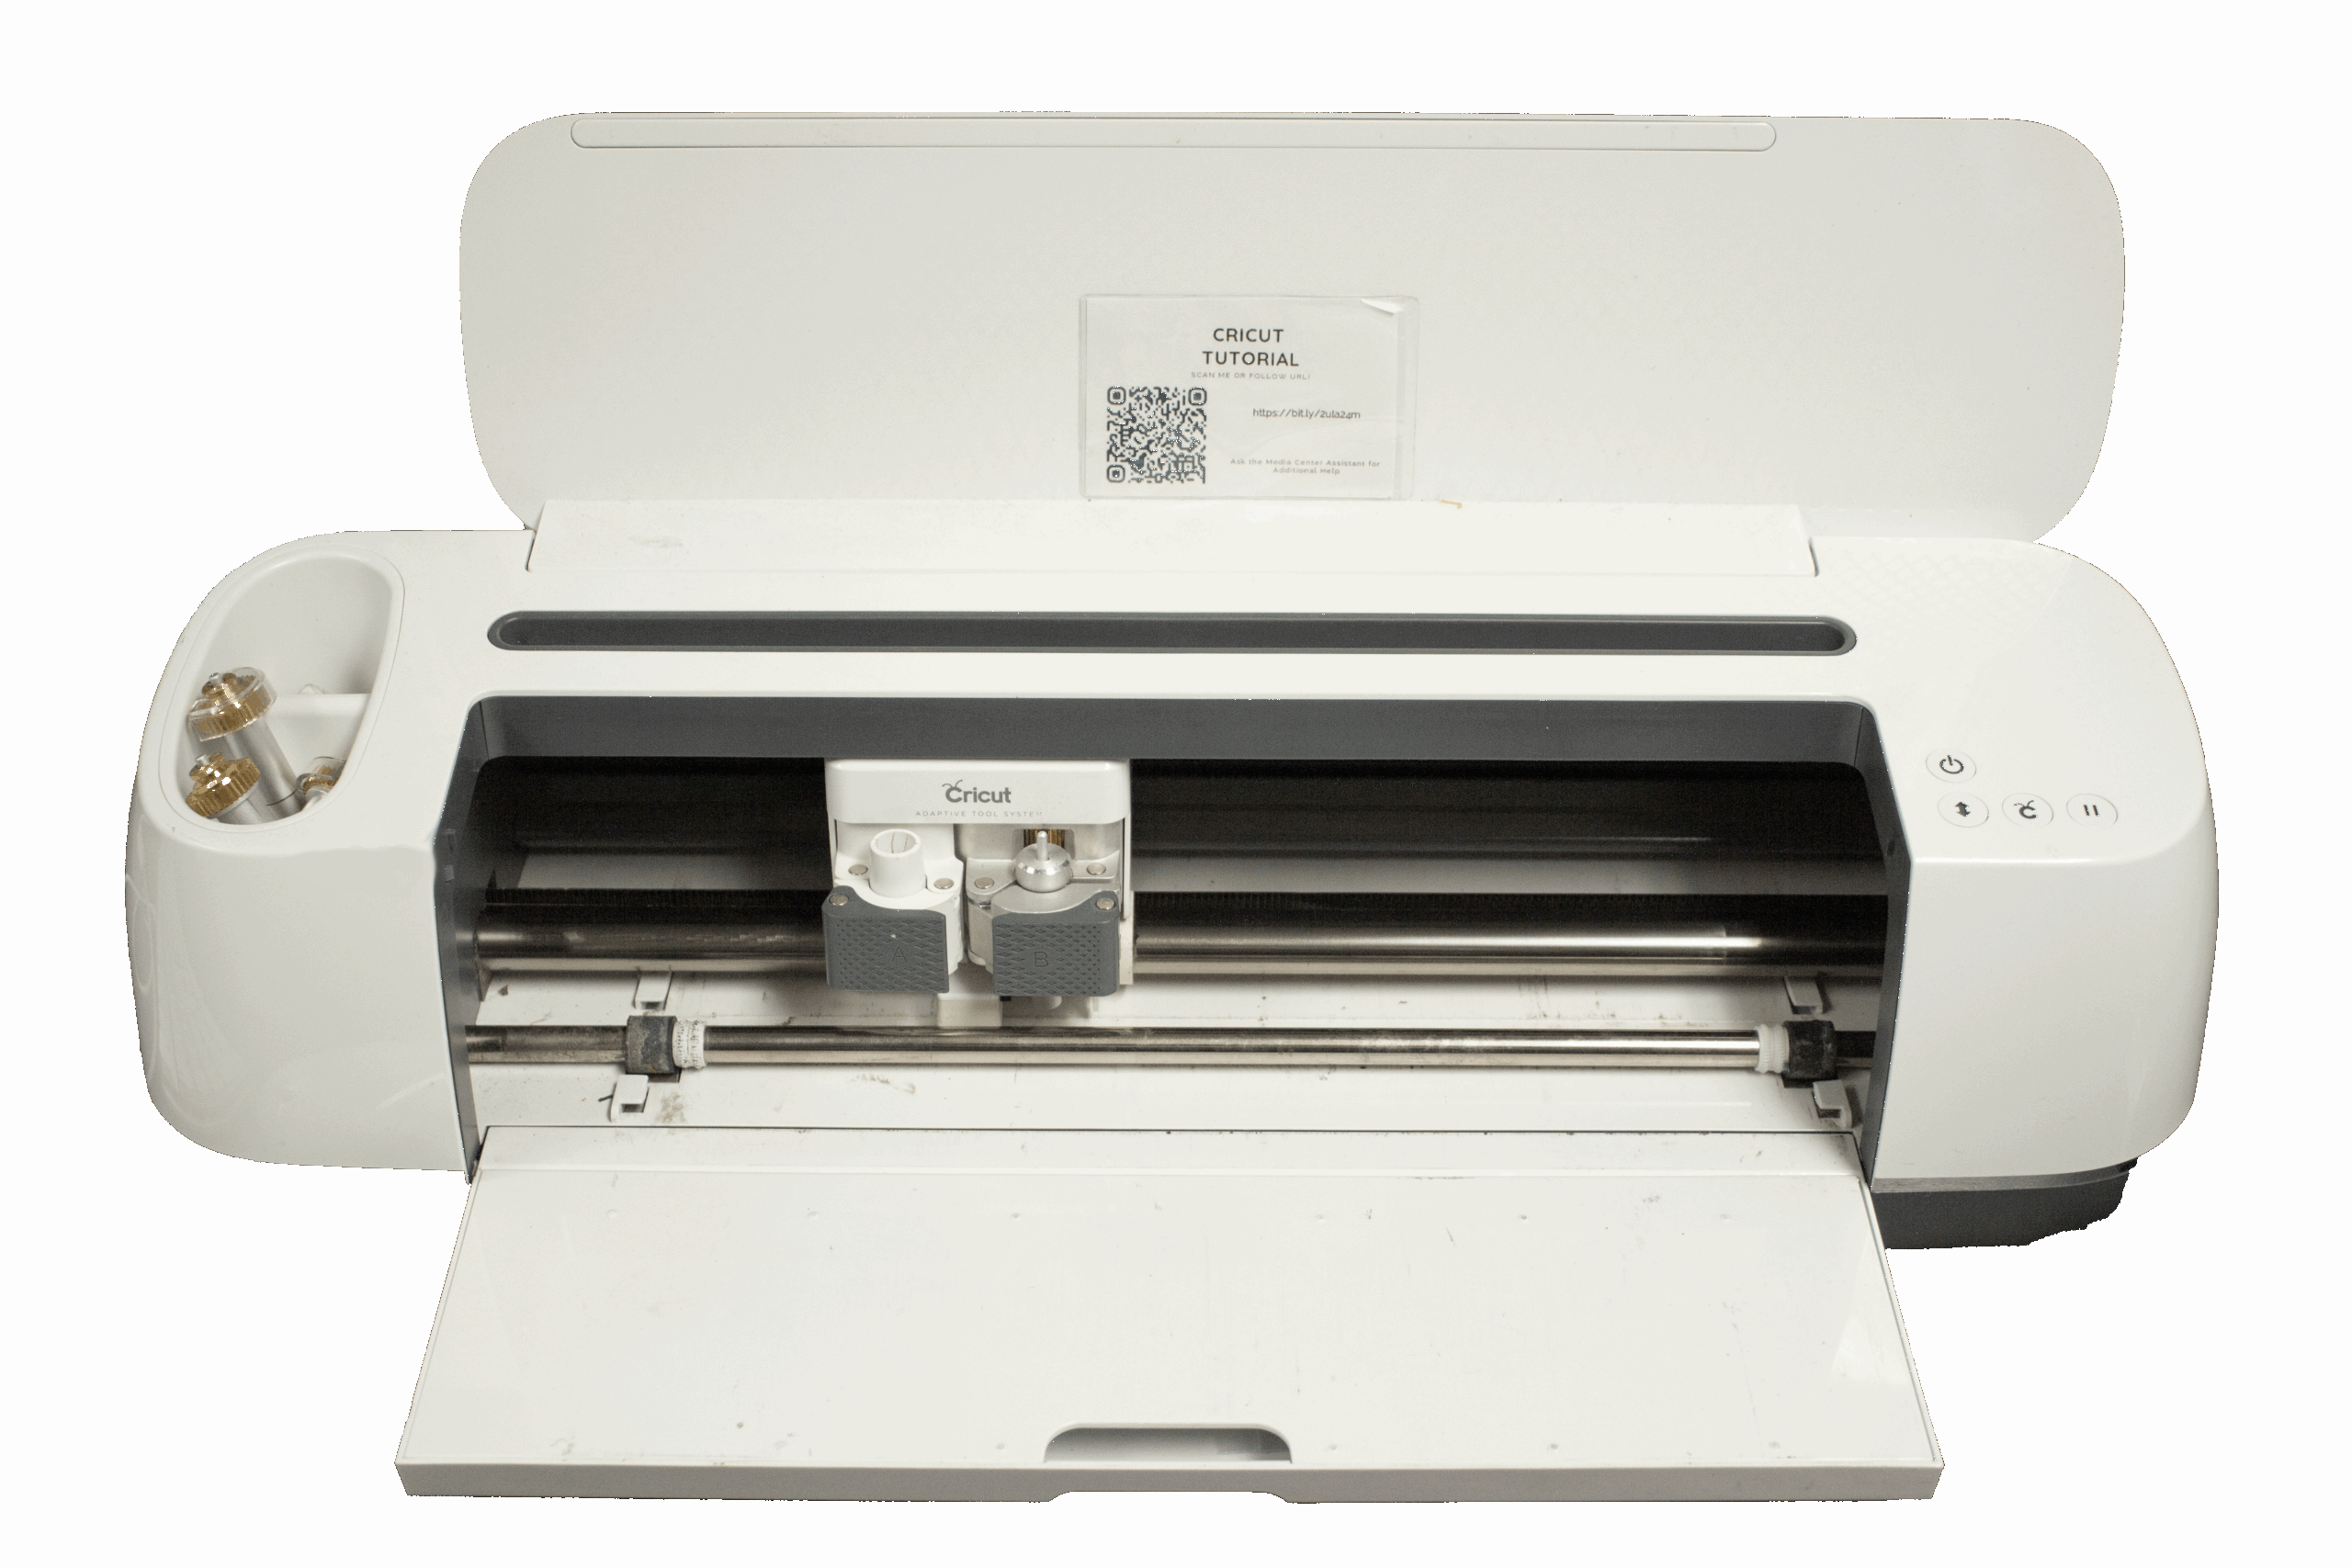
The Cricut cutting machine is a digital cutting tool used to precisely cut designs from materials like vinyl, paper, cardstock, and iron-on. You might choose a Cricut when you want to create custom decals, signs, labels, apparel designs, or project components with clean, professional results. It’s ideal for creative projects, class assignments, and prototypes where accuracy and repeatability matter.
This tutorial will help you get started with the Cricut machine. Follow the steps below to learn how to set up your design, load materials, and make your first cut.
1. Getting Started
Power on the Cricut machine
Open Cricut Design Space on the computer
2. Creating or Choosing a Design
Start a new project or choose a ready-made design
Add text, shapes, or images to your canvas
Resize and arrange your design as needed
3. Preparing Your Design to Cut
Click Make It in Design Space
Select the correct material type (vinyl, cardstock, iron-on, etc.)
Confirm your cut settings
4. Loading Materials and Tools
Place your material on a cutting mat
Align it with the grid and smooth it down firmly
Insert the mat into the Cricut and press the Load button
Make sure the correct blade is installed
5. Cutting Your Design
Press the Go / Start button when prompted
Stay nearby while the machine is cutting
Do not remove the mat until the cut is complete
6. Removing and Finishing Your Project
Carefully unload the mat
Remove your cut design from the mat
Weed, assemble, or apply the design as needed
Helpful Tips
Always double-check material type and blade
Use a test cut for unfamiliar materials
Don’t force materials—stop the machine if something looks wrong
See the video below for a detailed video walkthrough.
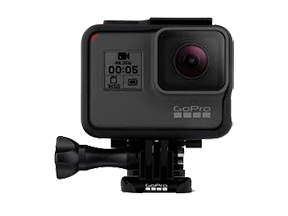
The GoPro HERO5 Black is a compact, durable action, waterproof camera designed for capturing high-quality video and photos in dynamic environments. You might choose the HERO5 Black when you need a small, portable camera for movement-based shots, hands-free recording, or situations where a traditional camera isn’t practical. It’s ideal for action footage, point-of-view shots, time-lapse projects, and creative angles.
This tutorial will help you get started with the GoPro HERO5 Black. Follow the steps below to learn how to power on the camera, record video, and use basic features.
1. Turning the Camera On
Make sure the battery is charged and a microSD card is inserted by pressing the button on the bottom of the GoPro and gently sliding to the right
Press and hold the Power/Mode button on the side of the camera to power the device on
2. Adjusting Settings
Swipe down on the screen and tap the lock to unlock the settings
On the touchscreen, press any settings you’d like to adjust (ex: frame rate, resolution, time lapse, etc.)
3. Recording Video
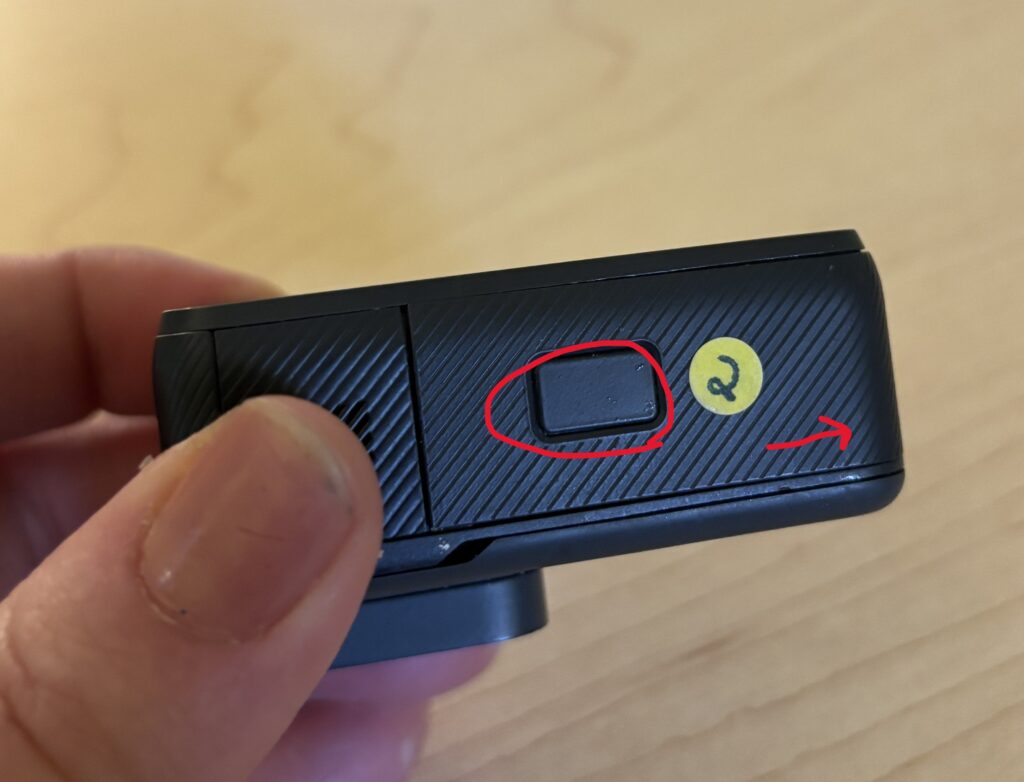
Press the Shutter button on the top of the camera to start recording
Press the Shutter button again to stop recording
4. Taking Photos
Swipe on the touchscreen to switch to Photo mode
Frame your shot
Press the Shutter button to take a photo
5. Mounting and Stability
The GoPro works best when securely mounted.
Use the mounts provided by the Media Center
Double-check that mounts are tight before recording
Use a tripod or grip for stationary shots
6. Audio Basics
The built-in microphones record sound automatically
Avoid covering the microphone openings
Wind and background noise can affect audio outdoors
7. Reviewing and Deleting Footage
Swipe down on the touchscreen and tap Playback
Swipe left or right to review clips
Delete clips you don’t need to free up storage space
Helpful Tips
Charge batteries fully before filming
Clean the lens before recording
Use shorter clips for easier editing
Test your setup before important shots
You’re Ready to Capture the Action
The GoPro HERO5 Black makes it easy to capture immersive video from unique angles. Start with automatic settings, secure your camera properly, and focus on creative positioning to get the most out of your footage.
For a detailed video walkthrough on using the GoPro Hero 5 Black, see the video below.
The Canon VIXIA HF R50 is a compact, easy-to-use camcorder designed for straightforward, reliable video recording. You might choose the VIXIA HF R50 when you need simple setup, long recording times, and dependable video for interviews, presentations, performances, or documentation. It’s well suited for users who want quality video without managing complex camera settings.
This tutorial will help you get started with the Canon VIXIA HF R50 camcorder. Follow the steps below to learn how to power on the camera, record video, and review your footage.
1. Turning the Camcorder On
Make sure the battery is charged and an SD card is inserted
Press the Power button located on the side of the camera next to the SD card slot
Flip the switch by the lens to open its cover
2. Recording to the SD Card
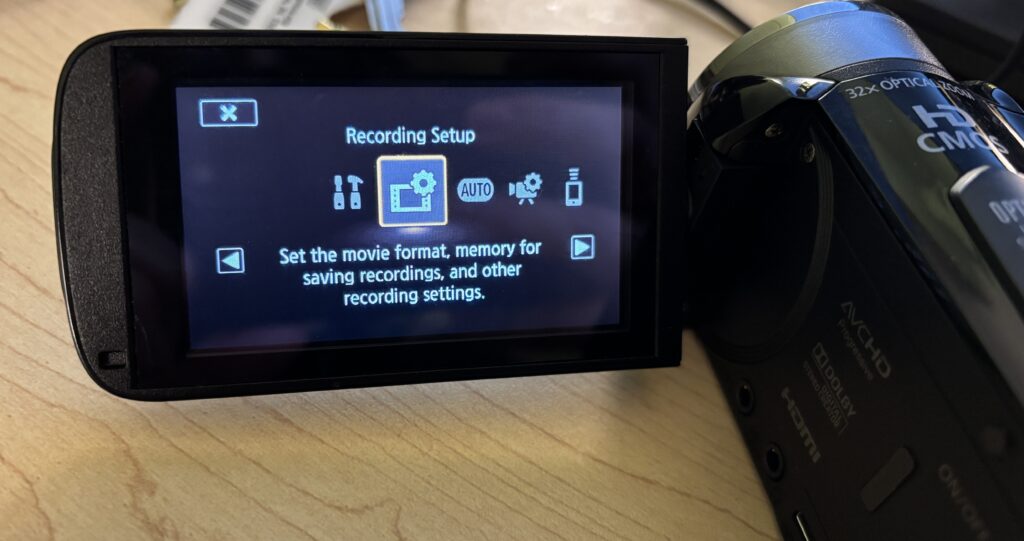
Press the Home icon on the touchscreen
Select Recording Setup
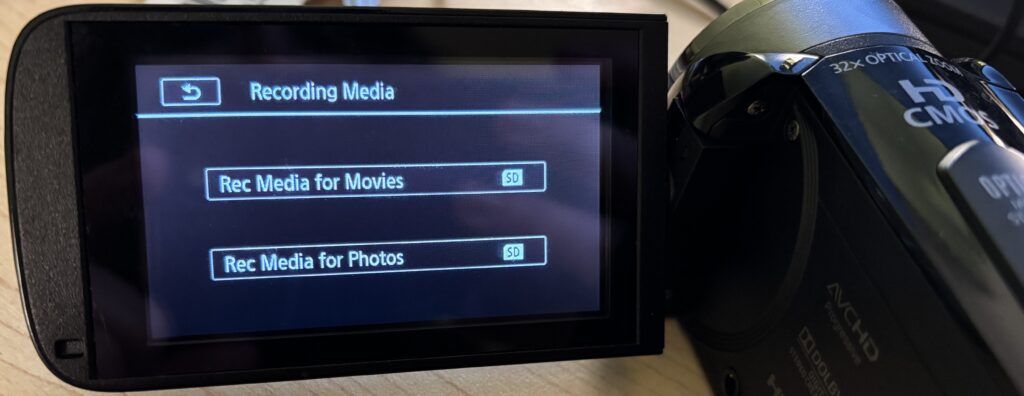
Select Recording Media
Select the SD card
3. Checking the File Output Type
The camcorder allows you to select your desired recording format before you start recording. By default, the camcorder will record as an mp4 file. This is fine as long as what you’re recording is less than 30 minutes.
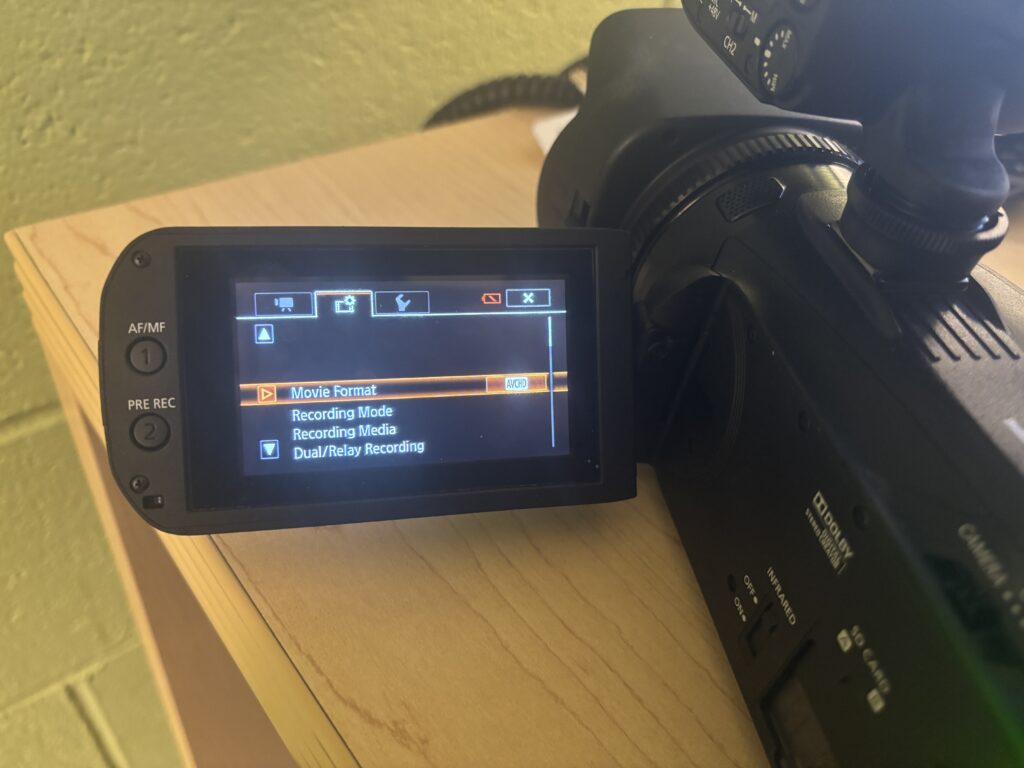
Planning to record something longer than 30 minutes? You’ll want to change the format to AVCHD so that your recording isn’t broken up into multiple files. To do so:
Press the Home icon on the touchscreen
Navigate to the Recording Setup menu
Select Movie Format
Select AVCHD and Confirm
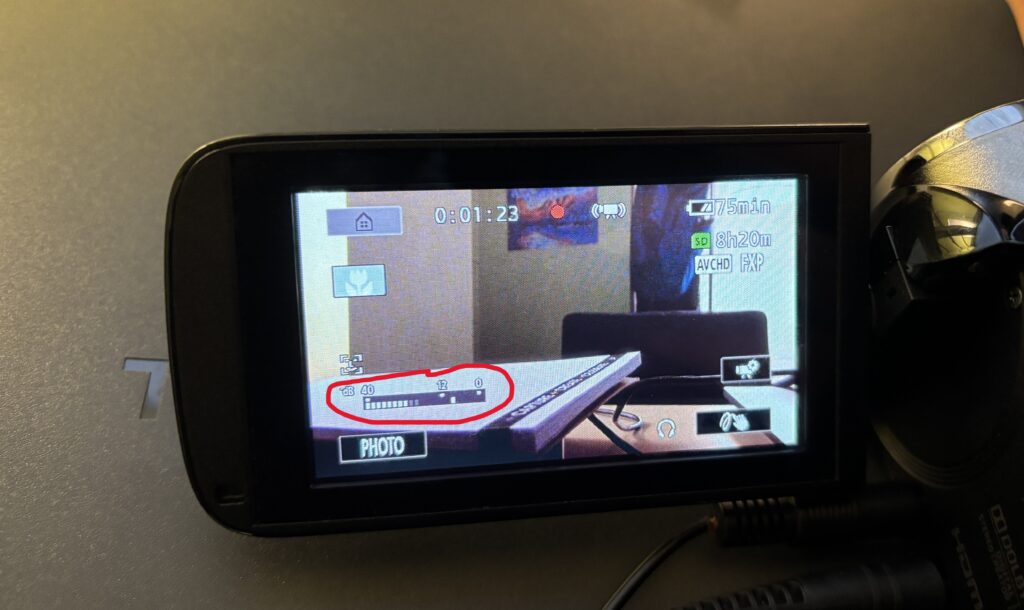
4. Using the Audio Level Indicator
The Audio Level Indicator can help you monitor audio while recording. Once you plug in a microphone, this level will automatically appear on the touchscreen.
5. Recording Video
Frame your shot using the LCD screen
Press the Start/Stop button to begin recording
Press the Start/Stop button again to stop recording
A red recording indicator on the screen confirms when recording is active.
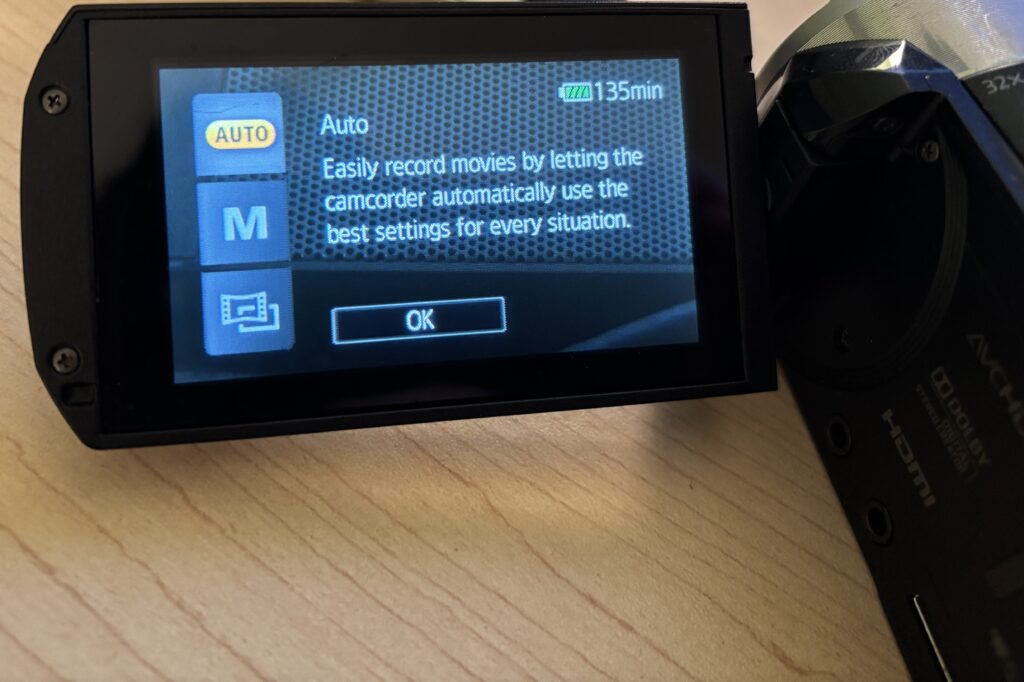
6. Using Auto Mode (Recommended)
For most projects, Auto mode works best.
Leave the camcorder in Auto mode
The camera will automatically adjust focus, exposure, and color
Focus on framing your subject and keeping the camera steady
7. Holding the Camcorder Steady
Stable footage makes a big difference in video quality.
Use the hand strap for support
Keep your movements slow and controlled
Use a tripod for interviews or longer recordings
Avoid fast pans or sudden movements while recording.
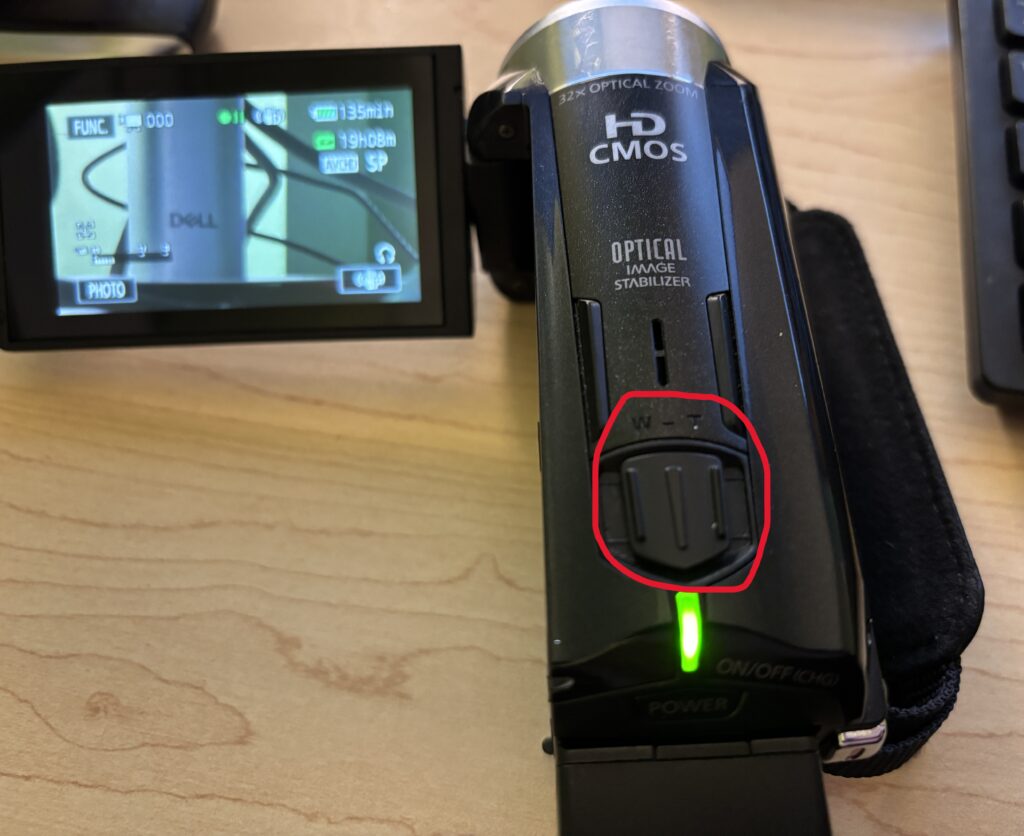
8. Zoom and Focus Tips
Use the zoom rocker slowly for smooth zooming
Avoid excessive zooming during recording
Pause briefly before recording to allow auto-focus to lock
Slow, intentional movement looks more professional on video.
9. Reviewing and Deleting Footage
Press the Playback button to review recorded clips
Use the on-screen controls to navigate videos
Delete unwanted clips to free up storage space
Always review footage before leaving your recording location.
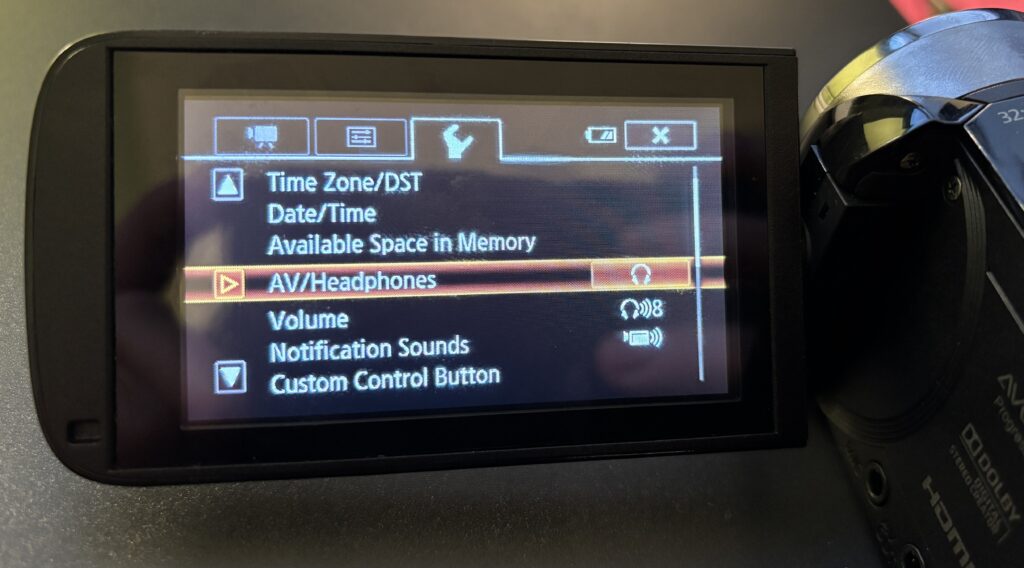
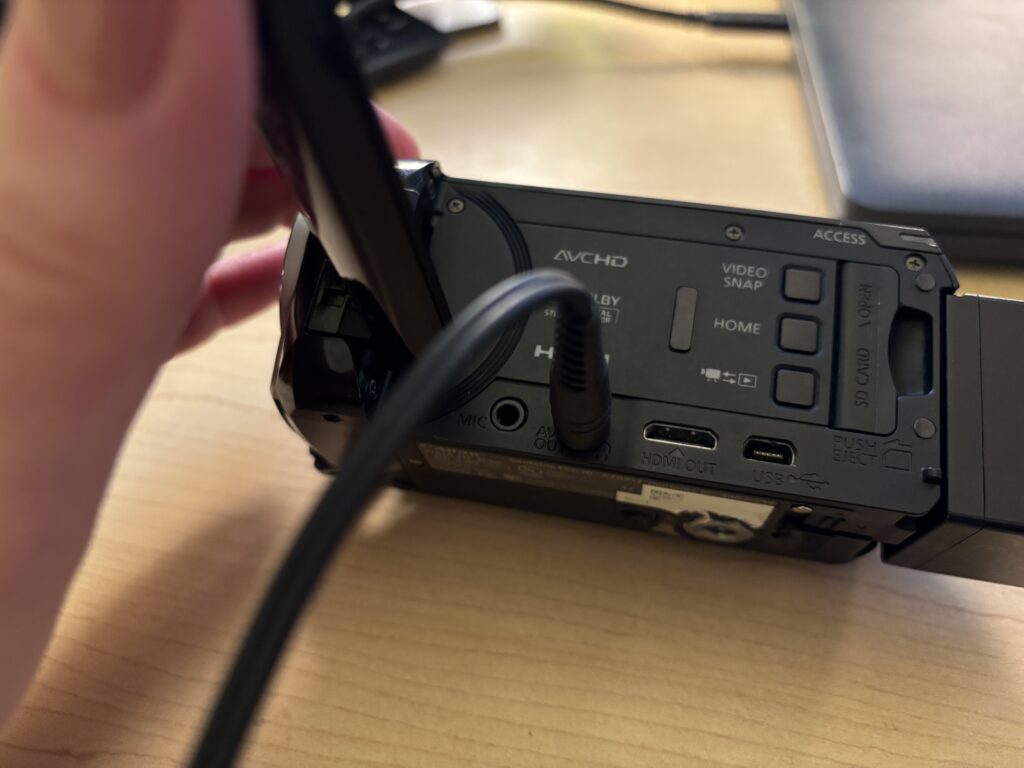
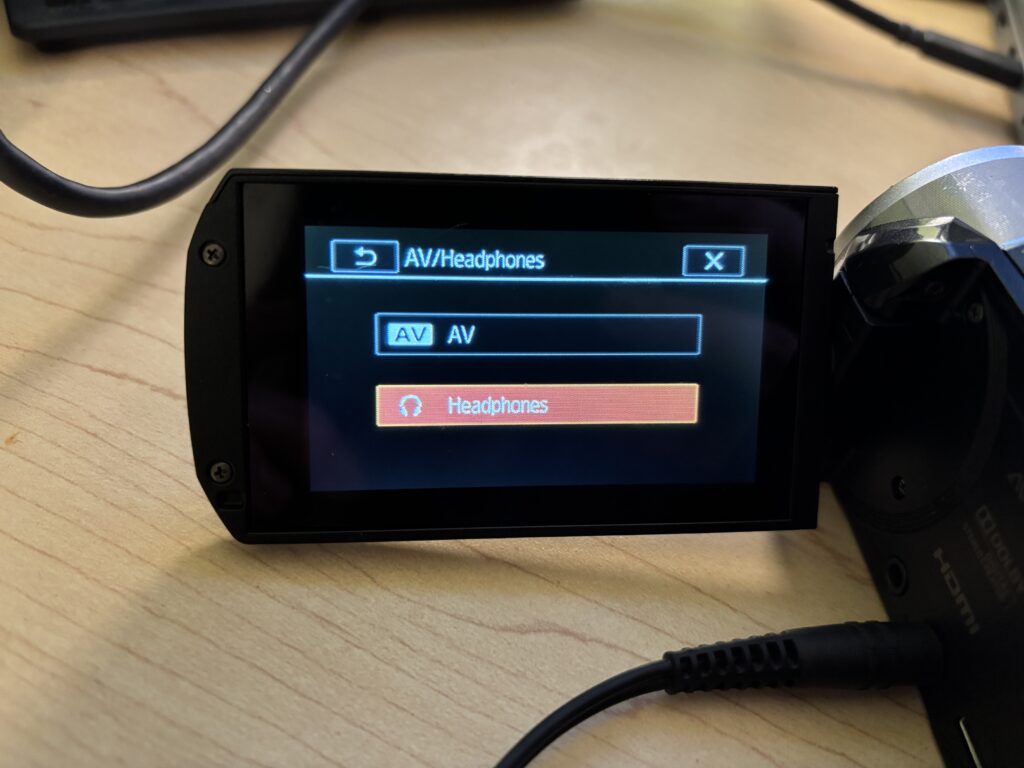
Using Headphones to Monitor Audio
If you’re using headphones to monitor audio during filming and you hear a buzzing noise once the headphones are plugged in, you will need to follow the below steps.
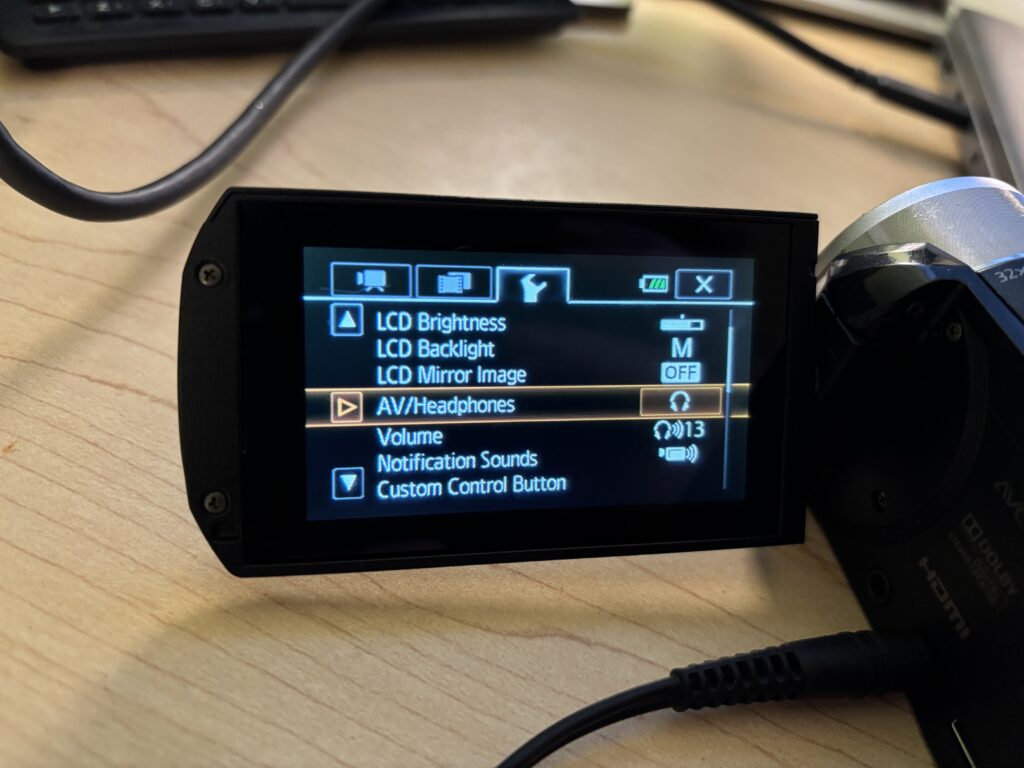
Click on the Home button in the top left of the touchscreen
Select Other Settings
Click the tab at the top with the wrench icon
Select AV/Headphones
Select the Headphones option
Helpful Tips
Record a short test clip before important shoots
Keep shots simple and steady
Use a tripod whenever possible
Check battery life and storage before recording
You’re Ready to Record
The Canon VIXIA HF R50 is designed to make video recording straightforward and reliable. Start in Auto mode, focus on steady shots and clear audio, and you’ll be ready to capture strong video for class projects, interviews, and events.
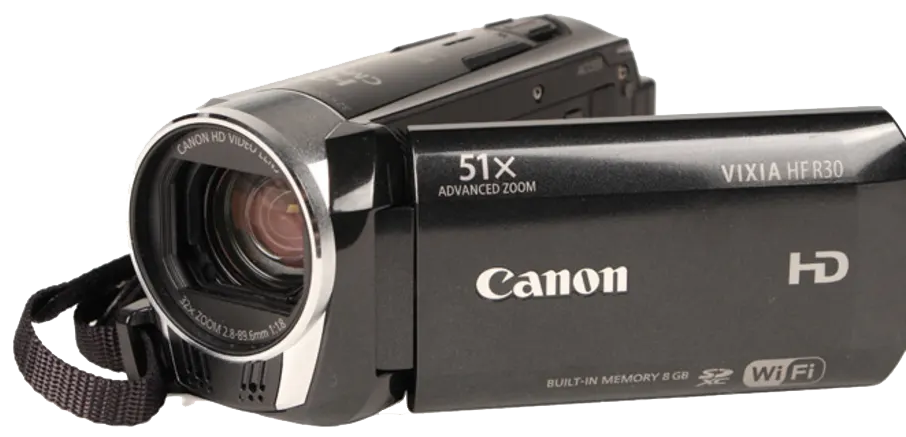
The Canon R30 Camcorder is a reliable, easy-to-use video camera designed for capturing high-quality footage with minimal setup. You might choose the Canon R30 when you need smooth, consistent video, strong auto-focus, and dependable audio for interviews, presentations, performances, or events. It’s especially well-suited for users who want professional-looking video without needing to manage complex camera settings.
This tutorial will help you get started with the Canon R30 camcorder. Follow the steps below to learn how to power on the camera, record video, and adjust basic settings for clear, steady footage.
1. Turning the Camcorder On
Make sure the battery is charged and an SD card is inserted
Press the Power button located on the back of the camera just above the battery
Flip the switch by the lens to open its cover
2. Recording to the SD Card
Press the Home button on the side of the camera
On the touchscreen, select Other Settings
Click the second tab with the filmstrip icon
Select Rec. Media for Movies and change to SD
3. Checking the File Output Type
The camcorder allows you to select your desired recording format before you start recording. By default, the camcorder will record as an mp4 file. This is fine as long as what you’re recording is less than 30 minutes.
Planning to record something longer than 30 minutes? You’ll want to change the format to AVCHD so that your recording isn’t broken up into multiple files. To do so:
Press the Home button on the side of the camera
Navigate to the Recording Setup menu
Select Movie Format
Select AVCHD and Confirm
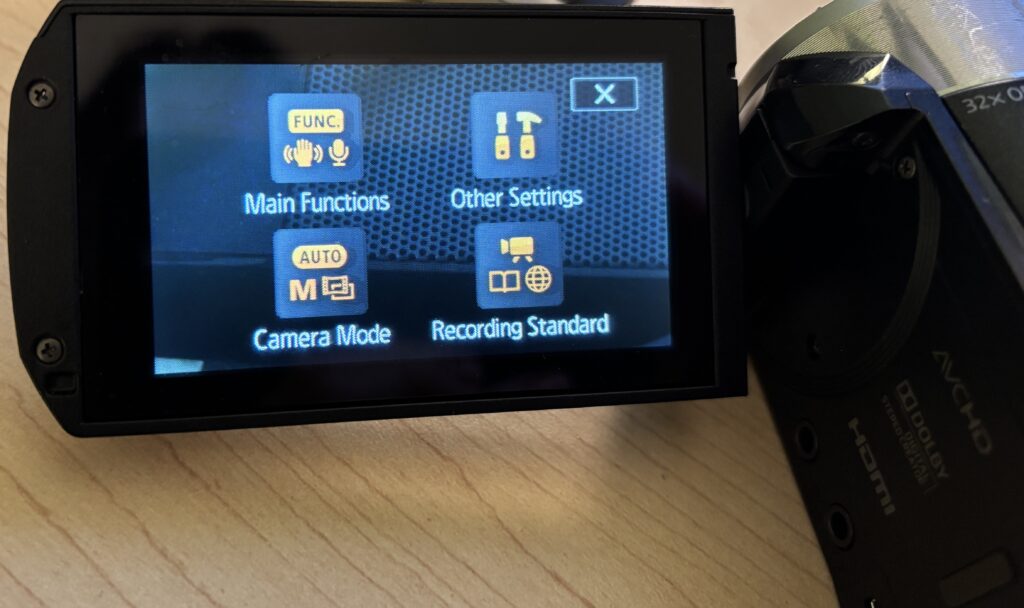
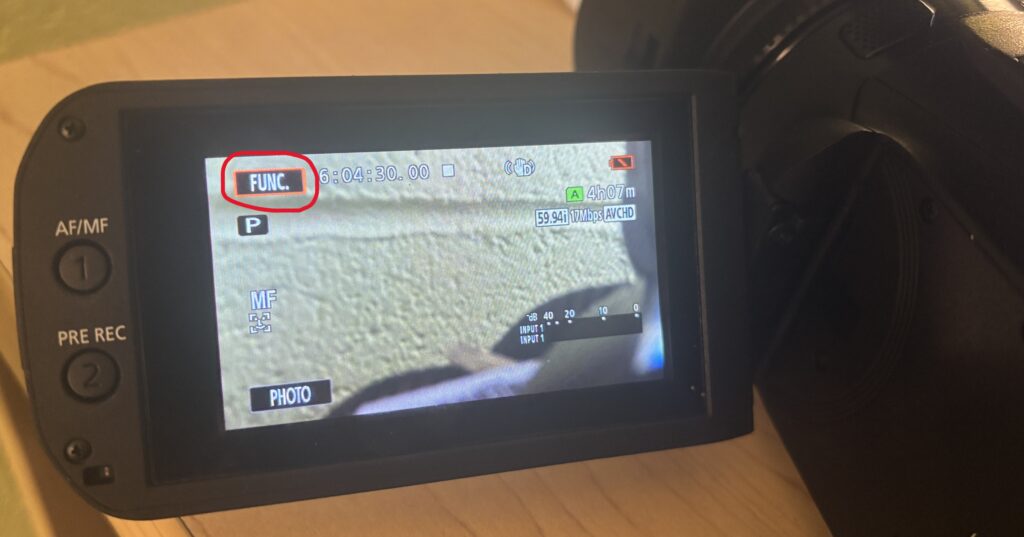
4. Using the Audio Level Indicator
Provided you have the camcorder in Manual mode, the Audio Level Indicator can help you monitor audio while recording.
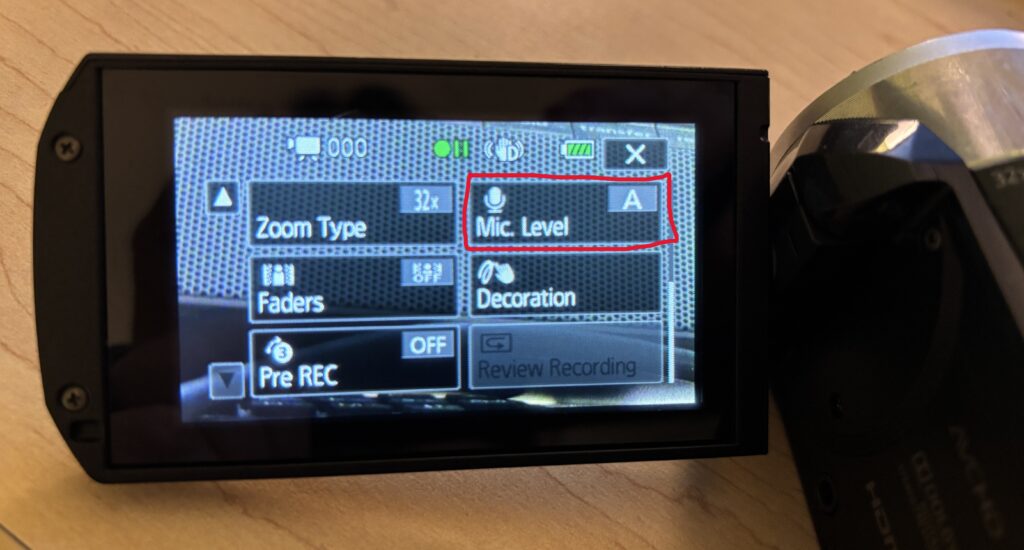
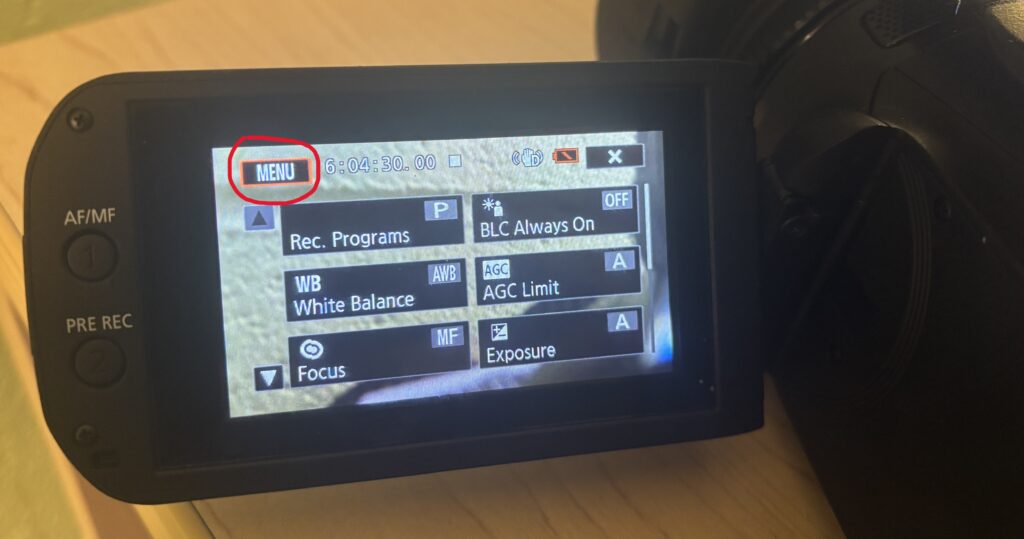
On the touchscreen, press FUNC
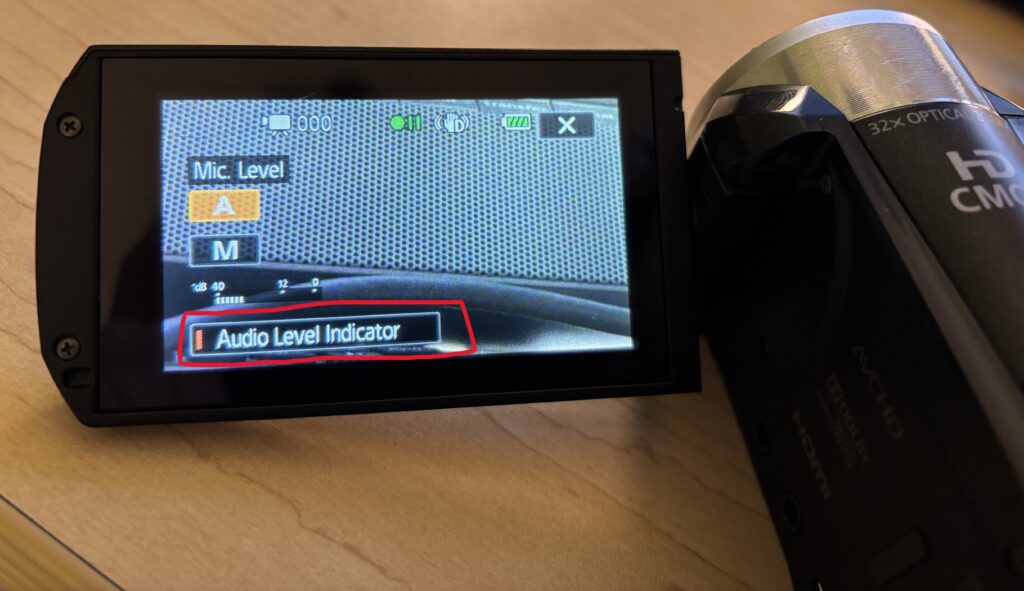
Scroll down and select Mic Level
Press the Audio Level Indicator button and the scale should now display
5. Recording Video
Frame your shot using the LCD screen
Press the Record button to start recording
Press the Record button again to stop
A red indicator on the screen confirms when recording is active.
6. Switching to Auto Mode
If you aren’t looking to adjust many settings, for most situations, Auto mode works well and requires no setup. Auto mode is ideal for interviews, presentations, performances, and events.
Press the Home button on the side of the camera
On the touchscreen, select Camera Mode
Select Auto
Note: when in Auto mode, your ability to change settings is limited. If you want more control over your settings, you’ll need to switch to Manual Mode using the same process as mentioned above.
7. Holding the Camcorder Steady
Good video depends on stable footage.
Use the hand strap and keep elbows close to your body
Move slowly when panning or tilting
Use a tripod whenever possible for interviews or longer recordings
Even small movements are noticeable in video.
8. Zooming and Focus
Use the zoom toggle slowly for smooth zooms
Avoid excessive zooming while recording as it can be distracting
Let the camera auto-focus, but pause briefly before recording to allow it to lock focus
Slow, intentional movements look more professional.
9. Reviewing Your Footage
Press the Playback button to view recorded clips
Use the on-screen controls to scroll through videos
Delete clips you don’t need to free up space
Reviewing footage on location helps prevent reshoots later.
Using Headphones to Monitor Audio
If you’re using headphones to monitor audio during filming and you hear a buzzing noise once the headphones are plugged in, you will need to follow the below steps.
Navigate to the menu by pressing the Home button on the side of the camera
Select Other Settings
Click the tab at the top with the wrench icon
Scroll down to AV/Headphones and click on it
Select the Headphones option
Helpful Tips
Record a short test clip before important shoots
Watch for background noise when recording audio
Keep clips short and intentional
Use a tripod whenever possible
You’re Ready to Record
You don’t need advanced settings to create strong video content. Start with Auto mode, focus on steady shots and clear audio, and build confidence as you record. The Canon R30 is a reliable camcorder for class projects, interviews, documentation, campus events, and more.
The Canon XA11 is a professional video camera designed for interviews, events, and documentary-style projects. It offers higher video quality and professional audio options than basic camcorders. This camera is best used when clear video and reliable sound are important. This is a more advanced camera and supports professional microphones using XLR cables.
This tutorial covers the essential steps students need to successfully record video and audio using the Canon XA11.
1. Getting Started
Remove the lens cover
Slide the switch on the left side to Camera to turn on the camcorder
Insert an SD card into the memory slot
Adjust the date and time if prompted
2. Preparing to Record
Use the LCD screen to frame your shot
Adjust the camera position as needed
Use the zoom slowly, or avoid zooming altogether
3. Checking the File Output Type
The Canon XA11 allows you to select your desired recording format before you start recording. By default, it may record as an mp4 file. This is fine as long as what you’re recording is less than 30 minutes.
Planning to record something longer than 30 minutes? You’ll want to change the format to AVCHD so that your recording isn’t broken up into multiple files. To do so:
Press the Func button on the touchscreen
Press the Menu button that has appeared in the top left of the touchscreen
Select the middle tab that has the film strip and gear icon
Select Movie Format
Choose AVCHD
3. Recording Video
Press the Record button on the back of the camera to start the recording
Look for the red REC indicator on the screen
Press the Record button again to stop the recording
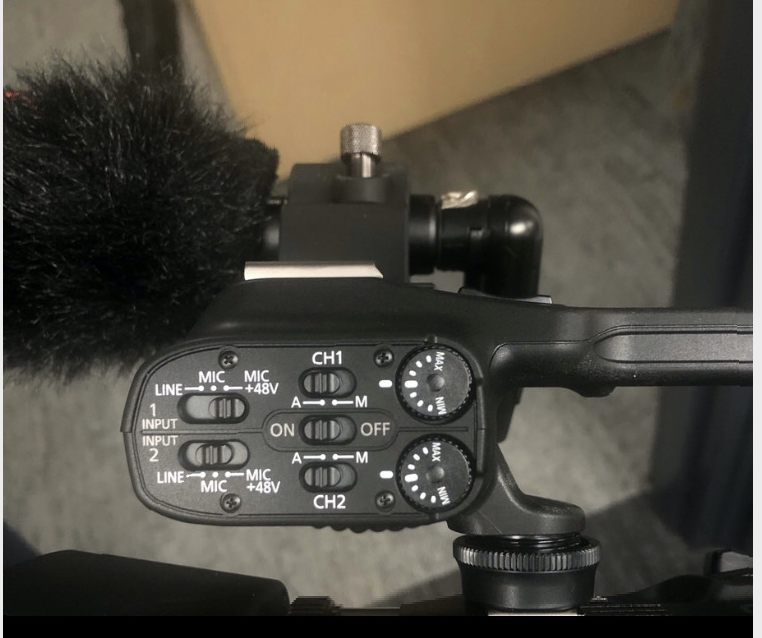
4. Audio Setup (Critical Step)
This camera supports external microphones using XLR cables.
Plug the microphone into XLR Input 1 or 2
Make sure the audio input switches are set correctly in the Menu
Watch the audio level meters on the screen
Levels should move but not reach the red
To use one XLR microphone, ensure your settings match the below photo.
Helpful Tips
Always check audio before recording
Keep the camera steady using a tripod when possible
Record in a quiet space
When in doubt, ask for help before adjusting controls
You’re Ready to Record
The Canon XA11 is a more advanced camcorder that makes it easy to capture professional, high-quality video and audio. Start with simple shots, explore zoom and stabilization features, and connect professional microphones via XLR for the best sound. With practice, your videos will look polished and professional every time.
More information on using the Canon XA11 can be found here.
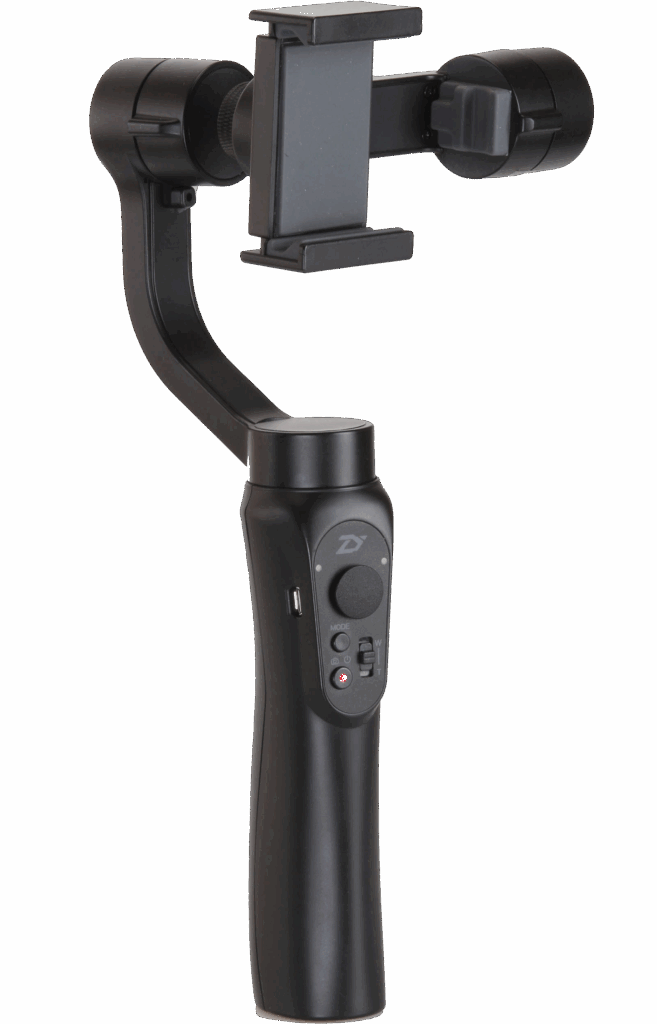
The Smooth-Q is a handheld gimbal that stabilizes your smartphone for smooth, professional-looking video. You might choose the Smooth-Q when you want to eliminate shaky footage, create cinematic movement, or record on the go with ease. It’s perfect for class projects, interviews, event coverage, or any mobile video where smooth motion matters.
This tutorial will help you get started with the Smooth-Q. Follow the steps below to set up, balance, and record stabilized video with your smartphone.
1. Getting Started
Charge the Smooth-Q fully using the included USB cable
Attach your smartphone securely using the clamp
2. Balancing Your Phone
Adjust the phone clamp so your device is centered
Tilt, pan, and roll the gimbal manually until the phone remains level
Proper balance reduces motor strain and ensures smoother video
With your phone balanced, turn on the gimbal by pressing and holding the power button
Through the app, connect your phone via Bluetooth to the gimbal
Explore camera settings and shooting modes within the app
4. Recording Video
Use the joystick and buttons on the gimbal to control pan, tilt, and zoom
Start recording via the app or gimbal button
Move slowly and smoothly for cinematic results
5. Modes and Features
Follow Mode: Gimbal follows your movements smoothly
Lock Mode: Keeps the camera fixed on one direction
Panoramic / Timelapse: Use app features for creative shots
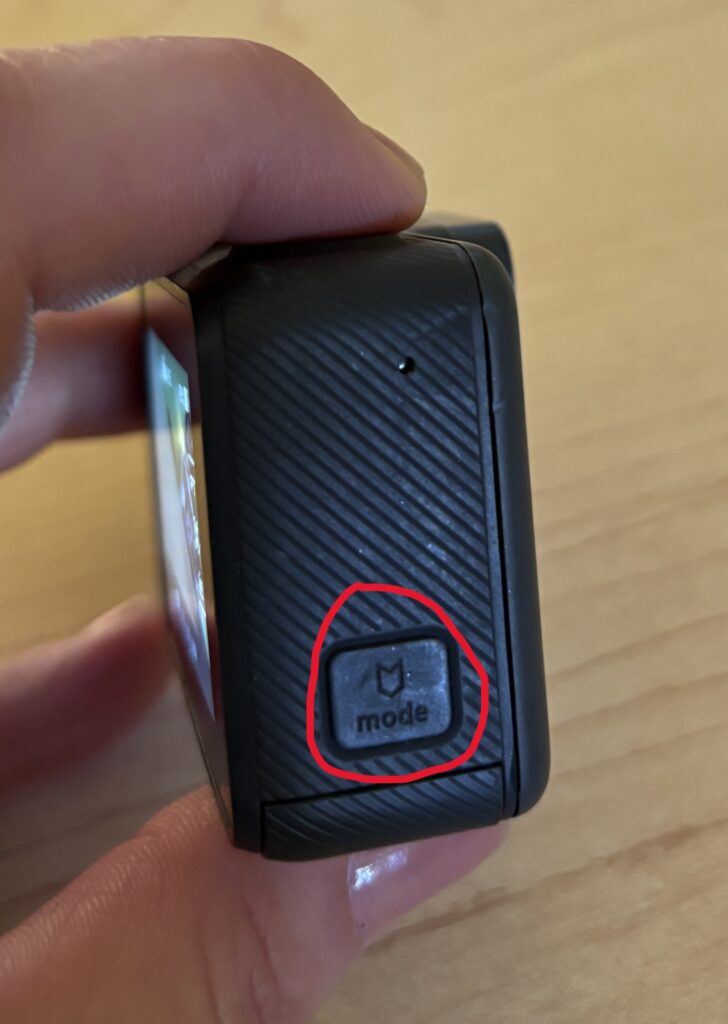
Switch between modes using the gimbal’s mode button
Helpful Tips
Always balance your phone before powering on
Keep movements slow to avoid jerky footage
Use a lightweight case or remove it to improve balance
Charge both your phone and gimbal before long shoots
You’re Ready to Record
The Smooth-Q phone gimbal makes it easy to capture stable, cinematic video with just your smartphone. Start with simple shots, explore different modes, and gradually experiment with creative angles and movements. With practice, your mobile videos will look professional every time.
The below video walks you through the basics of setting up and using the Smooth Q.
Subtitles and captions make videos more accessible and easier to understand in noisy or quiet environments. YouTube provides automatic captioning tools that can be edited for accuracy, making it easy to add captions during or after upload.
This tutorial walks you through adding and editing captions after a video has been uploaded to YouTube.
1. Navigate to the Subtitles Section
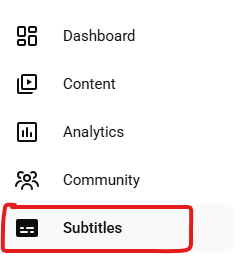
In YouTube Studio, select Subtitles on the left side
Select the video you’d like to edit
2. Edit YouTube’s Automatic Captions
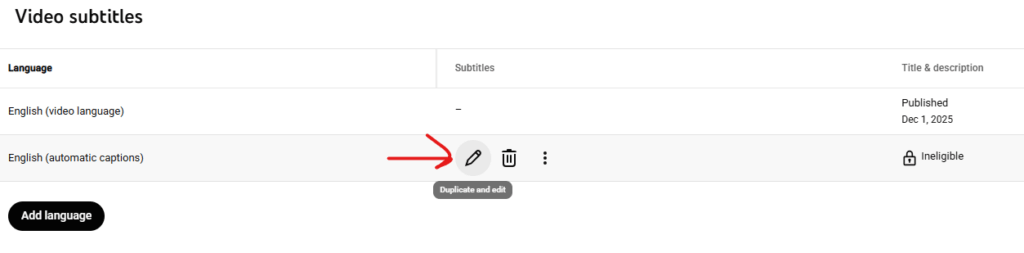
With Subtitles selected on the left, under English (Automatic), click Duplicate and Edit
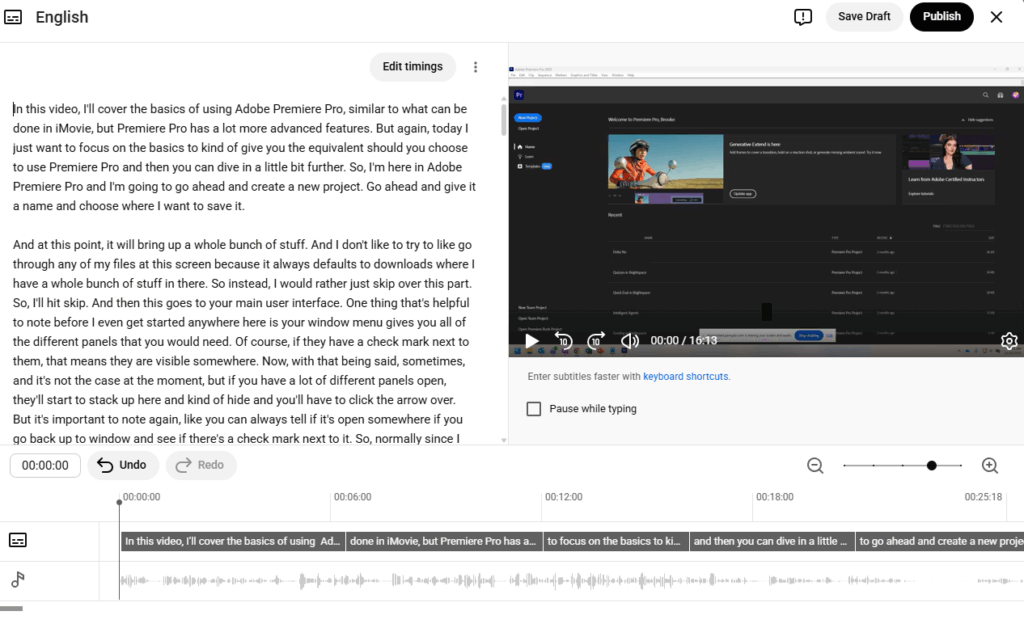
From here, you can now edit the existing text
3. Publish Your Captions
Click Publish when editing is complete
Captions will now appear as an option on your video
Viewers can turn captions on or off using the CC button
Helpful Tips
Always review automatic captions before publishing
Speak clearly in your video to improve auto-caption accuracy
Captions should reflect spoken words, not paraphrases
Include important non-speech audio when relevant (e.g., [music], [laughter])
Captions improve searchability and viewer engagement
You’re Ready to Caption Your Videos
Adding captions to YouTube videos is one of the easiest ways to improve accessibility and reach. Start with YouTube’s automatic captions, make quick edits, and publish with confidence.
The Panasonic HC-V770 is a versatile camcorder ideal for capturing smooth, high-quality video for class projects, interviews, or creative assignments. You might choose the HC-V770 when you need full HD recording, built-in image stabilization, and a powerful zoom, along with flexibility for external microphones and easy playback. It’s great for students or instructors who want professional-looking results without complicated setup.
This tutorial will help you get started with the Panasonic HC-V770. Follow the steps below to learn how to set up, record, and manage your video projects.
1. Turning the Camera On
Make sure the battery is charged and an SD card is inserted in the slot on the bottom of the camera near the battery
Press the Power button located on the side to turn on the camcorder
2. Checking the File Output Type
The camcorder allows you to select your desired recording format before you start recording. The camcorder may be set to record as an .mp4 file. This is fine as long as what you’re recording is less than 30 minutes.
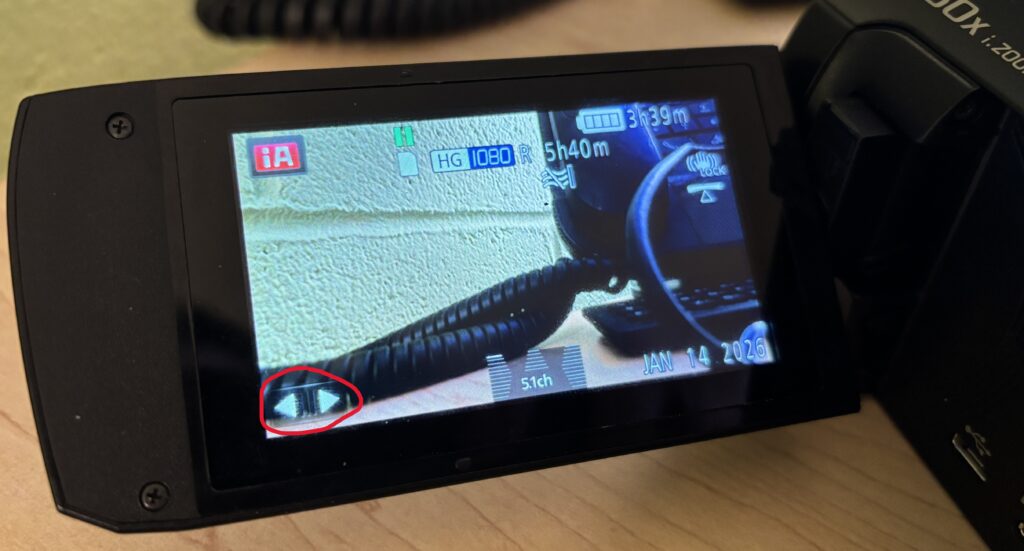
Planning to record something longer than 30 minutes? You’ll want to change the format to AVCHD so that your recording isn’t broken up into multiple files. To do so:
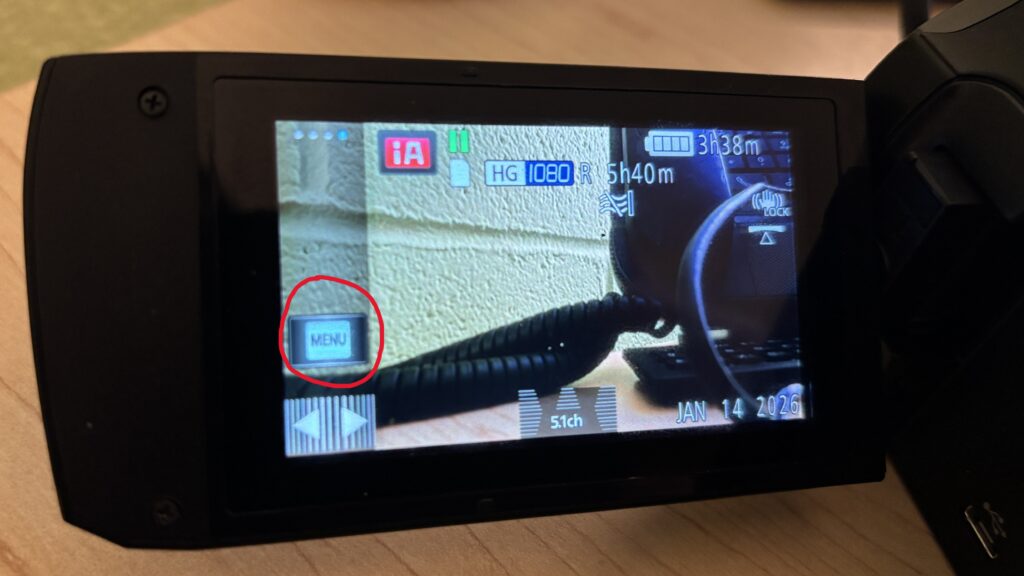
Press the Two arrows on the touch screen
Press Menu
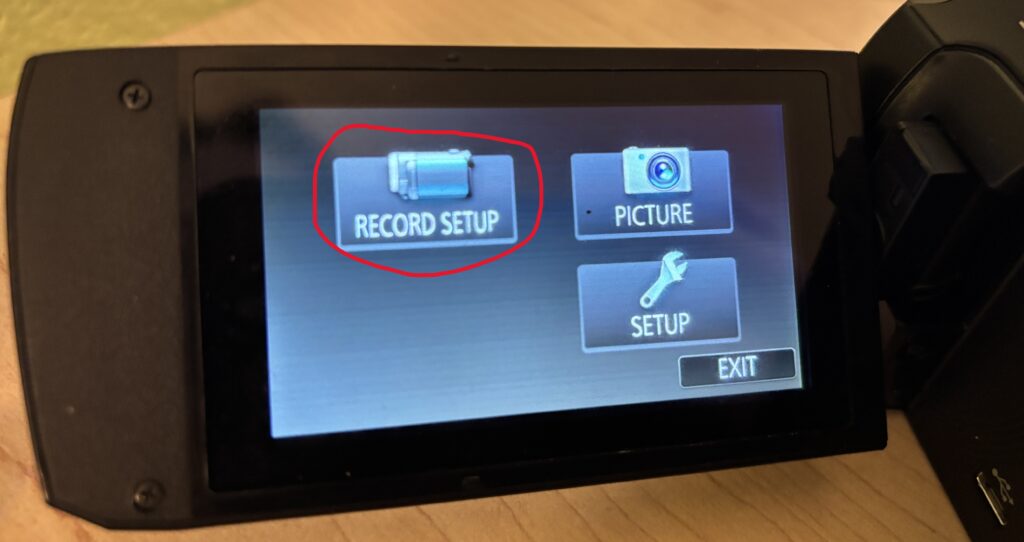
Choose Record Setup
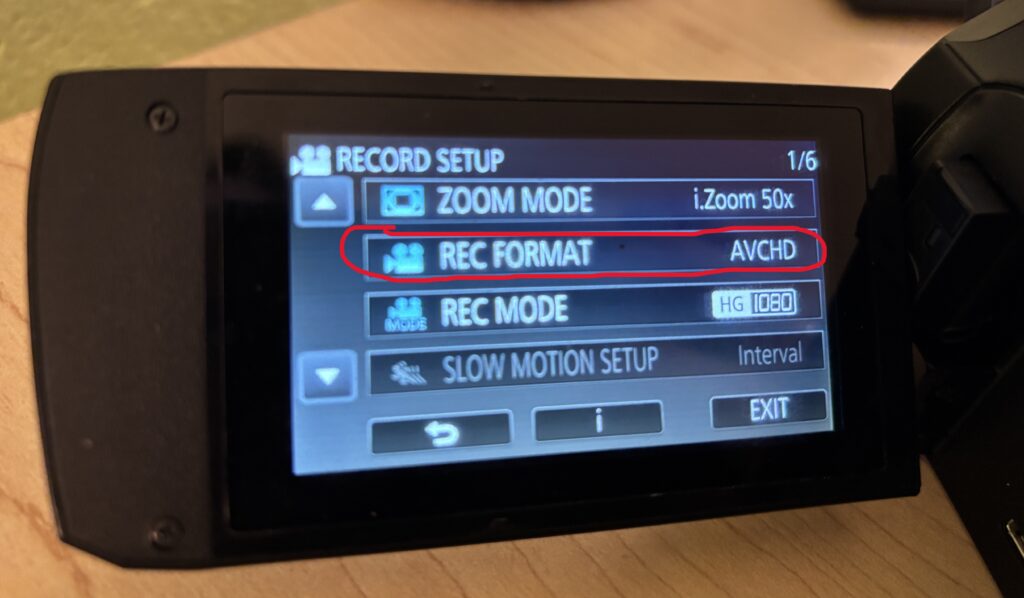
Select Rec Format and choose AVCHD
3. Recording Video
Press the red Record button to start
Press the button again to stop recording
Stay steady while recording, and try to avoid sudden movements for smooth footage.
4. Capturing Audio
Connect an external microphone if higher-quality audio is needed
Adjust audio levels in the menu
5. Playback and Reviewing Footage
Press the Playback button on the side of the camera
Use the LCD to review your clips
Scroll through footage with the arrow buttons
6. Transferring Files
Remove the SD card and insert it into a computer via an SD card reader
Transfer and organize your files for editing or sharing
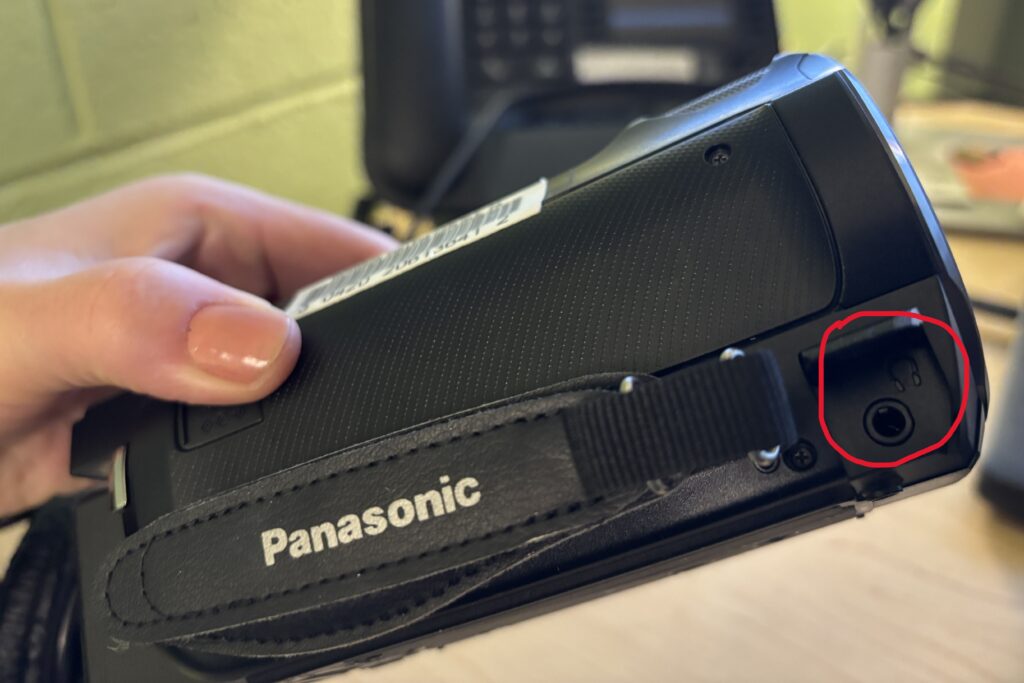
Using Headphones to Monitor Audio
Unlike some of our other camcorders, the Panasonic HC-V770 has a separate port for headphones located in front of the hand strap as seen in the photo below. Make sure you plug the headphones into this port and NOT the AV port.
Helpful Tips
Use a tripod for long or complex shots to avoid shaky video
Keep the lens clean for the clearest image
Record a few seconds of extra footage before and after your main shot (for easier editing)
Always double-check SD card space before starting a project
Test external microphones before recording critical audio
Avoid over-zooming while handheld to maintain stability
You’re Ready to Record
The Panasonic HC-V770 makes it easy to capture polished, high-quality video. Start with simple shots, explore zoom and stabilization features, and gradually add external audio for professional results. With practice, your projects will look and sound great.
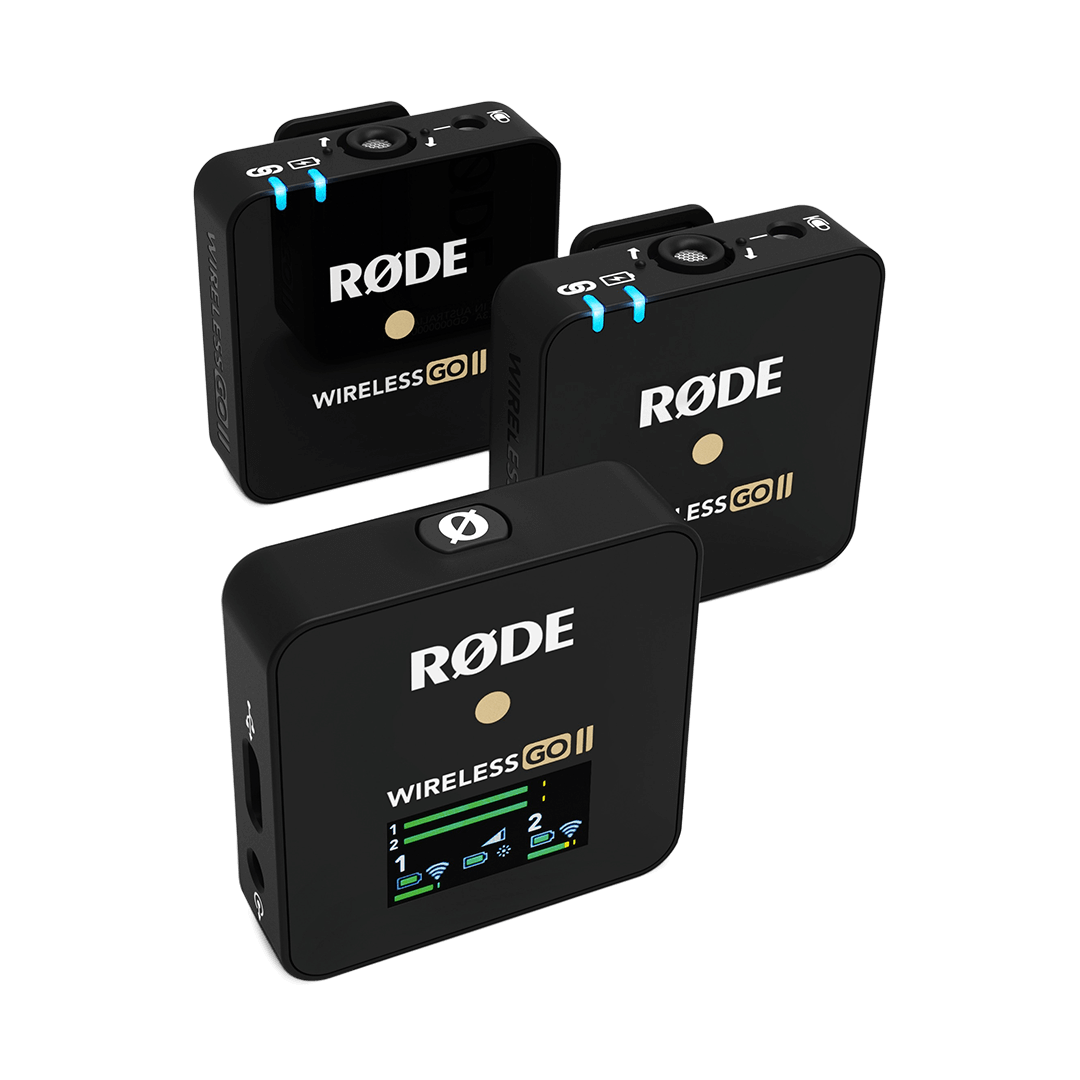
The Rode Wireless Go II is a compact, wireless microphone system that makes capturing clear audio simple for interviews, presentations, podcasts, and video projects. You might choose the Wireless Go II when you need freedom of movement, professional-quality sound, and the ability to record directly to the receiver or internal recorders. It’s ideal for classroom projects, campus events, or any situation where mobility and clear audio are important.
This tutorial will help you get started with the Rode Wireless Go II. Follow the steps below to set up, pair, and record high-quality audio.
1. Getting Started
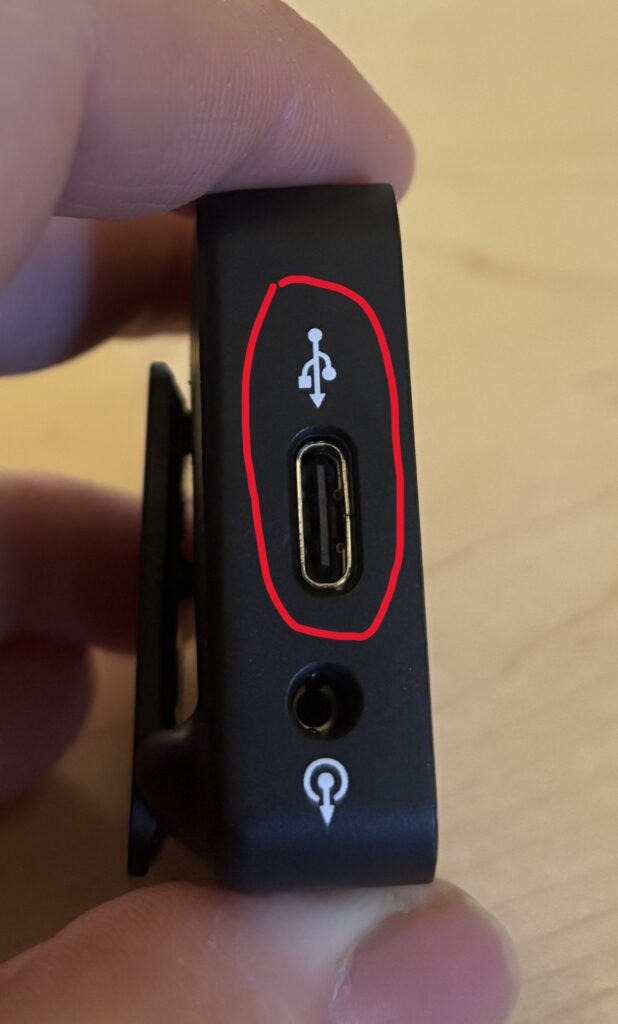
Charge devices fully before first use using the included USB-C cables
Turn on each device by pressing and holding the power button until the lights on the device come on
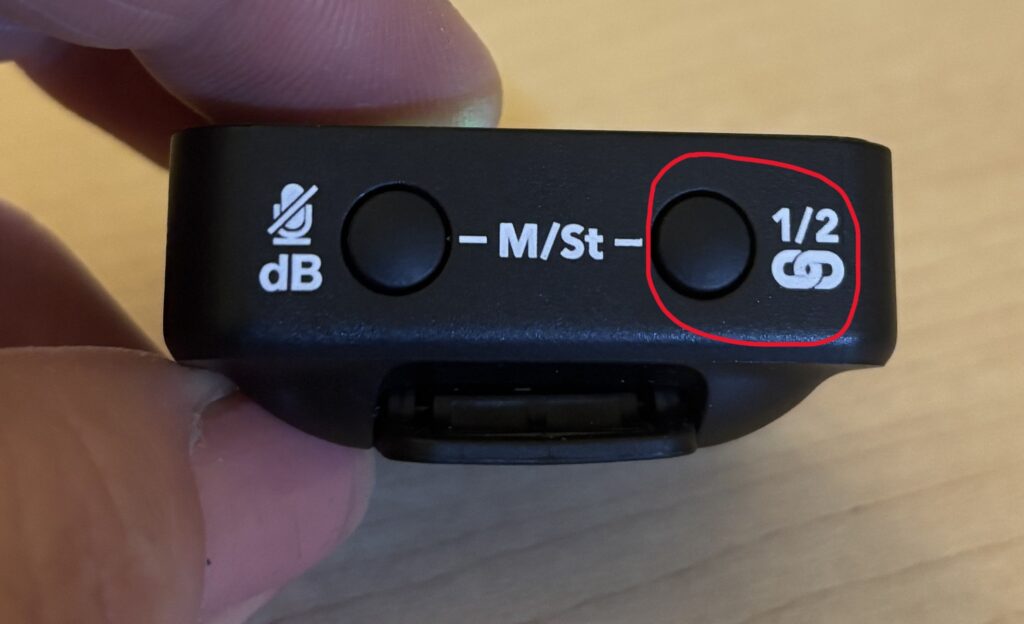
2. Pairing the Transmitters and Receiver
The transmitters and receiver should automatically pair, but check the receiver’s display for connection status
If needed, manually pair by holding the pairing button on each device until the connection is confirmed
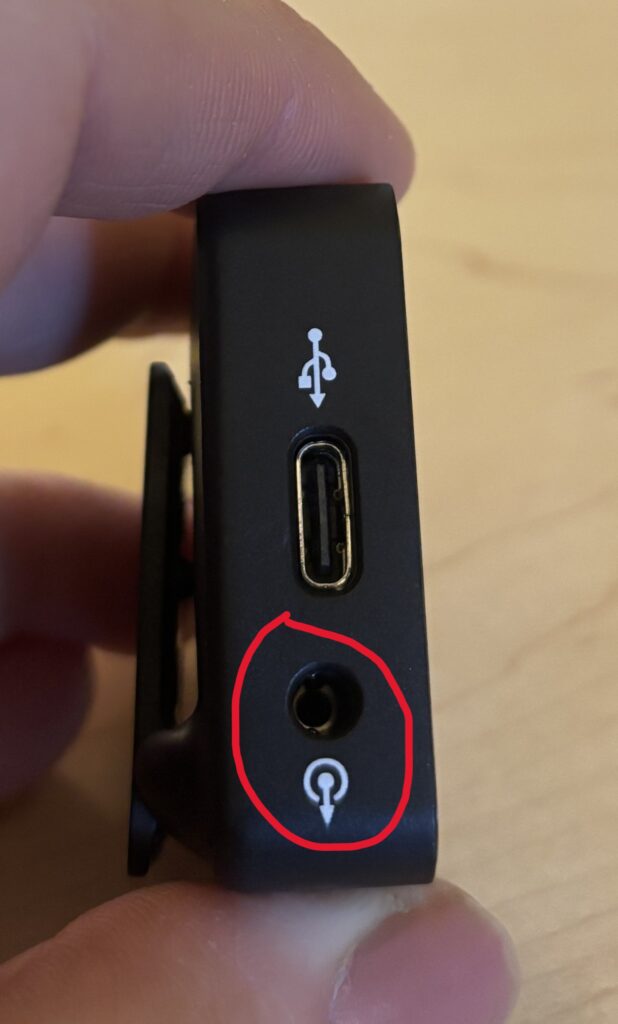
3. Connecting to Your Camera or Device
If using a camera, connect to your camera’s audio (mic) jack with a TRS cable and adjust your camera’s audio settings so the audio comes primarily from the mic
If using a phone, connect the receiver to your phone from the USBC port. Once connected, the mic should automatically work. This can be tested through any voice recorder app (i.e. Voice Memos or Voice Recorder)
4. Attaching the Wind Screens
To attach the wind screen to the transmitter, simply align the circles and turn
5. Using Rode Central
If desired, you can download the Rode Central app on any device for more controls
6. Recording Audio
Clip the transmitter to your subject
Press the record button on your device
Monitor levels on the receiver’s display and ensure the receiver stays nearby to the transmitter
Helpful Tips
Always do a quick sound check before recording critical audio
Keep transmitters within range (up to ~200m or ~650ft line-of-sight) of the receiver
Be aware of the battery levels as each transmitter (mic) should last for roughly 7 hours
Avoid placing transmitters near strong electronic interference
Use the included windshields outdoors to reduce wind noise
You’re Ready to Record
The Rode Wireless Go II makes it easy to capture clear, professional audio without being tethered to your camera. Start with simple setups, monitor your levels, and explore wireless recording for presentations, interviews, or creative projects. With practice, you’ll get crisp, reliable audio every time.
The below video provides a walkthrough of getting started using the Rode Wireless Go II.
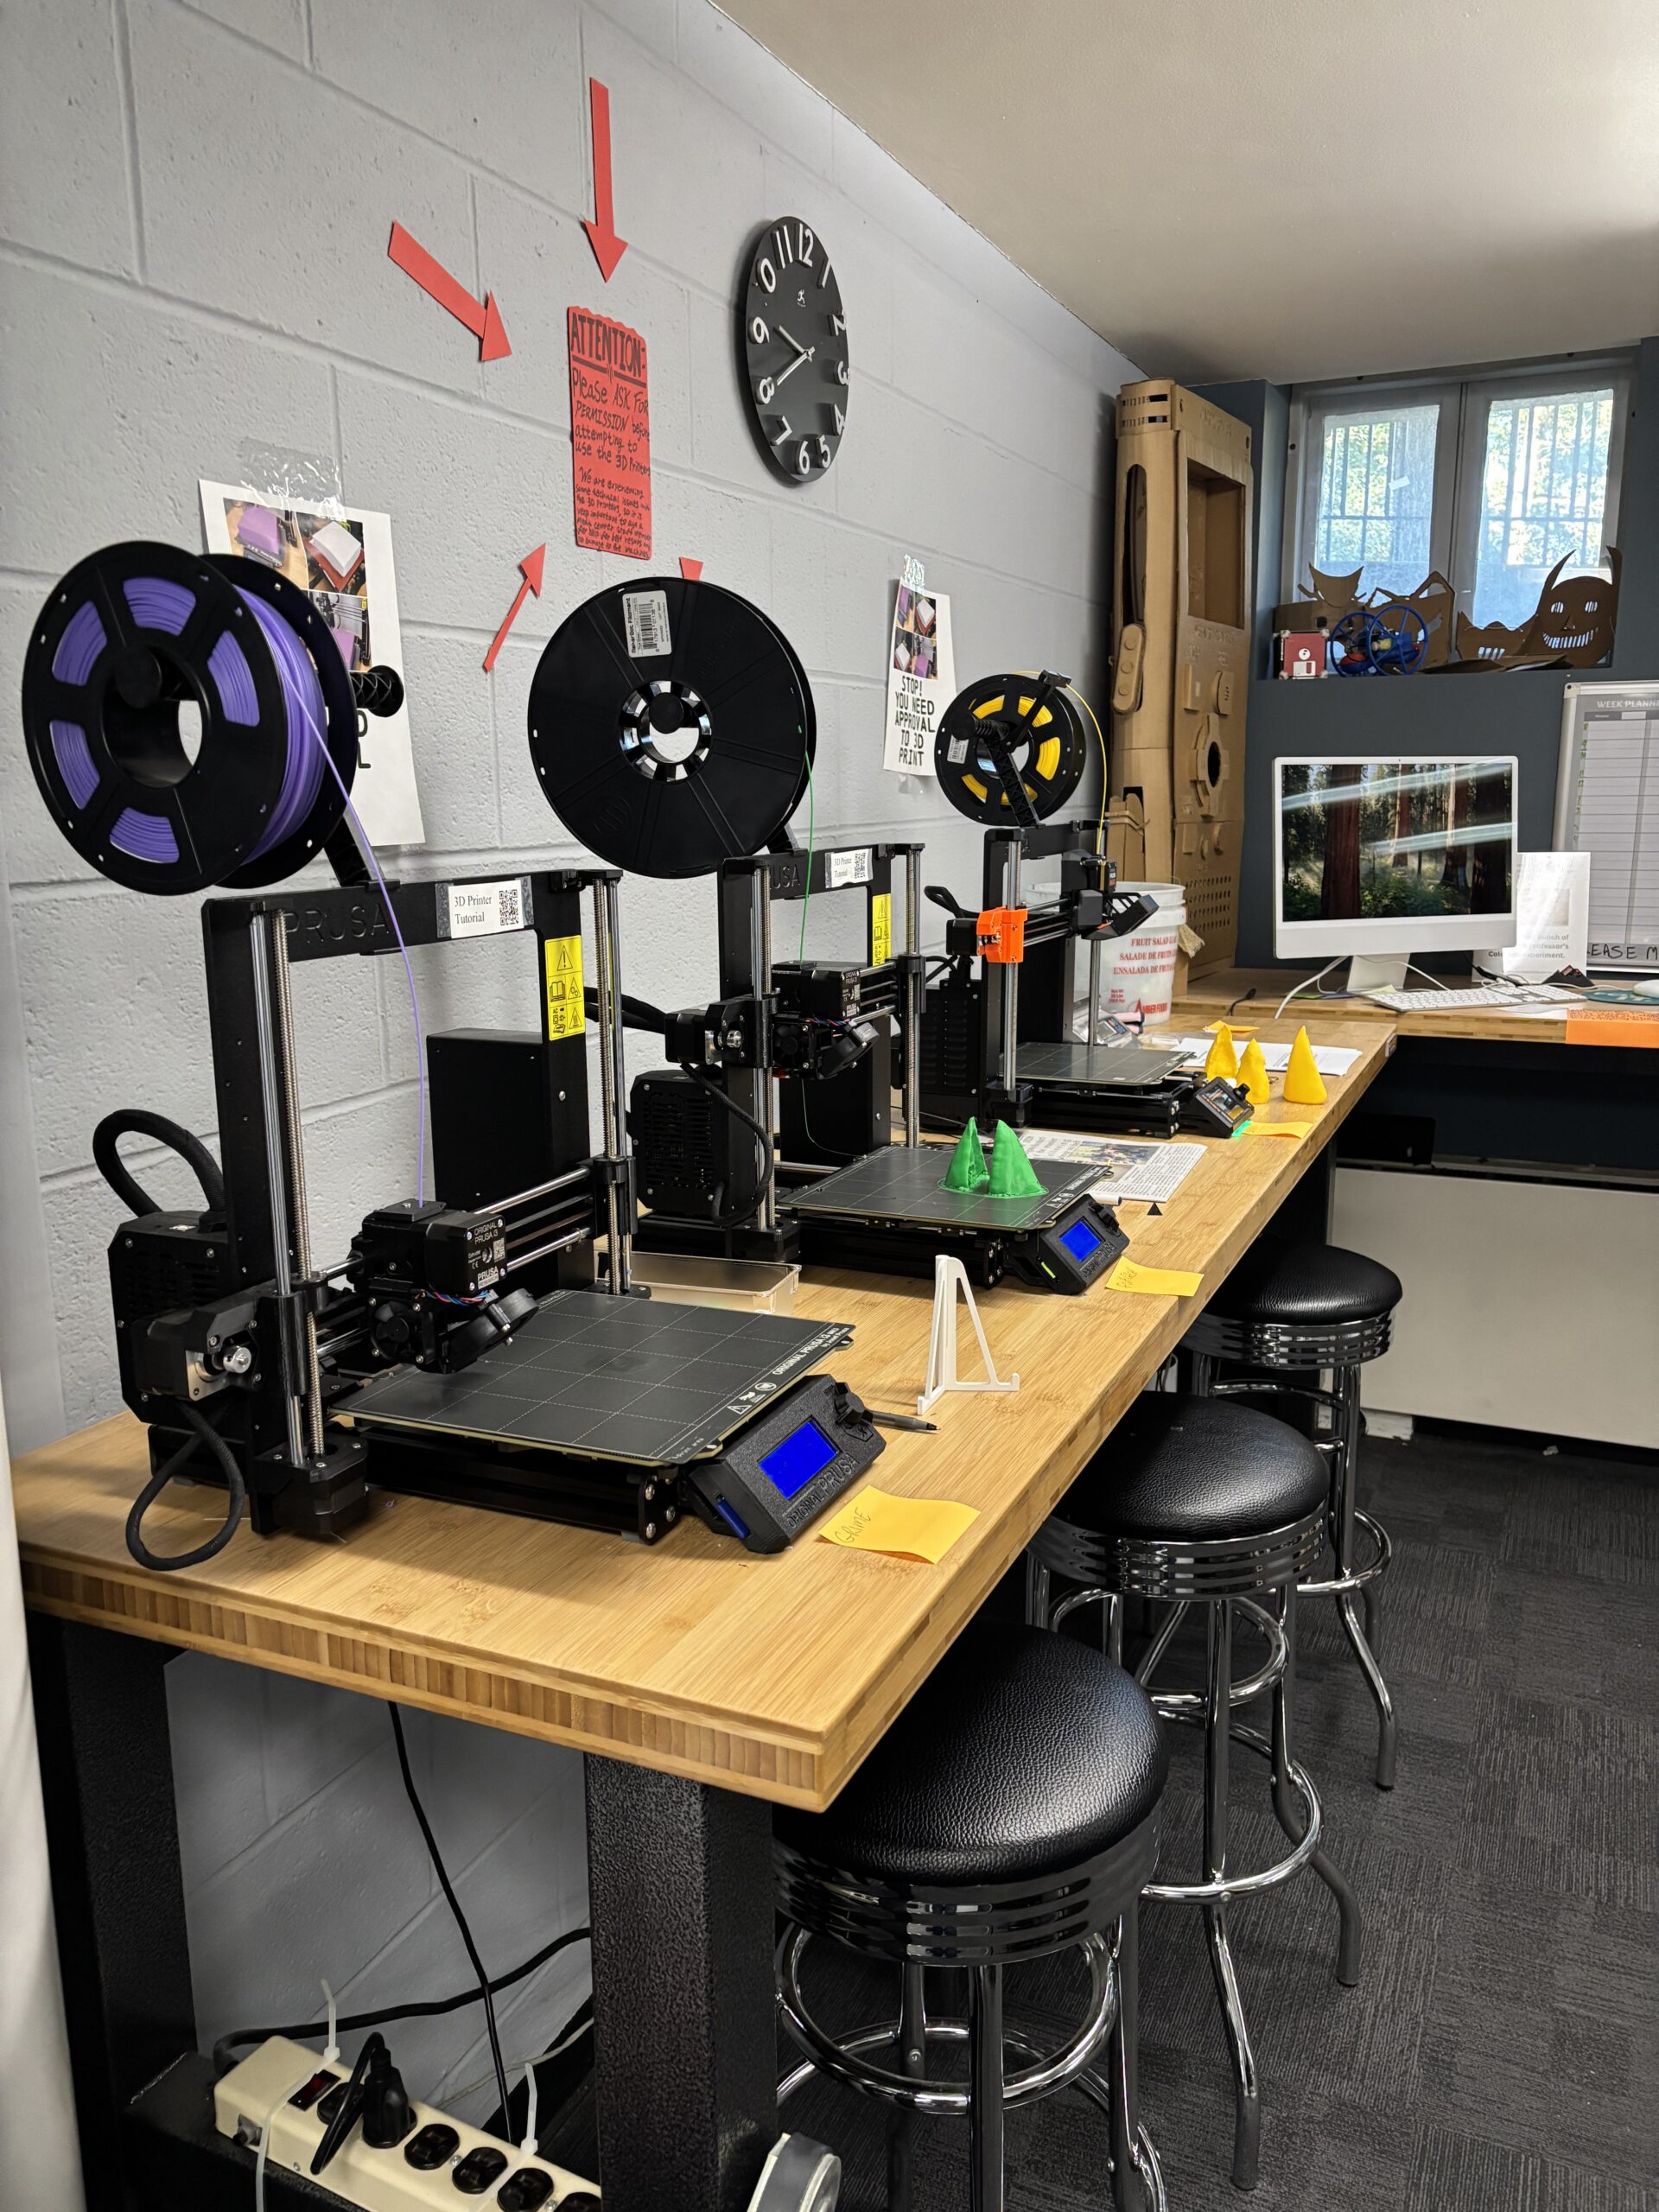
3D printers are powerful tools for visualization, invention, and creation. In the Media Center, we are pleased to offer you access to these printers, but ask that you please contact a member of the Academic Technology department to learn proper use and ensure we can continue to offer access to 3D printing to all.
1. Saving your Object
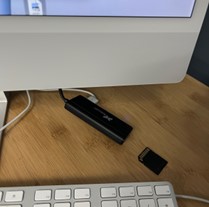
You will want to make sure the object you want to print is saved as an STL, OBJ, X3D or 3MF file type. The file type is listed after the file name as shown below. You will need to transfer the file to the computer in the Makery via email, OneDrive, or an SD card.
2. Preparing your Object for Printing
On the computer located next to the 3D printers in The Makery, sign into the Temp account using the below login information:
User: Temp Pass: dson1223!
3. Opening the PrusaSlicer Software
From the desktop, select the Prusa Slicer icon.
The software should open a blank project. If it instead loads a previous project, select File > New Project.
4. Importing your file into PrusaSlicer
In PrusaSlicer, click on the box with the plus at the top of the screen and select your item from the computer’s files. The object should appear on the screen in green. You can also click and drag the file in from its folder. Note: you can select multiple files to import by holding Ctrl/Cmd on your keyboard, but you will need to properly arrange the objects on the platter prior to printing (see step 6).
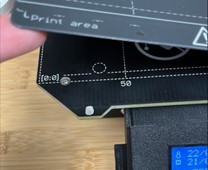
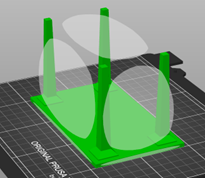
5. Placing Objects on the Build Plate
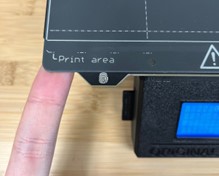
The build plate is the grid under the object that defines the area that the printer is capable of printing within.
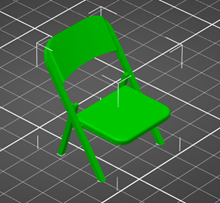
To create a 3D object, the printer stacks layers from the bottom up which means that each layer must be supported. This usually involves placing the large, flat side of the object onto the build plate.
For example, if printed the table in the below image, you would want to flip the table onto it’s surface to ensure there is ample support for the print.
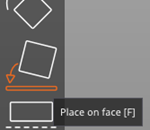
To ensure the object is properly placed on the build plate:
Select the object.
Press the F key or select the Place on Face button from the toolbar.
6. Manipulating your Object
The menu on the sidebar displays the types of manipulations you can perform.
You can Rotate the camera by clicking and dragging anywhere in the window.
Rotate the camera. Hold the Ctrl/Cmd key and click and drag anywhere in the window.
Move an object. With the object selected, click the M key on the keyboard or click in the toolbar on the box with four arrows. Drag the arrows in the direction that you want the object to move.
Scale an object. With the object selected, press the S key on the keyboard or click the dotted box tool in the toolbar. Adjust the object by dragging the orange squares. Scale on one axis by dragging either the red, blue, or green squares.
Rotate an object. With the object selected, press the R key on the keyboard or click the angled box with the curved arrow tool in the toolbar. Drag each square in the direction you would like the object to rotate.
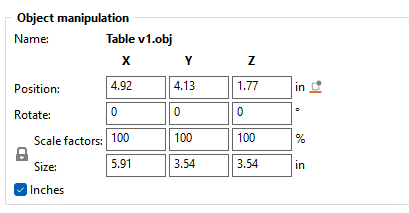
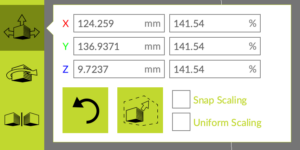
Precise control. Use the object manipulation values on the right side of the window. You can change between metric and imperial by checking/unchecking the box in the bottom left.
7. Resetting Printer Settings
Before printing an object, the printer settings should be set to default.
Be sure that the Printer option on the left-hand side of the screen is set as follows:
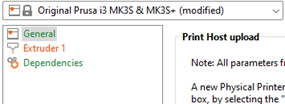
Then, click through the tabs at the top of the screen labeled “Print Settings”, “Filament Settings”, and “Printer Settings.” Ensure that each box looks like the screenshot below without a “(modified)” label.
If a modified symbol does appear, click on the orange page on the left. In the below example, it’s Extruder 1.
From the page, click the orange lock to reset to default values. After clicking it should turn grey, indicating the value has been reset.
Repeat this process until all modified indicators have been removed.
8. Deciding on Supports
If a part of your model exists without support directly beneath it, it needs supports. For example, the chair seen in the below screenshot cannot be rotated in an orientation where every piece is supported from below. In other words, it needs supports.
Although some prints can be rotated to avoid using supports (see the screenshot in step 5), oftentimes, you will need to add supports. To do so, check the box next to Generate Support in the right side of the Print Settings menu.
Supports can be pulled away once the print is finished.
Note: even if using supports, the object should still be placed in an orientation that minimizes the amount of supports needed for the object (see step 5).
9. Determining the Infill
Infill provides support from inside the object. Most objects should have between a 5% and 15% infill. The more infill you add, the stronger your print will be and the longer it will take to print.
To change the infill, adjust the Infill from the dropdown located on the right side of the screen.
10. Preparing for the Printer
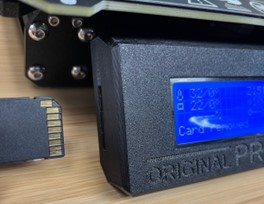
SD cards for the Prusa 3D printers are in the SD card slot located on the left side of the printer’s screen. Remove the card and insert it into the computer using the black adapter plugged into the back. Then, follow the steps below.
In the PrusaSlicer software, click the Plater tab at the top of the screen, then click the Slice Now button in the bottom right.
Sliced objects show each layer that the printer will print. Orange parts are the objects and green parts are the generated supports (if applicable).
Once your object has been sliced, click the Export G-code button in the bottom right. Select the SD card as your folder.
Note: If you receive an error stating that there is an object with no extrusions in the first layer, this means that the object needs supports before it can print. Refer back to step 8 to see how to add supports.
11. Starting your Print
Insert the SD card with your G-code generated by the PrusaSlicer software into the SD card slot located on the left side of the printer’s screen.
Press the dial in to wake the printer.
Rotate the dial on the printer to navigate to Print From SD.
Press the dial to select that option.
Find your file from the list and press the dial to start the print.
The printer will heat up and begin its calibration process.
Once it’s ready, it will begin printing. Please wait at the printer to ensure your object actually begins printing. If your print does not start, ask a Media Center employee for help.
12. Removing your Object from the Build Plate
Peel up the build plate from the printer. Remove your object by gently bending the build plate and pulling the object off the surface. If it’s stuck, you may have to use something to carefully scrape it off the surface, paying extra attention to not damage the plate.
Remember to remove any and all filament from the print surface so that the plate is completely clean before being placed back onto the printer.
If you used supports, you may have to use pliers to carefully remove them from your print.
Place the plate back onto the 3D printer and push it back ensuring the screws align with the indent on the back of the plate.
Meshmixeris a free 3D modeling and mesh-editing tool commonly used for preparing files for 3D printing. You might choose Meshmixer if you want to modify existing 3D models, repair files, add or remove details, or customize objects without starting from scratch. It’s especially useful for learning practical 3D workflows and turning downloaded models into something uniquely your own.
In the below video, we walk you through the basics of using Meshmixer focused specifically on modifying bird beaks for a class project.
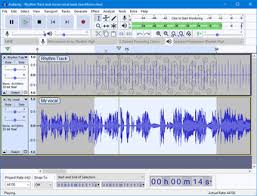
Audacity is a free, open-source audio editing and recording tool that’s widely used for podcasts, voiceovers, and basic sound editing. You might choose Audacity if you want a straightforward way to record audio, clean up sound, remove background noise, or edit clips without needing expensive software. It’s a great option for learning core audio concepts and producing solid-quality audio for class projects, presentations, or creative work. And the best news is, it’s free to download on both Apple and Windows devices.
In the video below, we walk you through how to edit audio and we share some tips and tricks for using Audacity effectively.
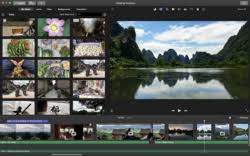
iMovie is a free, user-friendly video editing app available on all Apple devices that’s great for getting started with video projects. You might choose iMovie if you want to edit quickly, learn the basics of storytelling and timeline editing, or create polished videos without a steep learning curve. It’s ideal for simple projects, class assignments, and personal videos, especially if you’re new to video editing and want professional-looking results with minimal setup.
In the video below, we walk you through everything there is to know in iMovie.
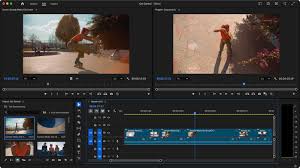
Adobe Premiere Pro is a widely used, industry-standard video editing program found in film, television, marketing, and online content creation. You might choose Premiere Pro if you want a familiar, timeline-based editing experience that integrates seamlessly with other Adobe tools like Photoshop, After Effects, and Audition. While Premiere Pro does require a paid student subscription, it offers powerful editing features, strong collaboration options, and skills that translate directly to many creative and professional media workflows.
In the video below, we walk you through basic video editing using Adobe Premiere Pro.
DaVinci Resolve is a professional-grade video editing and color correction tool used across film, television, and online media and it’s available to download for free for both Windows and Apple devices. You might choose DaVinci Resolve for more creative control, higher production quality, or experience with software used in real-world media and creative careers. It’s especially well-suited for narrative projects, documentaries, advanced editing work, and anyone interested in learning industry-standard workflows.
In the video below, we cover how to use Davinci Resolve for basic editing.
3D printers are powerful tools for visualization, invention, and creation. In the Media Center, we are pleased to offer you access to these printers, but ask that you please contact a member of the Academic Technology department to learn proper use and ensure we can continue to offer access to 3D printing to all.
1. Saving your Object
You will want to make sure the object you want to print is saved as an STL, OBJ, X3D or 3MF file type. The file type is listed after the file name as shown below.
2. Preparing your Object for Printing
On the computer located next to the 3D printers in The Makery, sign into the Temp account using the below login information:
User: Temp Pass: dson1223!
3. Opening the CURA Software
From the desktop, select the green Cura icon.
The software should open a blank project. If it instead loads a previous project, select File > New Project.
4. Importing your file into CURA
In Cura, click on the folder icon in the top left of the screen and select your file. Note: you can select multiple files to import by holding Ctrl on your keyboard, but you will need to properly arrange the objects on the platter prior to printing (see step 6).
5. Placing Objects on the Build Plate
The build plate is the grid under the object that defines the area that the printer is capable of printing within.
To create a 3D object, the printer stacks layers from the bottom up which means that each layer must be supported. This usually involves placing the large, flat side of the object onto the build plate.
For example, if printed the table in the below image, you would want to flip the table onto it’s surface to ensure there is ample support for the print.
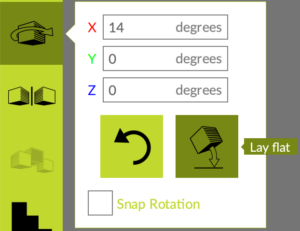
To rotate the object to the face that’s on the build plate:
Select the object.
Click the “Rotate” button in the left-hand menu.
Use the red, green, and blue wheels to rotate the object to the desired orientation for printing.
Click the Lay Flat button located beside the rotate button to ensure the desired face will be placed directly onto the build plate.
6. Manipulating your Object
The menu on the sidebar displays the types of manipulations you can perform.
Rotate the camera. Hold the Control Key and click and drag anywhere in the window.
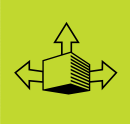
Move an object. With the object selected, click the icon of the box with a single large arrow. Then, drag the arrow in the direction that you want the object to move.
Scale an object. With the object selected, click the icon with three arrows and a box. Scale the object by dragging any of the small boxes that have appeared around the object.
Rotate an object. With the object selected, click the icon with the curved arrow. Drag each square in the direction you would like to rotate the object.
Precise control. Use the object manipulation values that appear in the menus beside each of the above icons when selected.
7. Resetting Printer Settings
Before printing an object, the printer settings should be set to default.
Be sure that the “Profile” option on the right-hand side of the screen is set to “Standard” or “Highspeed” (other profiles don’t add much benefit and are time consuming):
Then, ensure that no star appears next to the selected profile. The star symbol, depicted below, indicates modifications have been made to the profile.
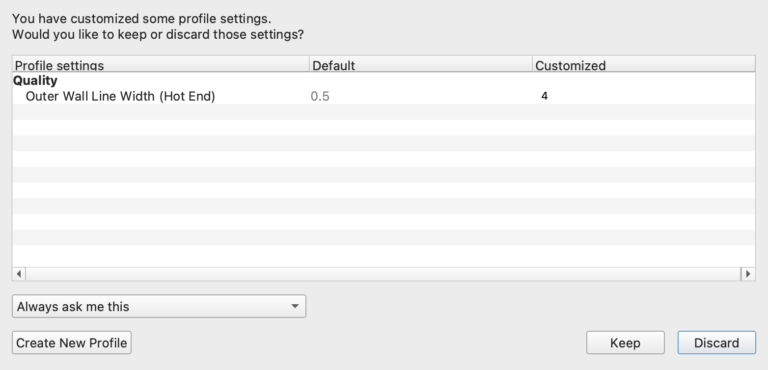
If the star symbol appears next to the selected profile:
Click the “Profile” dropdown and re-select the profile you want to use.
A message will appear asking if you would like to “Discard or Keep Changes”. Click Discard. The star should disappear.
8. Deciding on Supports
If a part of your model exists without support directly beneath it, it needs supports. For example, the chair seen in the below screenshot cannot be rotated in an orientation where every piece is supported from below. In other words, it needs supports.
Although some prints can be rotated to avoid using supports (see the screenshot in step 5), oftentimes, you will need to add supports. To do so, check the box next to Generate Support in the right side of the Print Settings menu.
Supports can be pulled away once the print is finished.
Note: even if using supports, the object should still be placed in an orientation that minimizes the amount of supports needed for the object (see step 5).
9. Determining the Infill
Infill provides support from inside the object. Most objects should have between a 5% and 15% infill. The more infill you add, the stronger your print will be and the longer it will take to print.
To change the infill, adjust the Infill slider located on the right side of Print Setup menu.
10. Selecting the Material
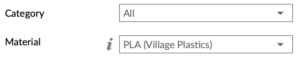
Please don’t adjust the “Material” dropdown” menu. If you want to change the 3D printer material, please ask a Media Center employee.
11. Preparing for the Printer
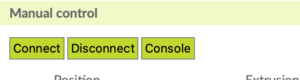
In the Cura software, click the Monitor tab at the top of the screen.
Click Connect and wait until the “USB Printing, Connected Via USB” message is displayed at the top. Note: You may have to try connecting a couple of times before this message is displayed.
12. Starting your Print
In the Cura software, click the “Start Print” button at the bottom right.
The printer will heat up and begin its calibration process.
Once it’s ready, it will begin printing. Please wait at the printer to ensure your object actually begins printing. If your print does not start, ask a Media Center employee for help.
13. Removing your Object from the Build Plate
Peel up the build plate from the printer. Remove your object by gently bending the build plate and pulling the object off the surface. If it’s stuck, you may have to use something to carefully scrape it off the surface, paying extra attention to not damage the plate.
Remember to remove any and all filament from the print surface so that the plate is completely clean before being placed back onto the printer.
If you used supports, you may have to use pliers to carefully remove them from your print.
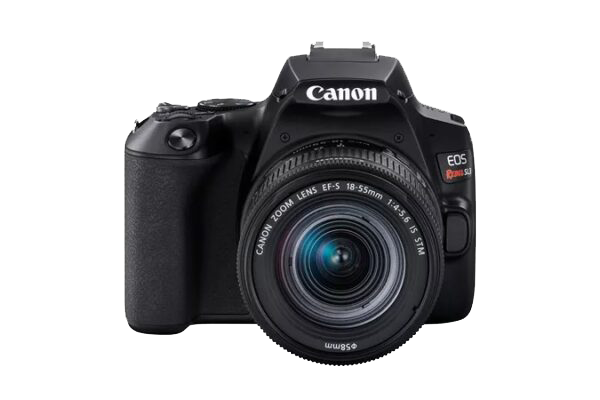
The Canon SL3 DSLR Camera is a versatile, beginner-friendly camera that gives you more creative control than a phone or point-and-shoot. You might use the Canon SL3 when you want higher-quality photos or video, sharper images in low light, or the ability to control settings like aperture, shutter speed, and ISO. It’s a great option for learning the fundamentals of photography while still being powerful enough for class projects, creative work, and campus events.
This tutorial will help you get started with the Canon SL3 DSLR camera. Follow the steps below to learn how to turn the camera on, take basic photos, and begin using manual settings for more creative control.
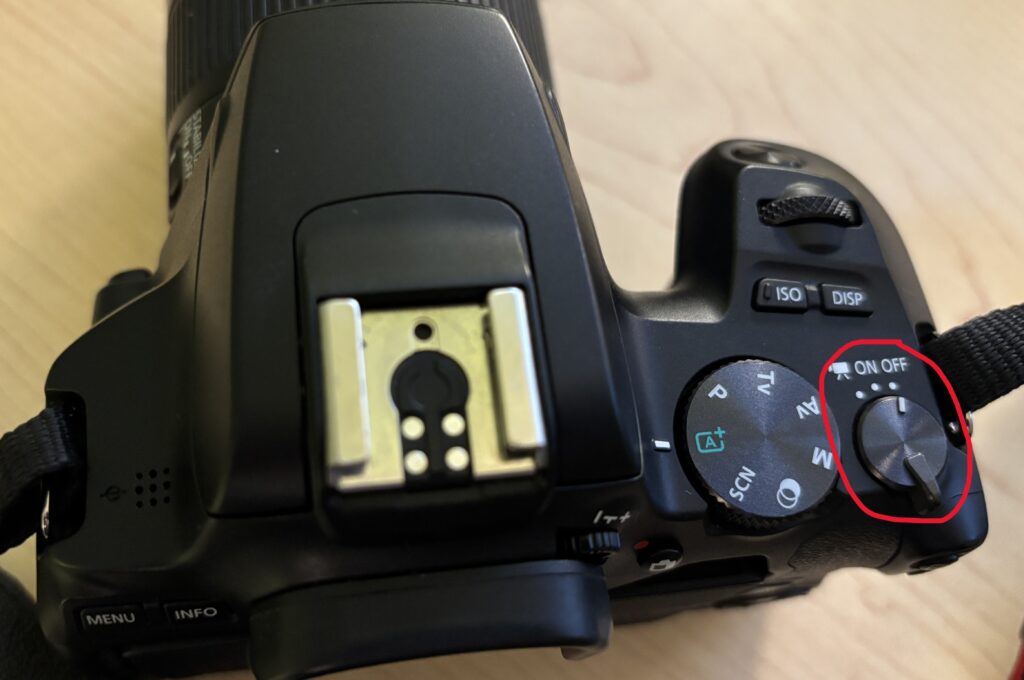
Turning the Camera On
Make sure the battery is charged and an SD card is inserted
Remove the lens cap
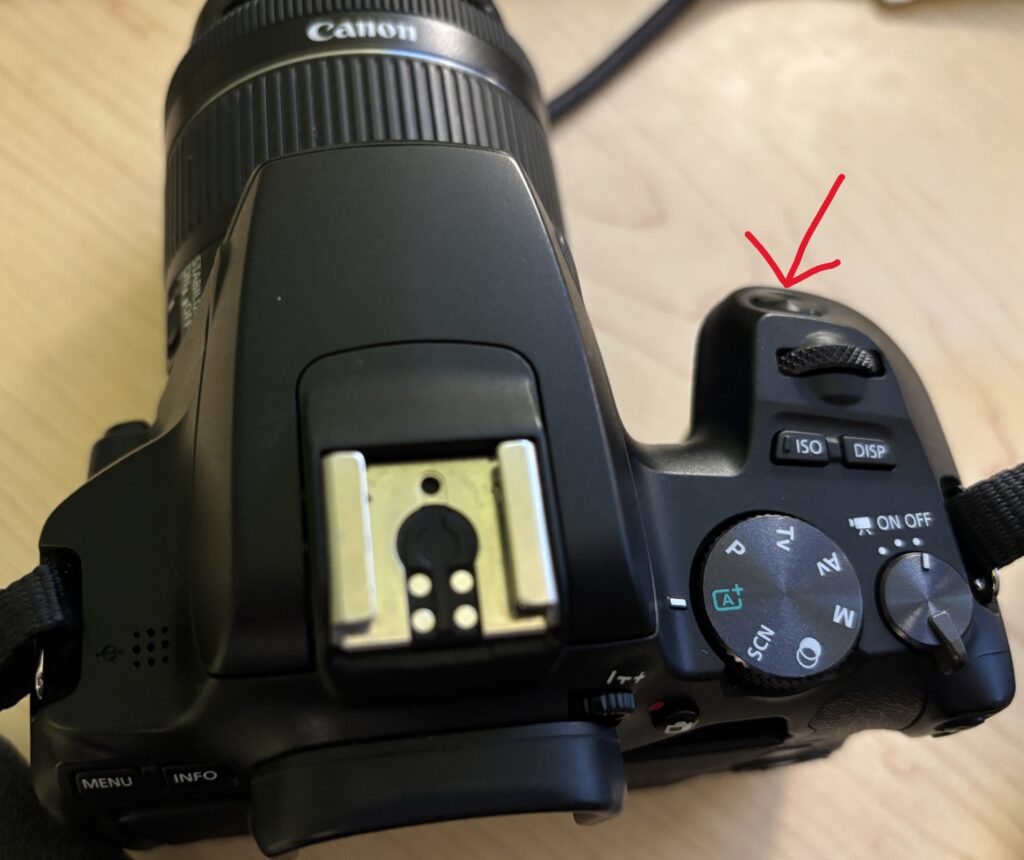
Move the power switch on the top of the camera to ON
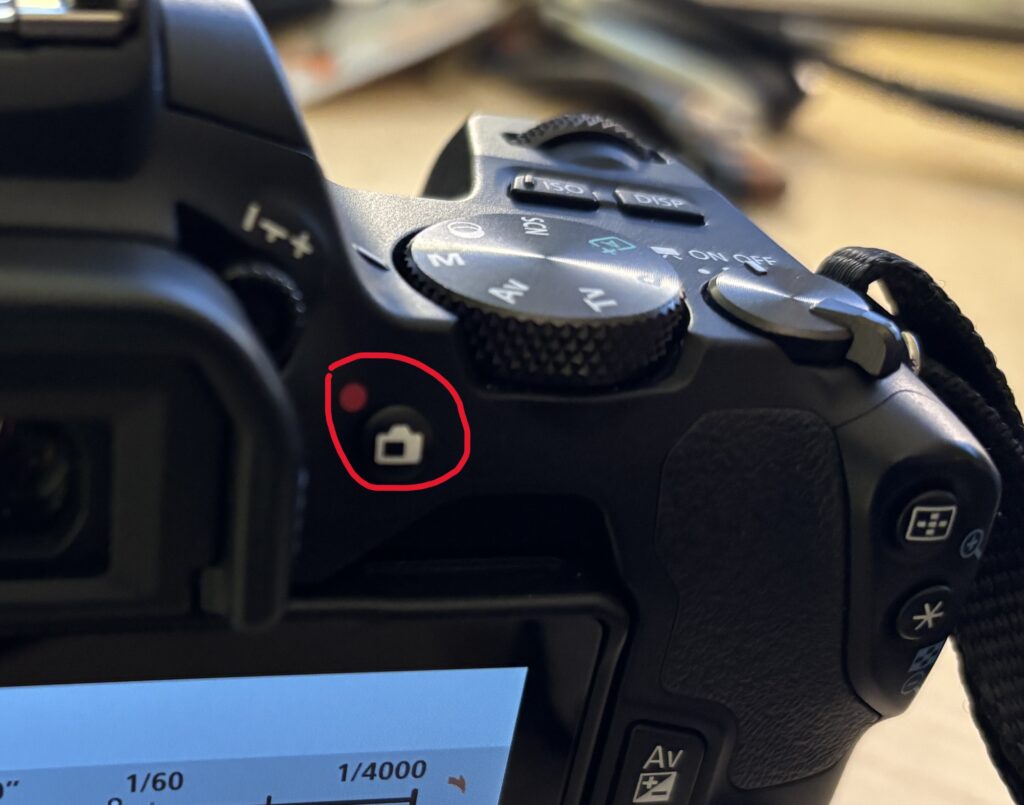
Taking a Photo
Look through the viewfinder or use the screen
To switch between the viewfinder and the screen, press the button with the camera icon
Press the shutter button halfway to focus
You’ll hear a beep or see a focus indicator
Press the shutter button all the way down to take the photo
Using Auto Mode (Recommended for Beginners)
If you just need to take photos quickly:
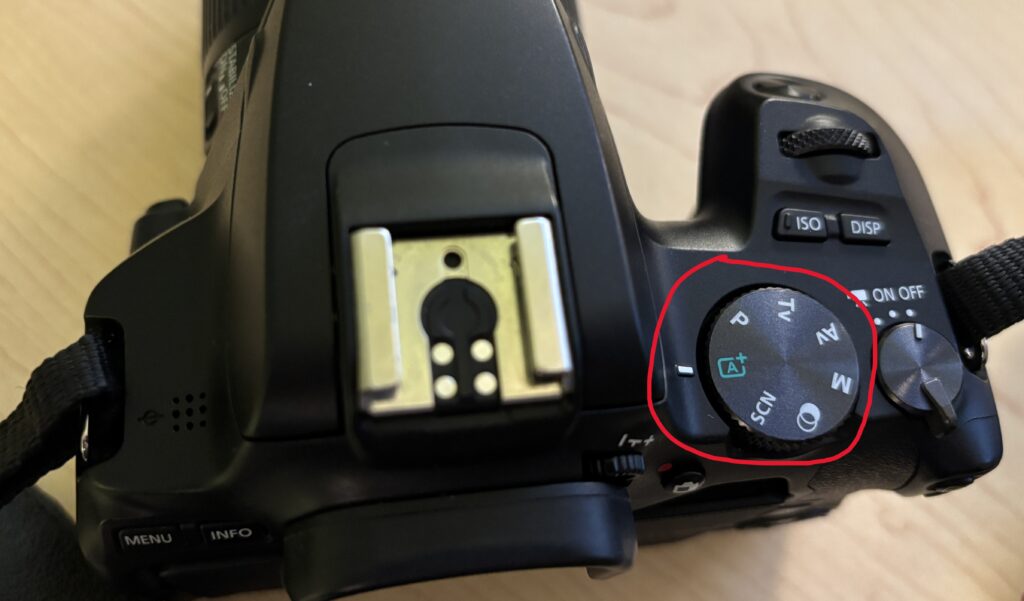
Turn the mode dial to A (Auto)
The camera will automatically choose the best settings for you
Focus on framing your shot and pressing the shutter
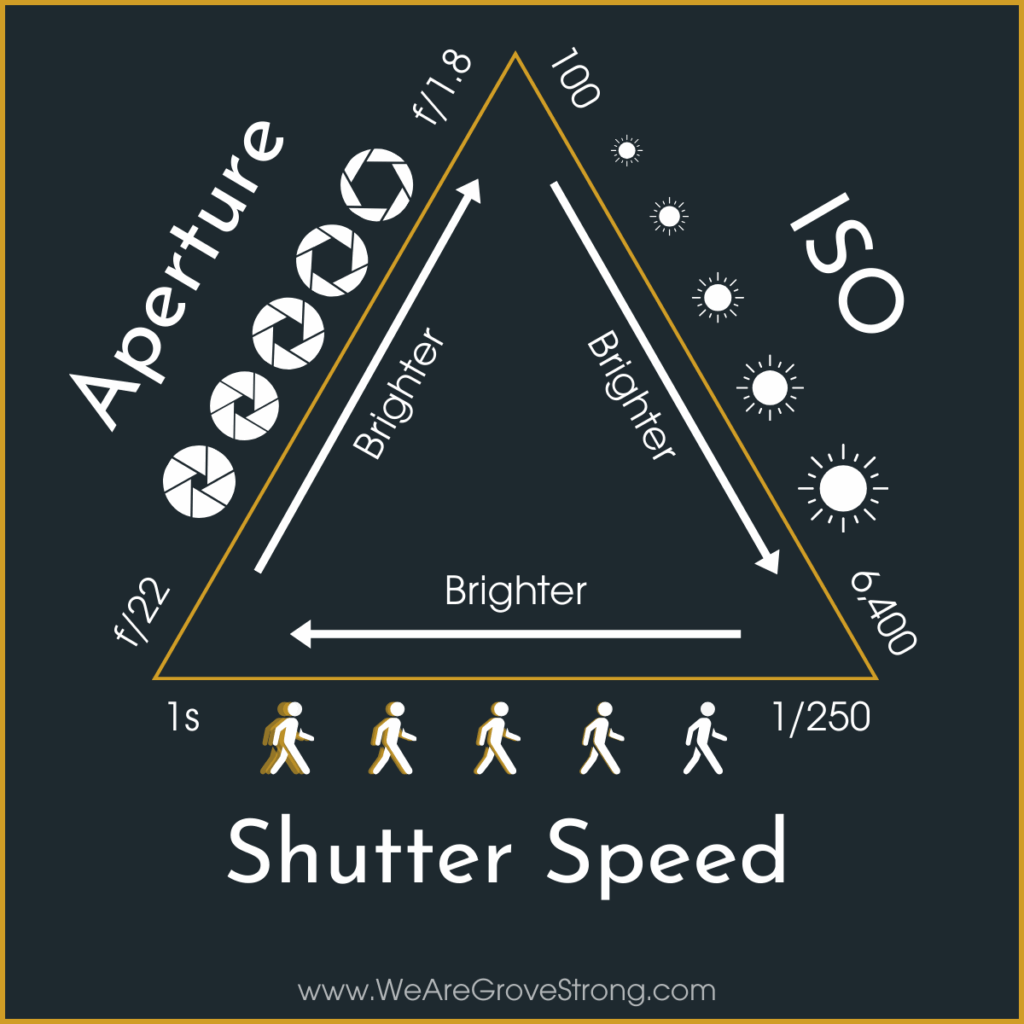
Understanding the Exposure Triangle
When you’re ready for more control, you’ll adjust three settings that affect how bright your photo is:
Aperture (f-stop): Controls how much light enters the lens and how blurry the background is
Shutter Speed: Controls how long the shutter stays open and how motion appears
ISO: Controls how sensitive the camera is to light
Changing one setting affects the others. Together, these make up the exposure triangle.
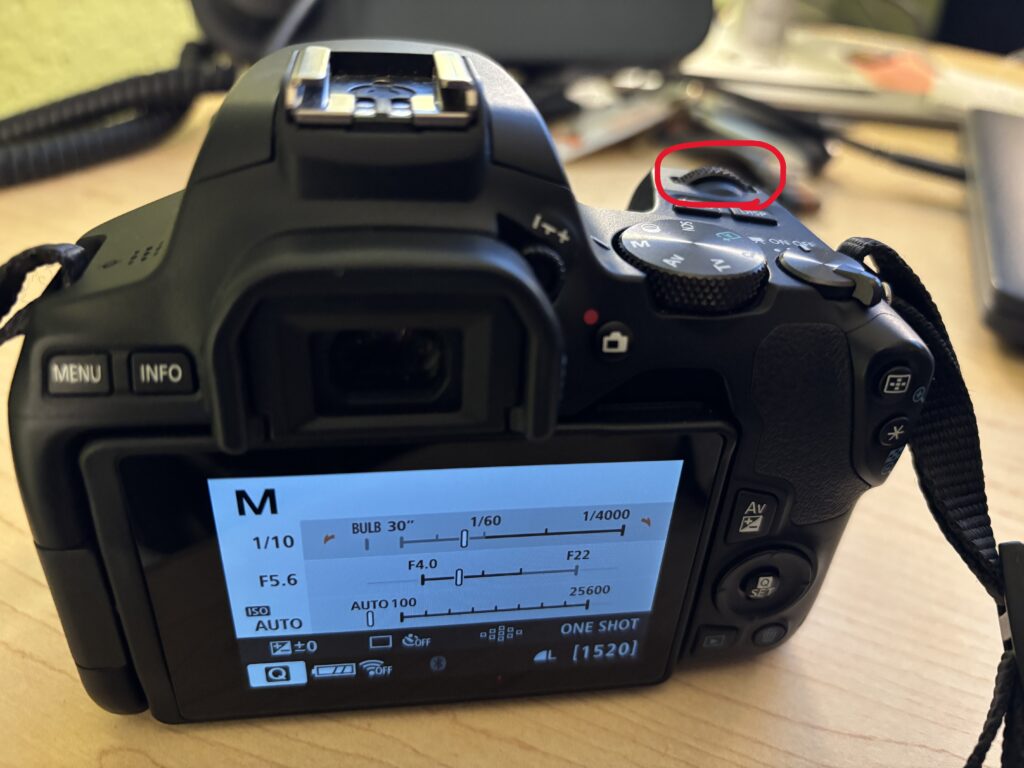
Using Manual Mode
To control all settings yourself:
Turn the mode dial to M (Manual)
All settings will appear on the screen
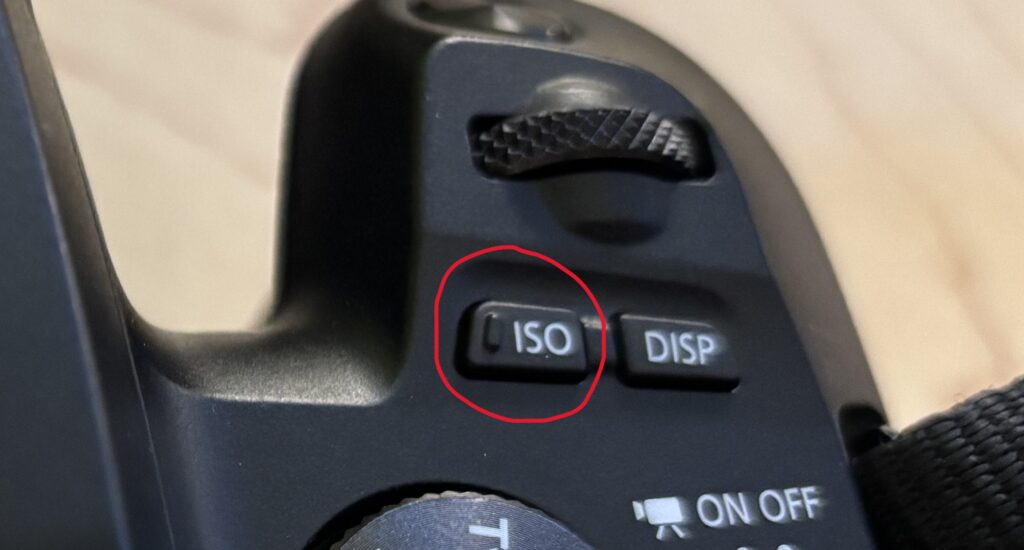
In Manual mode:
Use the main dial to change shutter speed
Press the ISO button to adjust ISO
To change the aperture, use the main dial while holding the AV button
Watch the exposure meter on the screen to help balance your settings.
Reviewing Your Photos
Press the Play button to view photos you’ve taken
Use the arrow buttons or dial to scroll through images
Press Delete if you need to remove a photo
Shooting Video
Turn the dial to movie mode
To start and stop the recording, press the camera button with the adjacent red dot
Helpful Tips
Use Auto mode when you’re unsure
Use Manual mode when lighting or motion matters
Keep your ISO as low as possible for cleaner images
If photos look blurry, try a faster shutter speed
You’re Ready to Shoot
You don’t need to master every setting to take good photos. Start simple, experiment often, and adjust as you go. The Canon SL3 is a great camera for learning photography fundamentals while producing high-quality results.


