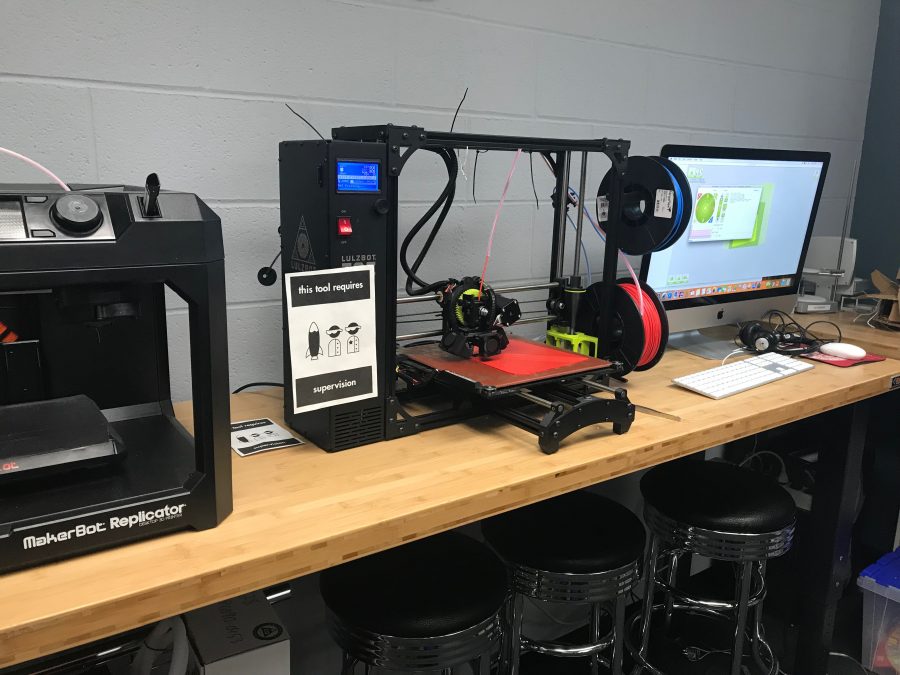
3D Printing with LulzBot Taz-6 Printer:
The 3D printers are powerful tools for visualization, invention, and creation. Because of their usefulness, we ask you to please be careful with school 3D printing equipment. Not only is it expensive, it can be easily damaged if not used properly. Parts on the 3D printer require regular maintenance to ensure they are functioning properly. If you are not careful or aware of what you are doing, you could accidentally damage the printer or its components. Please treat the school’s 3D printing equipment with care and respect, as it is a valuable resource for the entire school community.
1. Ensure you have an .stl or .obj file type to print on the printers.
- How do I identify my 3D model file type? The file type is listed after the file name (eg. .obj or .stl):

- Accepted file types: STL, OBJ, X3D, and 3MF.
2. Sign into the Temp account on the computer next to the 3D printers in the Makery.
User: Temp
Pass: dson1223!
3. Open the CURA Software.

- Someone left an open project on the software before me. The software should open a blank project. However, if someone’s previous work is still open, create a new project with: File > New Project.
4. Import your file into Prusa
- Click on the button with the folder icon in the top left of the screen. Then, select your item from the computer’s files. The object should appear on the screen.

- Invalid File, Failed to Load error. If this error occurs, then your file has an error in it, you will need to repair it before continuing.
- Can I import more than one object at once? Yes, however you will need to arrange objects on the platter before printing (see step 6).
5. Place objects on the build plate.
- The build plate is the grid under the object, it defines the area that the printer is capable of printing inside of.
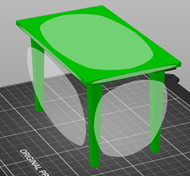
- It matters what face is on the build plate! The 3D printer stacks layers from the bottom up to create a 3D object, each layer must have support under it to ensure a good print. This usually means placing a large flat side of the print onto the build plate.
- Let’s say you wanted to print a table, If printed upright, the tabletop would have no support whilst printing. By inverting the whole table, we ensure the tabletop surface has support underneath during the whole print.

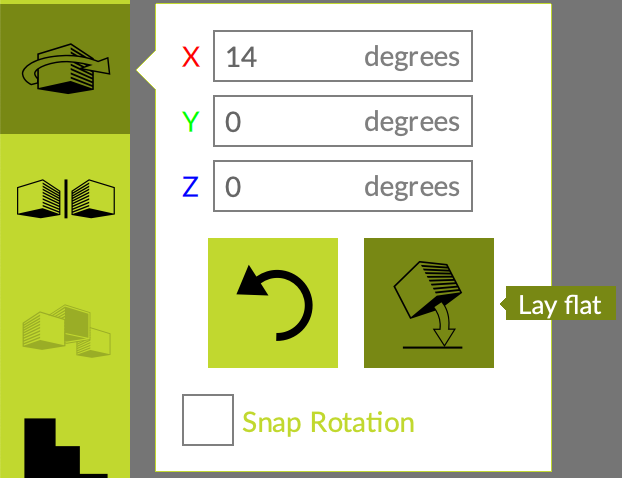
- To rotate the object to the face that’s on the build plate:
1. Select it by clicking on it, red, green, and blue arrows appear around objects when selected.
2. Click the “Rotate” button in the left-hand menu.

4. Use the red, green, and blue wheels to rotate the object to the desired orientation for printing.
3. You must click the “Lay Flat” button located beside the rotate button to ensure the desired face will be placed directly onto the build plate.
6. Object manipulation
- To manipulate the object, select it by clicking on it. Red, green, and blue arrows appear around objects when selected.
- The menu on the sidebar displays the types of manipulations you can perform.

- You can Rotate the camera by holding the Control Key and clicking and dragging anywhere in the window.
- Move an object. While an object is selected, click the icon of the box with a single large arrow. Arrows appear on the selected object, drag the arrow in the direction that you want to move the object.

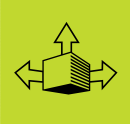
- Scale an object. While an object is selected, click the icon with three arrows and a box. Cubes appear the selected object, scale the whole object by dragging any of them.
- Rotate an object. While an object is selected, icon with the curved arrow. Squares appear around the object, drag each square in the direction you would like to Rotate the object.
- Precise control. For precise control, of the position, rotation, and scale of the object, use the object manipulation values that appear in the menus beside each of the above icons when selected.

7. Printer settings reset
- Before printing an object, the printer settings should be set to default. Steps 7-10 of the tutorial will walk you through how to do so.
1. Be sure that the “Profile” option on the right-hand side of the screen is set to “Standard” or “Highspeed” (other profiles don’t add much benefit and are very time consuming):
![]()
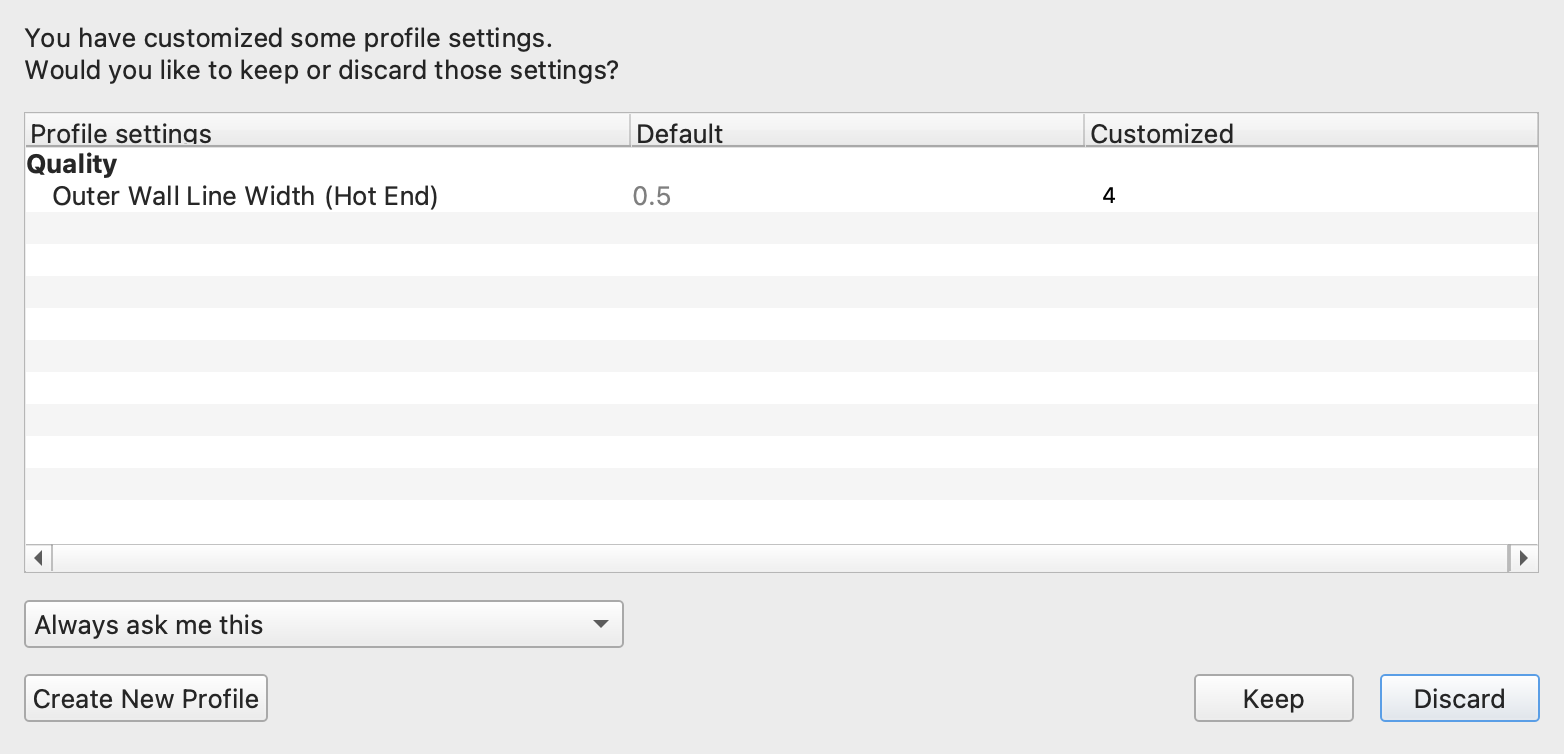
2. Then, ensure that no star appears next to the selected profile. The star symbol, depicted below, indicates modifications have been made to the profile.
![]()
- If the star symbol appears next to then selected profile:
1. Click the “Profile” dropdown and re-select the profile you want to use again.
2. A message will appear asking if you would like to “Discard or Keep Changes”. Click Discard. The star should have disappeared.
8. Supports
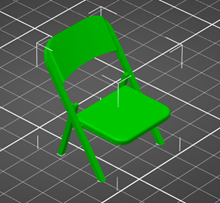
- Does my print need Supports? Simple rule of thumb is, if a part of your model exists without support directly beneath, it needs support. Take for instance, this chair model. It cannot be rotated in an orientation where every piece is supported from below. It needs Supports.
- Although some prints can be rotated to avoid using Supports (see table from step 5), often you will need to add support. Add supports, by simply checking the “Generate Support” option in the right side “Print Settings” menu.

- On a finished print, supports can be pulled away once the print is finished.
- Even if Supports are necessary the object should be placed in an orientation that minimizes the support needed for the object (see step 5).
9. Infill
- Do I need infill? Infill provides support from inside the object, as a rule of thumb all objects need between %15 and %5 infill. The more infill you add the stronger your print will be, but the longer it will take to print.
- Adjust the infill by simply sliding the the “infill” slider located on the right side “Print Setup” menu.
![]()
- There are tradeoffs and advantages to different amounts of infill. For a larger object, you may want to select a lower amount of infill, this will decrease the print time, but also decrease the strength of the print. For a smaller object (eg. table and the chair models listed above in this tutorial), %15 or more infill is enough. The are smaller the objects the less print time will effected by a higher infill.
10. Material select
- Please don’t adjust the “Material” dropdown” menu. If you want to change the 3D printer material, please ask a Media center employee.
11. Prepare for the printer
- The Taz-6 is connected to the computer in the Makery. You can print directly from the Computer.
1. To begin, click the “Monitor” tab at the top of the screen in the Cura software.
![]()
2. Click the connect button in the right-hand menu and wait until the “USB Printing, Connected Via USB” message is displayed at the top. You may have to try connecting a couple of times before this message is displayed.

12. Start the printer
- To start a print, click the “Start Print” button in the bottom of the right hand menu.

- The printer will not immediately move. Before printing the object, the printers will first heat up then go through a quick calibration process.
- Ensure the printer actually begins printing. Often the Taz bot will fail the calibration process. If this continues to happen, you will have to clean the nozzle. Ask a media center employee to do so.
13. Remove the print from the print bed
- To take the print off the platter, remove the object by pulling it off the build plate. If its stuck to the surface you may have to use something to scrape it off the surface. Be sure not to scrape the glass build plate while doing so.
- Remove all the filament from the print surface. The plate should be completely clean before being placed back onto the printer.
13. Finished!
- If applicable, remove the supports from your print. You may have to use pliers to remove stuck supports.
- Enjoy your printed model!


