Category: Video (Page 1 of 2)
Posts listed as Video Tutorials


Lots of video projects are coming due. The media center has iMovie on all its computers and is here to help. Learn how to import, edit, add titles, audio and more using the tutorial link below.


Our computers now come with Snagit! Snagit is a screenshot program that captures video display and audio output.

How to use Snagit
Please ask a media center assistant for additional help.
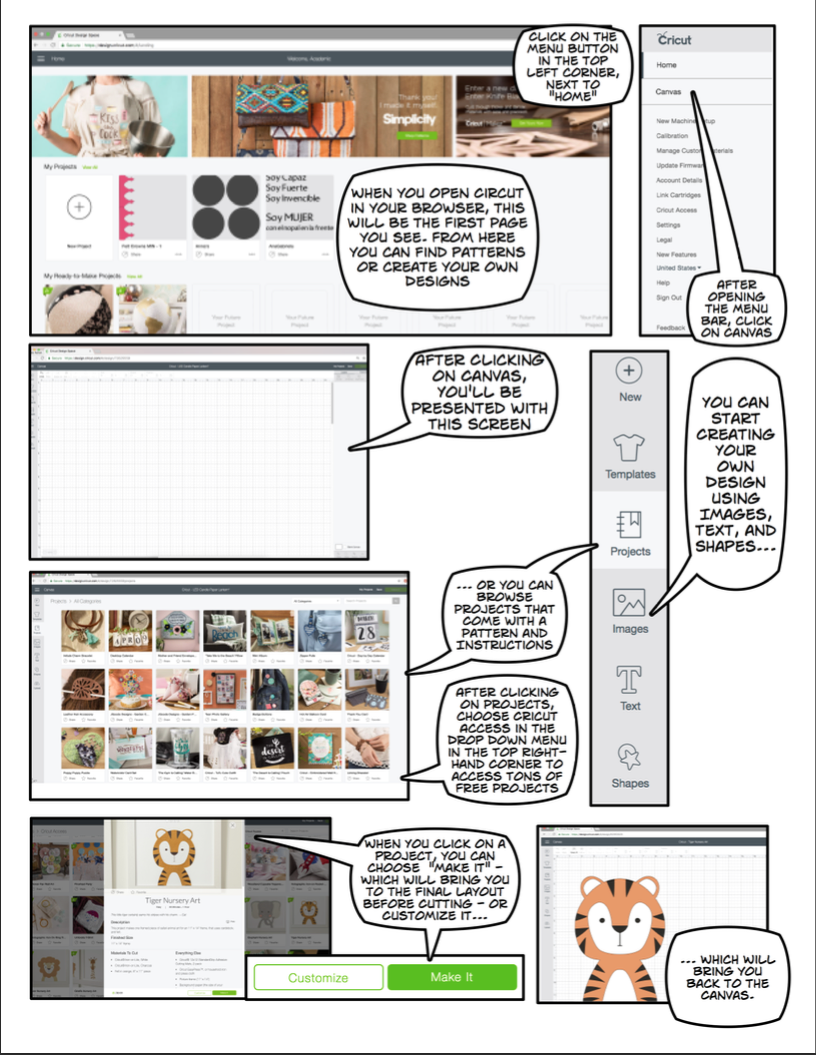
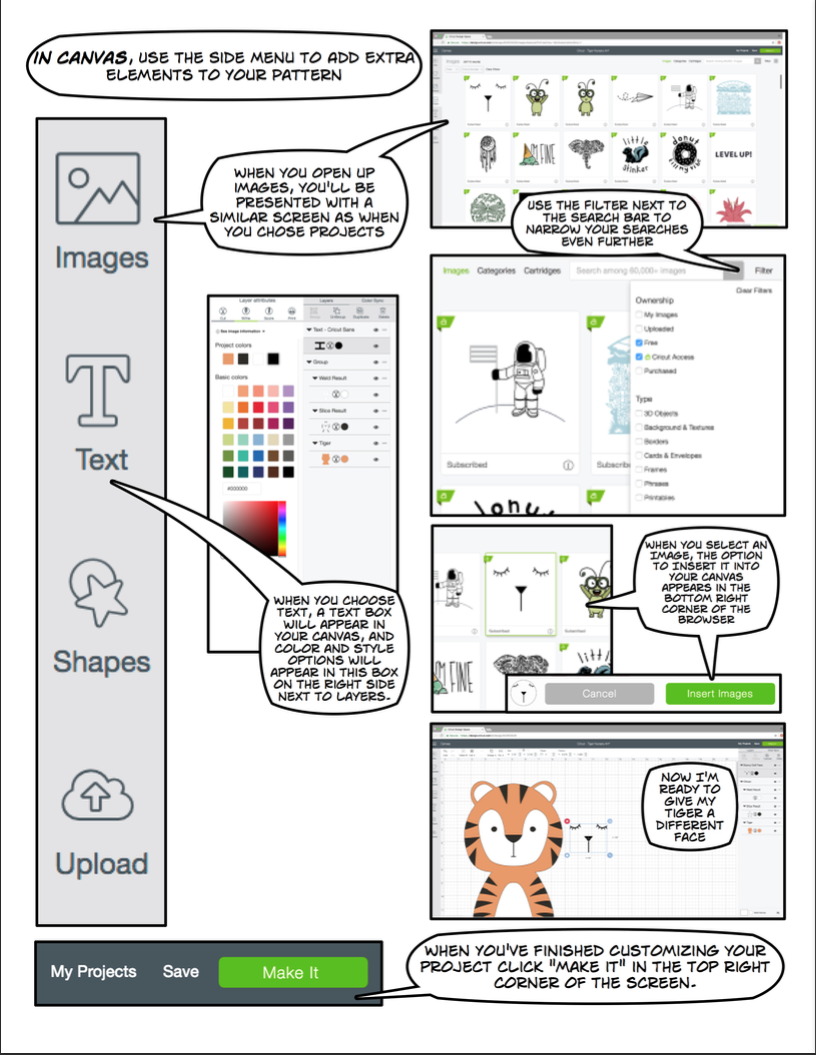
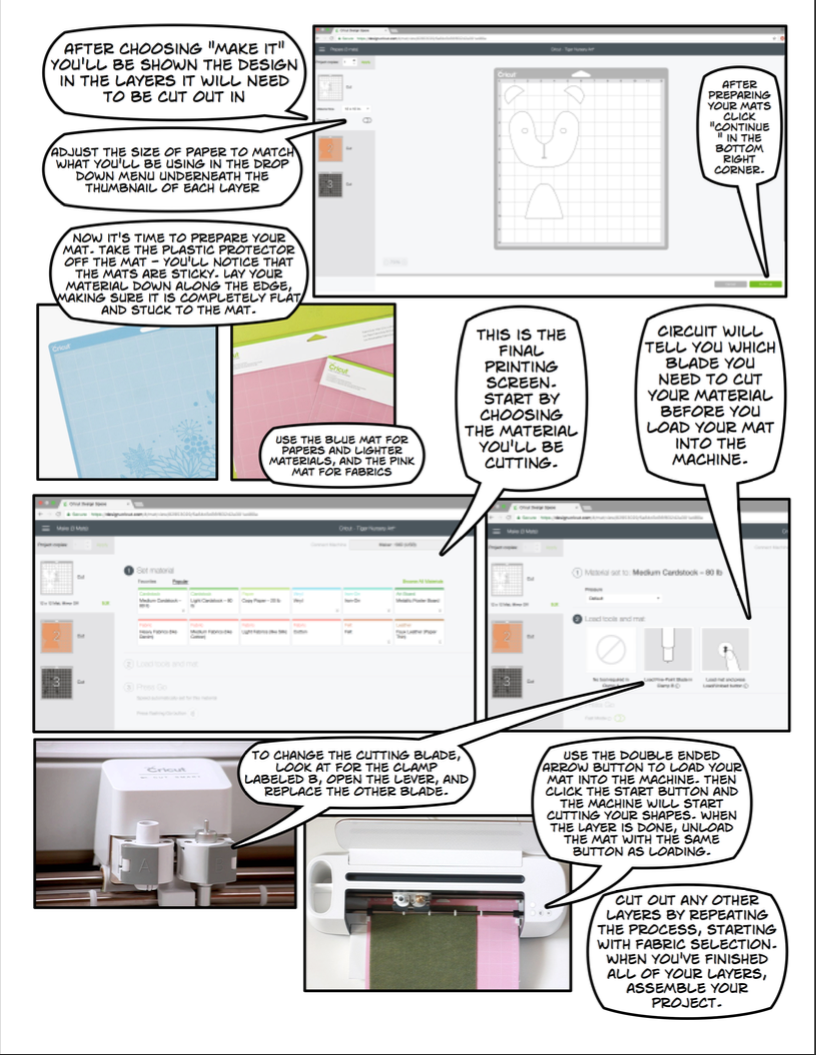
With the Cricut paper & fabric cutting machine, there are endless things you can make.
Creating clips using Snapz, VLC, and QuckTime
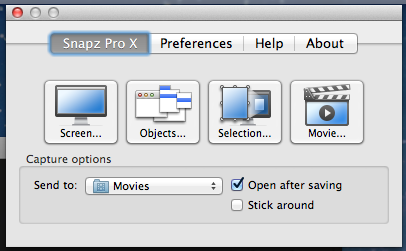
Snapz is an application for capturing video from the screen while also capturing the audio from the computer. It can be found on the Mac side of the computers in the Media Center. DISCLAIMER! This should only be used for the use of making short clips in which to make commentary directly related to your course work. This same method can be used to pull clips from YouTube by omitting step 1.
- After, inserting the DVD you will need to quit the DVD player application, then search for the VLC app. From the File menu choose Open Disc… Click the Open Button.
 On Mac, after inserting the disc you’ll need to quit the DVD Player application.
 Open VLC, using the Spotlight search is the quickest method
 From the File Menu choose Open Disc…
 Click the Open Button
 - Locate the scene you want to use and pause the video. Make sure to leave a buffer zone before the section you want it can be trimmed down later. Search for the Snapz app. Note: after opening Snapz the first time it can be activated in the future by pressing command + shift + 5.
 Open Snapz, using the Spotlight search is the quickest method
 Snapz window, activate by using command + shift + 5
 - Choose Movie… Change the frame rate from 15 to 29. Uncheck cursor visible. Use the cross hairs tool to draw a selection around the video.
 Snapz movie options
 Change framerate to 29 and uncheck cursor visible.
 Use the cross hairs tool to select the section of the screen with the video.
 - Press return on the keyboard to start recording, then press play on VLC. When you’ve got the portion you want press command + shift + 5 to stop the recording. Click the Save Now button. If you made a mistake you can also use the Move to Trash button and start over.
 Press Play on VLC
 Click the Save Now button to proceed or the Move to Trash button if you made a mistake
 - The video will open in QuickTime Player when it finishes processing. From the Edit menu select Trim. Use the yellow handle bars on each side to trim off the ends and select just the section you want. Then Click the Trim button. When you are done close the window and QuickTime will prompt you to save. Name it, select where to save and click Save.
 Select Trim… from the Edit menu
 Use the handle bars on the left and right to select just the portion a video desired.
 Name your video, select Where to save, and click the Save menu.


This odd and slightly annoying video hits most of the common missteps of first type videographers.
http://vimeo.com/videoschool/lesson/24/video-101-shooting-basics
Socialize


