Dickinson alumna and DCC contributor Alice Ettling, who created the Caesar Gallic War map animations, kindly wrote up a how-to, in case you would like to try your hand at it. You will need Google Earth Pro and iMovie. Thanks, Alice!
I didn’t start out with one, but it will probably make your life easier to begin with a map overlay, provided you have a suitable map. Google has a tutorial for this that explains it better than I could.
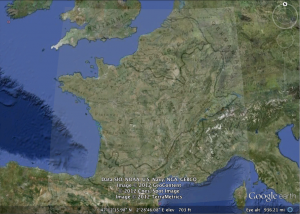
This is what mine for BG 1.1 looked like, once I’d gotten it into place. I kept the opacity low, since this is a geographically-based animation and I wanted people to be able to see the terrain below the map. Not all maps will work well for this, and it’s generally true that the larger the area a map covers, the harder it will be to align with Google Earth, since the projection of the map gets harder to align with the curved surface of the earth as its area increases.
Once you’ve got that, you can use it to find the borders and geographical features you want to define in your video. Rivers or other physical features, obviously, can be found without a map overlay, but it’s much easier to draw in the borders of provinces or tribes with a guide like this. (NB: There is a Water Body Outline layer built in to Google Earth, but I found that it wasn’t terribly accurate or comprehensive, so I preferred to define the rivers I needed myself.)
To actually define regions, use either the polygon or the line tool, depending on which you need. Both are in the top bar, towards the right. If you are referring to any cities or other specific points, you can use the Placemark button to set pins into particular locations.
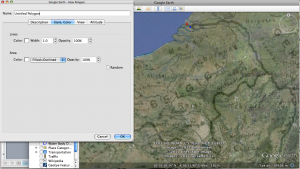
The first button in this row is the placemark tool; the second and third are the polygon and line tools, respectively. When you click on them, a window will open so that you can name the region and set its color/opacity. While this window is open, you can set the points that will define it; these can be edited later, so it’s hardly the end of the world if you misplace a point.
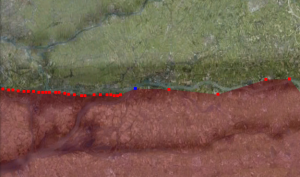
When defining regions, it’s important, if you’re going to be zooming in on them at all, to space your points fairly close together, so that the line running between them is smooth and follows the path you actually want.
(Here you can see the difference between closely-spaced points and ones that are farther apart; this border is supposed to be following the river.)
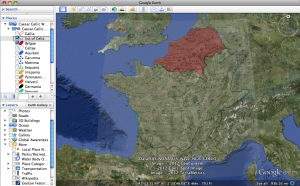
All of these regions display in a sidebar: if the box is checked, they will be visible, and if you click on a name, Google Earth will zoom onto that region.
Here, the map overlay (which, in this respect, acts like any other region) and the Belgae are checked, so they are visible, but all of the other regions, which are not checked, are not visible.
Once you have defined all the regions you will need for your video, you will need to set up “tours” that will actually move between the regions you have set up. Here is where my method gets sketchier; there may well be a better way to do this, but this is the solution I have found. To make recording a tour easier, set up your regions in the sidebar in the order you’ll be using them, and thoroughly plan just how you want the video to go.
When you click the “Record Tour” button (at the right end of the row with the buttons mentioned previously), a small bar will appear at the bottom of the window. The button with the red dot will both start and end recording.
Position the view in the angle/zoom level you want it, and then click the button to start recording. If you want the camera to move during your video, just click on the names of places you want to focus on, and check their boxes when you want them to appear. Because I’m not terribly adept at clicking only the things I want to, I think it’s helpful to divide what will eventually be your animation into several segments to be stitched back together later, so that you don’t ruin your whole work with one misplaced click. Don’t worry too much about timing your video to sync with the audio; that will be taken care of in iMovie.
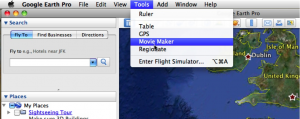
When you have your tour segments all recorded, you’ll need to export them as movie files. Everything else in this tutorial can be done with the free version of Google Earth (which is where I’ve been taking most of my screengrabs), but this step requires Google Earth Pro. Under the Tools menu is the option Movie Maker. With this option, you can convert the tours into files that can be opened in iMovie (or any other video editing program; iMovie is what I’m familiar with, though). The Movie Maker option won’t be usable, though, if any polygons, lines, or filters are highlighted.
It’s a good idea to export these files with a reasonably high frame rate; you will likely be slowing them down to sync with your audio later, and this will keep them from looking too jerky.
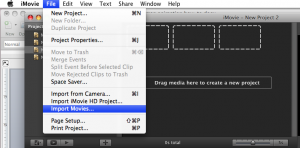
Once they’ve been exported, open them in iMovie with the Import Movies option.
Your files will appear in the bottom frame of the program; select and drag them up to the top middle frame to edit them.
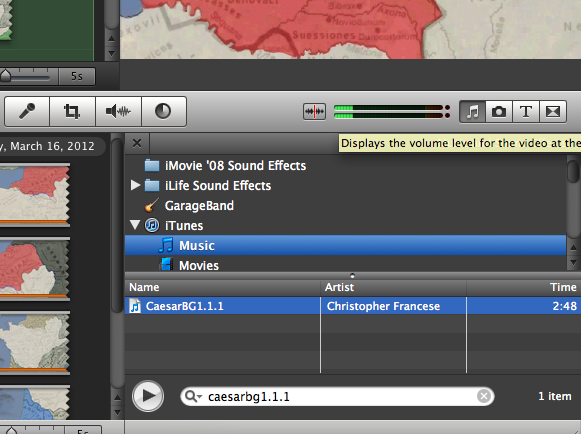
You can add audio here by using the Music and Sound Effects button in the middle right. All of my audio was recorded ahead of time, so all I had to do was import it from iTunes.
Drag this to the same frame you dragged the video to, and iMovie will combine the two; now all that’s left is to sync them up.
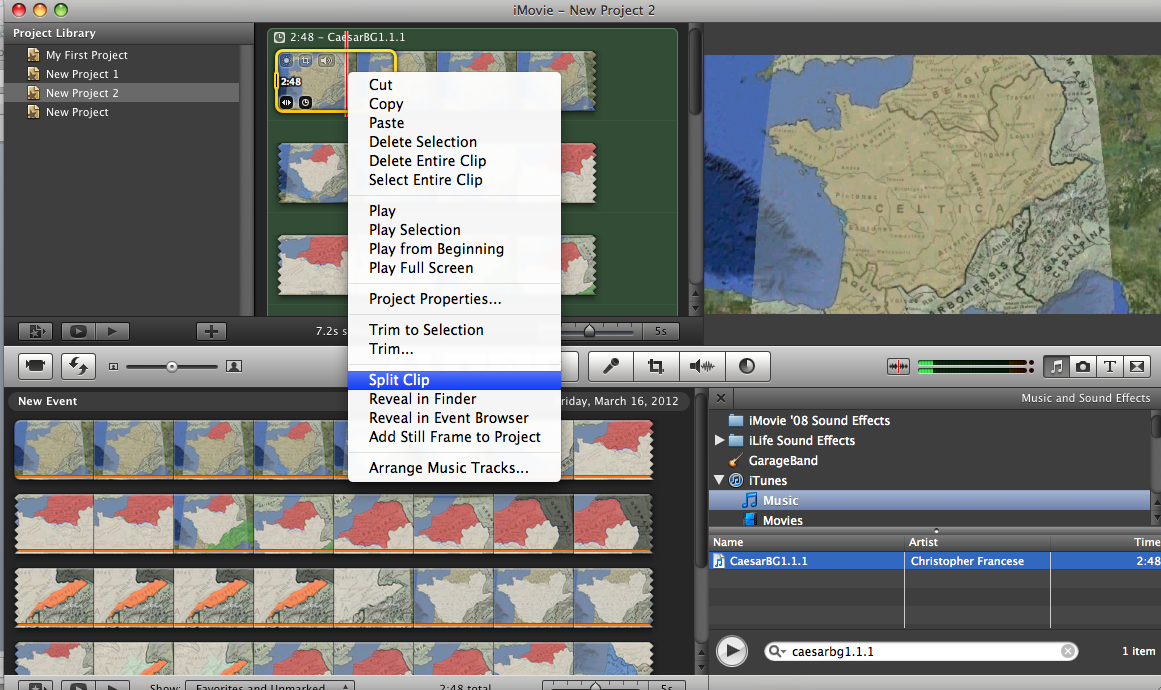
To do that, select individual pieces of your video (starting with the time from the start of the tour to your first cued action—in the case of my video for BG 1.1, this was the word “Belgae,” which should be keyed to the appearance of the corresponding region) and use the Split Clip command to separate them from the rest of the tour.
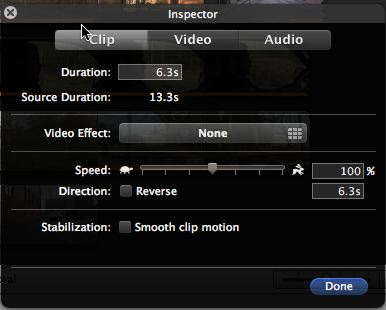
Now you can edit the speed of this clip separately from the rest of the video. To do so, click on the gear wheel that appears on top of the clip and go into Clip Adjustments.
Here, you can adjust the speed of the video; if it needs to take up more time relative to the audio, slow it down, and if it needs to take up less, speed it up. This involves a lot of finagling and listening to the same couple seconds of audio over and over again: be strong.
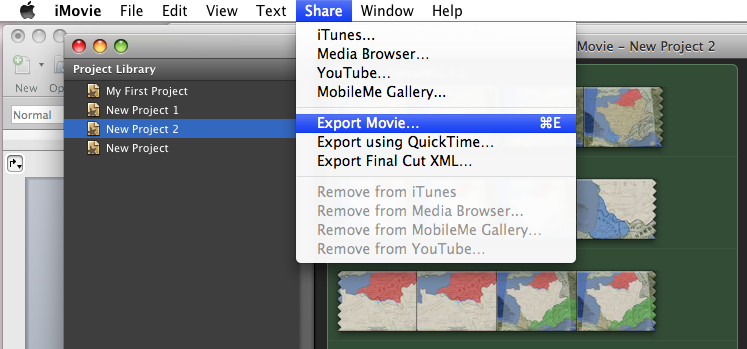
Once you’ve gotten that section of the movie synced properly, move on to the next and adjust its speed in the same way. Once you’ve gotten everything perfect, use the Export Movie button under the Share menu to save it in the format and quality you desire.
