[update 5/4/2017: the apparent mistake of Alexander going to Bangladesh derives from an error in the Pleiades database. https://pleiades.stoa.org/places/59910 Malli is described as “An ancient Indian people that settled at the confluence of the rivers Hydaspes, Acesines, and Hydraotes.” These are indeed the folks Alexander terrorized in the Mallian Campaign. But the current location in Pleiades has them way off near the Padma. They should be much further west, in the Indus valley. I have alerted the good folks at Pleiades to this.]
I got a nice response on Twitter to a photograph of a composite of Google Earth maps made by my students of the expedition of Alexander the Great. (People were too kind to point out that some of the students thought Alexander made it all the way to the Padma river in what is now Bangladesh).
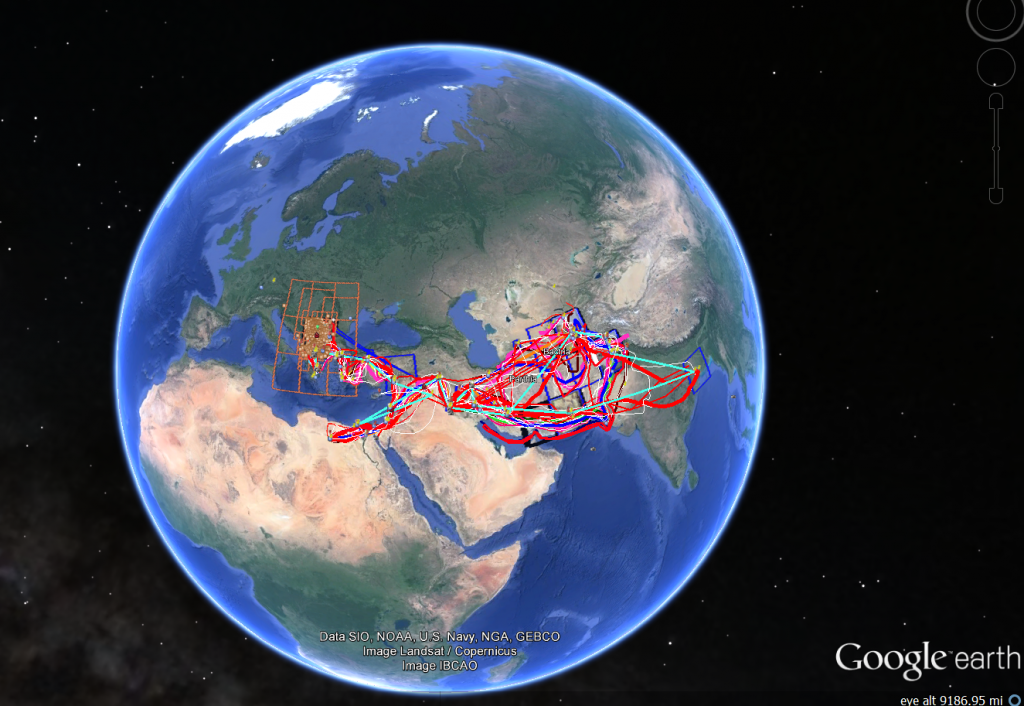
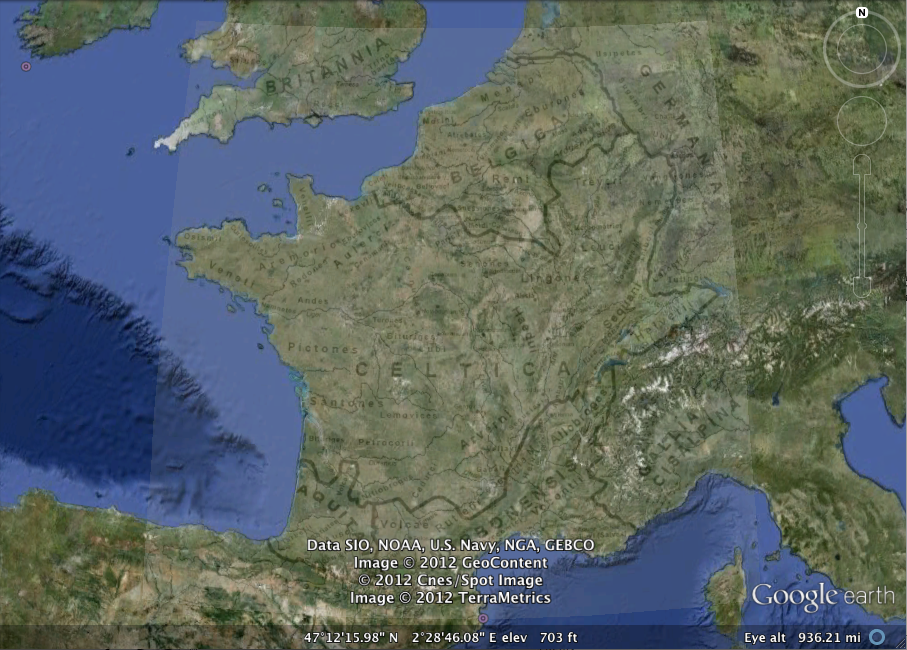
My students’ Google Earth maps of the expedition of Alexander, as seen from space.
A.M. Christensen (@AM_Christensen) asked me to post the assignment that generated these maps, and so here it is. I have done this for several years, and the reaction from students ranges from “Google Earth is infuriating” to “That was the best assignment we did–time consuming but really valuable.” I was on the point of cutting it out of the Ancient Worlds on Film class when a former student in that class convinced me to put it back in.
As with most unorthodox assignments it requires careful preparation and explanation well in advance, and a willingness to be flexible when technical issues crop up. For me this works because it is in sync with my learning goals: learning about the ancient world on the basis of primary sources. To do well a student must summarize and tell the significance material based on the reading, and cite the sources–by no means easy tasks for the average non-classics major in a general education classical studies course.
I spent some class time demoing Google Earth and showing them the magic of Pleiades, which has readily downloadable .kml files of the places. (Pro tip: “Tyre” is not findable on Pleiades. You have to know to search for Tyros.) One problem is that the dates of events are not always indicated in the books they are reading. So I pointed out the very full chronology available on Wikipedia. I have learned to be very, very clear about the necessity of having the entire folder highlighted before you save your .kmz. This is by far the most common problem. Second to that are Google Earth crashes, in which some students lose work. Make sure they save their stuff and back it up. I also pitch this as a way to take notes on the reading in Arrian. Pick a couple spots in every night’s reading, write down their significance, and making the map will be easier when the time comes.
Here is the whole 3-week timeline from start to finish:
4/10 Alexander (2004) no reading
4/12 Watch Alexander: Director’s Cut
4/14 Youth; Aristotle; sack of Thebes Romm, Alexander the Great, pp. 1–32; Plutarch, Life of Alexander, sections 11–14.
4/17 Granicus → Fall of Tyre Romm, Alexander the Great, pp. 33–69. Plutarch, Life of Alexander, sections 15–17 and 21–23.
4/19 Egypt → Gaugamela; Death of Darius Romm, Alexander the Great, pp. 70–93. Plutarch sections 27–28, 33–34, 36–40, and 42–43.
4/21 Central Asia; Roxane Romm, Alexander the Great, pp. 94–113. Plutarch sections 45 and 47.
4/24 India; the Gedrosia desert Romm, Alexander the Great, pp. 114–148. Plutarch, sections 64–67.
4/26 Susa weddings; death of Hephaestion Romm, Alexander the Great, pp. 149–173. Quiz on Alexander.
4/28 Alexander Map assignment due
Ok, here is the assignment. The grading rubric follows.
In the Tracks of Alexander the Great
The intent of this assignment is to familiarize you with the geography and chronology of Alexander’s conquests through the making a Google Earth map of them. It will act as a kind of combined map and timeline. It is due by noon Friday, April 28, 2017, via Moodle.
You will need to download Google Earth to your computer. A tutorial by Google on how to create a map with place marks is here: http://www.google.com/earth/learn/beginner.html#placemarks-and-tours&tab=placemarks-and-tours
. . . and see below for a step by step guide.
Using Romm’s book Alexander the Great (which contains the writings of Arrian) and the account of Plutarch in his Life of Alexander, create a series of place marks and a route to guide you through Alexander’s expedition. For each place, create a place mark, name it, and then write annotations in the description field. Each annotation should contain:
- a Pleiades link
- a brief discussion of your view of the significance of the place, based on your reading in Arrian and Plutarch.
- specific source citations of Arrian (book and chapter) and/or Plutarch (chapter) from which you got your information, along with any other sources you used
- an image of any relevant landscape, archaeological remains, artifacts, or an artist’s reconstructions from this place, with a title and specific photo/artist credit.
There should be at least one or two placemarks from every major stage of the expedition, a minimum of 20 total. Observe that the notes in Romm, and your translation of Plutarch’s Life of Alexander (Greek Lives pp. 448 ff.) specify dates for many incidents. The actual look of the tour is up to you, and you should feel free to add whatever enhancements you like. When you have finished making your place marks, put them in a folder and save the folder (it will save as a file with the suffix .kmz).
IMPORTANT:
- Make sure when you save your work that the whole folder is highlighted, not just one place.
- Give the folder a name that includes your own last name.
Submit the .kmz file via Moodle. Please feel free to contact me if you have any questions at all.
STEP-BY-STEP GUIDE to creating and saving placemarks:
- Download Google Earth: https://www.google.com/earth/
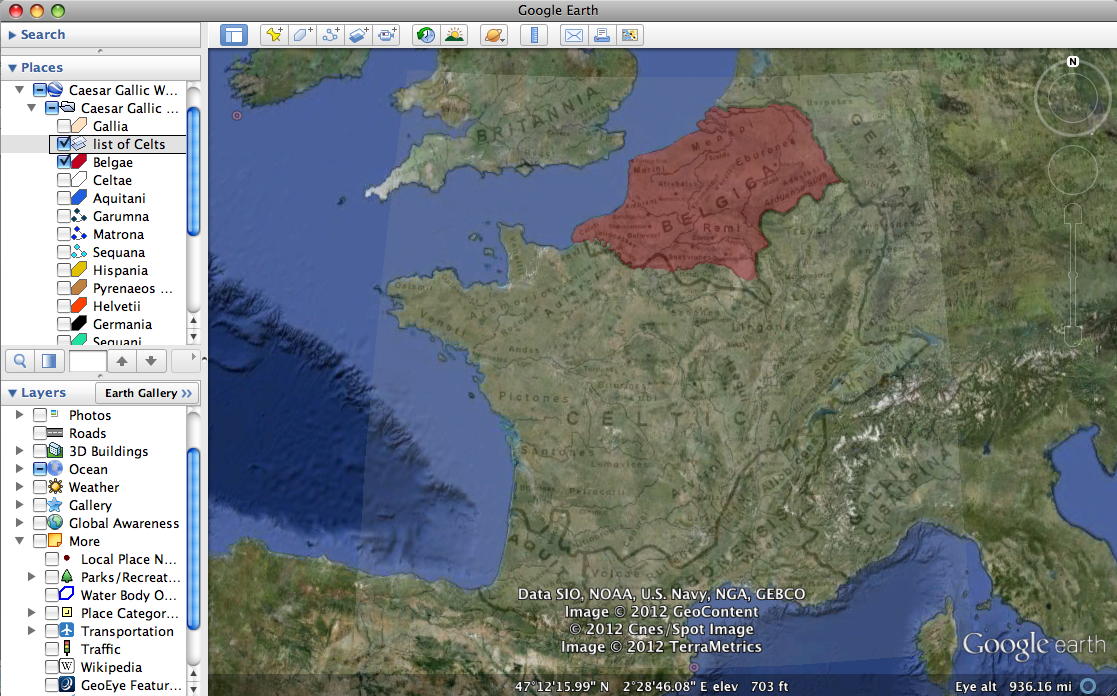
- Under the “Add” menu select Add Folder. Name the new folder with your name and Alexander’s Route or something similar. The folder you just created will now show up in the Temporary Places list at the left, and look something like this:
- Add a placemark: Either search in the search bar of Google Earth to find a place, or (more accurate) go to Pleiades and search for a place and download their ready-made placemark. On Pleiades, when you find the relevant site, scroll down to the list of “Alternate representations”:
Click on “KML.” (This stands for “Keyhole Markup Language,” the file type used by Google Earth.) Download and open that file and it will create a placemark for you in Google Earth at the precise location you want. (You may have to delete some extra placemarks included by Pleiades as associated places.) Make sure that your placemark is within the folder you created earlier.
1 placemarks must be included under the right folder or they will not be saved in the project when you save at the end.
- Edit the placemark: Right click on the placemark and select Properties.
You can change the name to whatever you want, add text, links, images, and change the look of the placemark itself by clicking on the small icon at the top right of the Edit placemark window.
Here is an example that has been edited to include an image, with information about that image, and some short annotations with source citations. Your annotations should be longer, several sentences.
- Create the Route. Click on the “Add Path” icon at the top of the screen
Name the path, and before closing that window, draw the path you want. Consult the maps in Romm’s book as you draw the paths. From the Properties window you can style the path, giving it any width you want.
- Save the file. Make sure that you have the whole folder highlighted, not just a single place within it, when you save. Go to File > Save > Save Place As and save the file on your computer as a .kmz. Submit that .kmz file via Moodle. You are done!
Rubric
| 20+ Places accurately identified? | |
| Route accurately marked? | |
| Significance of the spots clearly explained? | |
| References to sources included? | |
| Every major stage included? | |
| Dates included? | |
| Pleides uri included? | |
| Images included? |